Monday, November 1, 2010

Sustainable Tool: The Broadfork


"Oh, I knew I never should have let you read those Little House on the Prairie books," my mom laughed when I posted this picture to Facebook.  This, ladies and gentlemen, is the FC&G's household's new broadfork.

A broadfork is kind of a pitchfork on steroids.  What is difficult to see in this photo is that those tines -- which appear sturdy enough to last a lifetime, requiring only occasional changes of handle (although those feel pretty sturdy too) -- are curved, just like a pitchfork.  They are also much longer than those on a pitchfork. 

The beauty of this is that one can jam those tines in the ground, then pull back on the handles and not so much flip the soil as loosen it.  This is instrumental since we have started "lasagna gardening," a strategy in which you do not plow/rototill your soil so that you keep the various strata intact instead of destroying the work your beneficial flora and fauna have done to your soil over the year.  This should keep down the presence of annoying insects and diseases. 

You do this by continually mulching the soil, allowing the mulch to compost in situ.  I like to think of lasagna gardening as the "I hate to rototill" method.  If you keep mulching through summer, it theoretically keeps the weeds under control too, although I didn't succeed in doing that effectively this year.  However, the weeds I did get were much easier to pull, so this might be the "I hate to weed" method too.

In any event, if you practice lasagna gardening, you need to loosen that soil periodically, and this is what the broadfork is for.  It is fun to use, although my husband is more effective at it than me.  It is a great workout, as you might imagine, and it is certainly going to outlast a gas-powered rototiller, not to mention have a much smaller impact on the environment.  I love my broadfork, and I think Pa Ingalls might have been proud.

The Analysis

Fast:  In early experiments with the broadfork this fall, I suspect that it will do a quicker job of "tilling" the garden than would a rototiller, once you factor in the inevitable spring ritual of calling every hardware store in the area, going to rent one, trying to make sure you have the proper fuel, letting it jerk you around the garden for a couple of hours, and then cleaning it for the return.

Cheap:  This was $99 plus shipping from Lehman's, my favorite store for sustainable stuff.  The shipping was pretty expensive (about $25) as you might expect.  However, we have a theory around here that sometimes it is better to invest in a really good tool rather than simply having the money in the bank.  Preparedness and the ability to do a good job are a kind of savings, too.

Good:  Early indications are that this will be better for the health of my soil and for the size of my waistline.  Sustainable tool win!
Pin It!

Friday, October 29, 2010

FC&G Featured on Thrift Culture Now


Just a note to let you know that Fast, Cheap, and Good is the Thrifty Blogger of the Week for the week of November 1!  I am so proud of this honor; you can see the article here:


For those of you who have made your way here via Thrift Culture Now, welcome!  I'm planning a special week for you, with a post every day (instead of my usual 2-3 per week pace) so you can get a good feel for what I do here.  I hope you'll bookmark the site, comment on what you think and what you'd like to see, and, most important, choose a sustainable project or two to try yourself.   Let's make our lives better, less expensive, and less rushed, while living more sustainably, one project at a time.
Pin It!

Thursday, October 28, 2010

Fried Cod with Hushpuppie-Inspired Crust


Today's recipe is one I sort of stumbled upon this weekend, when I needed to make dinner and just grabbed the nearest things from freezer, pantry, and garden.  It was pretty inexpensive that way, and it is furthering my aim to make it cheaper yet.  Read on....

To start, I fried up some Alaskan cod pieces from Trader Joe's.  (I didn't keep the receipt on this one, but I remember them being fairly inexpensive for what turned out to be two dinners and two lunches.)  I dipped the cod in farm egg (which hubby scored a deal on at $1.50 a dozen!) and then dredged it in a mix of corn meal and Old Bay seasoning.  After frying in olive oil, I had a crust that tasted very much of hush puppy.

The tartar sauce that you see above is mostly homemade, and dead easy:  just mix half mayonnaise with half cucumber relish.  I put up my own relish last year, so I know the quality of that product.  Go ahead and use the full-fat mayo; the light often has HFCS in it (depending on brand) to improve taste and mouthfeel in the absence of the fat. 

Finally, I put my creation on a bed of greens from the last of the garden.  Here I have baby romaine and Simpson lettuce grown in the greenhouse/sunroom, along with mojito mint from the sunroom and the last of the basil from the garden, plus some tomatoes ripened in the house.  Let me tell you, I am in love with the taste of a little mint with my fish.  That addition made this dish light, fresh, and absolutely yummy. 

The Analysis

Fast:  As with most of my meals, this was on the table in about 30-45 minutes. 

Cheap:  The greens and tomatoes were all mine, so those were basically free, as was the cucumber relish for the tartar sauce.  My goal:  I want to learn to fish, because then I could occasionally bring in the protein for yummy dishes like this.

Good:  This is actually one of my favorite fish recipes to date, and I stumbled on it because I needed to put something on the table that night.  Score!
Pin It!

Tuesday, October 26, 2010

Bed Warmers, a.k.a. "Knee Thingies"


Last week, I talked about drying lavender blossoms, with the idea that they are useful for bed warmers.  Today, I'll talk you through the super-easy process of making one. 

These delightful little bags are often called "bed warmers" because they can be heated in the microwave and used to keep the foot of your bed warm for hours; they are also called "spa wraps" if you make a longer version that can be either heated or chilled to wrap around shoulders or sore muscles.  Since the most common use of these in our household is to soothe my bad knee, they are called "knee thingies" around here.

To make one, choose your favorite scrap of cozy fabric.  I used a leftover piece of flannel from a pair of PJ pants I made, but you can use anything you love.  In fact, I encourage you to use a piece that makes you smile when you see it; I made one last year using a piece of buffalo plaid from a 1980s dress I had, and I love seeing that fabric every time I use it.

You are just making a pillow.  Sew up three and a half sides of your fabric (with right sides together), and turn your bag inside out.  You should have a gap about half the width of the short side through which to fill the bag. 

Mix your filling.  For the one above, which is fairly small, I used about 2 cups of rice and 2/3 cup of lavender blossoms.  You want to let the filling be pretty slack, so it conforms to your feet, knee, or wherever you like.  I used a canning funnel in the opening of my bag to fill it with the rice and lavender mixture.  You can use any spice or herb; cinnamon and nutmeg are nice too.

Sew up the opening.  You can whip it by hand; I used a zig-zag stitch on my sewing machine.  You want to use a stitch you can pick out, because you really want to empty and change the filling once in a while (although I really have been bad about this).  The filling is compostable, and then the bag itself is washable if you used a washable fabric. 

To chill, put the bag in the freezer.  We keep one there most of the time, wrapped in a couple of plastic grocery bags to ward off freezer funk.  They are wonderful for post-exercise knee pain.  To heat, put in the microwave.  I nuke mine for about 3-4 minutes on high depending on size; you will want to experiment with your own particular bag and microwave.  Stick close the first few times; I have never had a problem, but you want to exercise the caution appropriate to putting a cloth bag of grain into the microwave.

The Analysis

Fast:  I whipped this "knee thingie" up in about 20 minutes.

Cheap:  My only expense was a couple of cups of cheap rice.  The lavender was from my garden, and the fabric was a remnant.

Good:  If you haven't experienced sliding one of these into the foot of your bed on a cold night, you are in for a treat.  In spite of my reticence to turn on the heat, I am fundamentally a person who can't maintain body heat, and one of these will keep me warm most of the night.  I actually like to have the bedroom a little cold just so I can enjoy the weight of a pile of quilts and the warmth of a "knee thingie." 

Fall Thermostat Challenge Update:  Although I weakened for a few hours at the end of last week (I just couldn't get the house to warm up higher than 61 degrees), a burst of warmth has allowed me to turn the heat back off and keep saving that money!  Total since Labor Day:  778 hours, or 32.4 days!
Pin It!

Thursday, October 21, 2010

Drying Lavender


I'm not much for decorative plants; one look at the petunias that I grudgingly put out each year will tell you that.  However, I am in love with lavender, a rather delicate perennial that, as it turns out, is pretty useful indeed.

Many people use lavender to cook with, but I really grow it for the fragrance.  I have plants out by the mailbox, where I can enjoy their scent every time I get the mail.  At the end of the season, I cut all of the long-stemmed flowers and bring them inside to lay on newspapers in a sunny south-facing window.  (I keep a few out for decoration in my foyer, as you see above.)

Once the lavender is dry, I strip the little flower buds off and keep them in a jar.  They are wonderful as potpourri; I love potpourri in my bathrooms, but I hate the neon-colored, shiny stuff you buy at the store.  I also mix lavender in with my rice to make spa wraps and bed warmers for those achy muscles and cold winter nights.

The Analysis

Fast:  This one takes almost no time at all.  Just enjoy your lavender while it grows, then spend a few minutes total preparing it for drying and stripping the flowers when dry.

Cheap:  As lavender is at least technically a perennial, the cost of the plants is spread over a few years.  Mulch the plants every year to give them the best chance of coming back in the spring.

Good:  Nothing smells better than lavender in a bed warmer (which we will talk about next time!).

Fall Thermostat Challenge Update

It's been a while since I updated you on my fall thermostat challenge.  We have been enjoying a few weeks of really moderate temps here in Ohio, and it has been easy to not run either the heat or the AC.  Only lately have the mornings started to be a little painful, as the daytime temps are not really sufficient to put the house heat "over the top" to handle the frosty nights.  However, the house is quite comfortable in the afternoons, and mornings are handled with some fleece socks, a cup of coffee, and a space heater in the office.  I've also been catching up on my baking and venting the drier inside.

Total savings since Labor Day:  663 hours, or 27.63 days without whole-house heat or AC!
Pin It!

Tuesday, October 19, 2010

Failure to Forage


When it comes to sustainable living projects, I'm a bit like an eight year old on Christmas morning when I discover one I haven't tried before.  I have salivated over DIY solar collectors for south facing windows, pondered backyard chickens, and calculated how much herb gardening I can sneak into the front yard under the guise of decorative plants.  So naturally, when the Old Farmers Almanac posted a link to Facebook last week detailing how to process acorns to make acorn meal, I was irrationally excited.

"I have oak trees; there's food out there for the taking!" I thought, grabbing a bowl and heading to the side yard.  Since one of my food goals for the 2011 growing season is to do more "suburban foraging," I thought this would be a great pre-season kick-off.  I no time, I had a heaping bowlful, which I placed in a sunny spot in the nearly-completed sunroom for drying while I took time to investigate my next steps.

Now, I should note that our suburban back yard is like no other I've ever experienced.  In spite of living on a corner lot near a fairly busy road, the fenced back yard typically looks like a Disney film on crack.  At any given time, you have no problem locating squirrels, chipmunks, and rabbits -- and most of them are completely unfazed by humans.  This spring -- I swear I'm not making this up -- I saw a mother rabbit lead three young bunnies to the edge of the garden fence and practically show them how to crawl through the spaces.  Last year -- and I'm not making this up either, nor was I on large doses of cold medicine at the time -- I watched a pair of squirrels chase one another across our fence, only to take a flying leap to land on our window awning.  They did this repeatedly for a good 15 minutes.  Our creatures are insane, and they seem to view me more as pest than predator.

So, it should not have surprised me when I went out to the sunroom Sunday and found two acorns, well-nibbled, in the corner of the room.  I assumed I had dropped them, and I cleaned them up.  Yesterday, I went out to find the opposite corner now totally filled with shredded acorns and discarded shells, along with a very much emptied bowl of acorns.

Long story short, I stormed out to the compost in my homemade fleece socks (too mad to put on flip flops) and got rid of my sustainable acorns, then my poor husband spent the evening taping any likely cracks in the house that might be an entry point for nefarious chipmunks who think I have put out a buffet for them.  Hopefully, that will indicate the point of entry, and we can deal with it.

I don't think we'll be living on acorn meal any time soon.
Pin It!

Thursday, October 14, 2010

Slightly-More-Frugal Book Buying


OK, confession time:  I really love books.

This is a problem for my frugal and sustainable cred, because I don't just want to read them; I want to own them.  While the usual frugality no-brainer is to tell someone to use the library, there is just something about bringing home a new copy from the store.  I like the smell of the print, I like the feel of the book in my hand, and I like the look of it on my shelf when I'm done.

So, stipulated:  I should be going to the library more to support our local libraries, to save on print and transportation, and to help my budget.  If I simply must have a book, I should buy an e-reader and take advantage of lower-cost electronic copies.

However, right now, it ain't gonna happen.  I've been helpless to control myself in a bookstore since I learned to read at age 3, and I don't think it is stopping anytime soon.  (I should note that this is probably my parents' "fault."  While it seems that I had to justify the expense of a new toy if it wasn't a holiday, my parents went out of their way to facillitate my reading habit.  If I win the lottery, one of the first things I will be doing is reimbursing them for the first 18 years of trips to the library, to the bookstore, and even to the grocery store magazine rack and the drugstore comic book rack, all in the hope of feeding the monster that was my reading habit.)

So, if you are like me, I have a couple of tips to at least moderate the amount of book-buying that goes on:

1.  My first tip is so simple, I'm kicking myself for only thinking of it recently.  There are many books I see on the shelf that I want to read, but I am at least willing to admit that I don't need them in hardback.  However, most mid-list titles kind of disappear when they appear in paper, so I am always fearful that I will miss them.  Therefore, I'm tempted to buy the hardback.  To combat this, I've started taking a photo of the book on the shelf (as above) with my iPhone, then storing these photos in an iPhone file called "Books."  Periodically, I can look to see which of my titles are out in paperback, and I'll delete the photo when I've purchased or dismissed the book.

2.  Along the same lines, I make liberal use of my Amazon.com wishlist.  (Any readers who would like to support FC&G can send me a gift from that list -- just kidding!)  Sometimes, the book urge is satisfied by a wish list "shopping trip" in which I stock the list; sometime later, I can consider if I need a treat or if I can live without the books.

3.  Finally, not every book earns a permanent home on my shelves.  When I remove a title from my personal library, I sell it at a used book store.  This doesn't recoup much of my money, but it does help a bit.

The Analysis

Fast:  The first two ideas are relatively quick ways to help me control and pace my book-buying habit.

Cheap:  I'm the first to say that my new-book-buying habit is not cheap.  But hopefully I can control it into a manageable expense.

Good:  A book is always a good thing.
Pin It!

Tuesday, October 12, 2010

Fall Linen Washing


The Midwest, particularly our corner of Ohio, is enjoying some unseasonably warm weather.  I'm loving having days of 85 degrees in which to get the yardwork done!

One of my traditional fall tasks, regardless of the temperature or duration of Indian Summer, is to wash all of the quilts, bedspreads, and blankets and hang them on the outside line to dry.  This simple tip allows you to start your winter with bedding and throws that all smell of summer, and, for me, every quilt I hang to dry saves me about an hour of drier time.

One caveat:  October has less heat, less direct sunlight, and shorter days than, say, July.  In July, I can pretty much do this task (if I wish -- I usually do it in May to prepare for summer) in one day by continually washing quilts and knowing they will be dry in about two hours.  Now, each quilt takes all day to dry, so plan ahead and prioritize your loads to take advantage of the few remaining warm days ahead!
The Analysis

Fast:  Line drying is definitely slower than using the appliance, but you don't really have to be involved for much of the process, either way.

Cheap:  As noted, for me each quilt washed and line-dried saves about an hour of drier time.  I'm not sure what this translates to in dollars and cents, but it has to be noticeable.

Good:  Your bonus is fresh bedding that smells of sun and air to cuddle into during the cold weeks to come.
Pin It!

Friday, October 8, 2010

The Last Tomato Harvest


Sigh.  The last tomato harvest. 

With frost threatening a few days ago, it was time for the last tomato harvest.  Since tomatoes don't do particularly well during and after a frost, even when the weather warms back up, that first sub-40 forecast means it is time to bring in everything that can possibly be useful.

Which, really, is quite a lot.  If you haven't yet made your last tomato harvest, do so when frost threatens (or now, if it already has happened).  Take every tomato of any size that is shiny green.  Some gardeners prefer to only take "breakers," those tomatoes that are just getting a blush on them, but I grab everything with a shine to it.  These tomatoes will ripen in the house.

As you can see, I pretty unceremoniously throw all my green tomatoes into a cardboard box, then every day I grab out those that are turning orange and put them on the counter to use quickly.  These are not high-quality red tomatoes like you had in August; they will be a bit tough, and they go bad quickly.  You will not really be wanting to eat them raw or slice them on a sandwich, but they are great for cooking.  These give you a few late-season extra-cheap garden meals before you have to start hitting your cans, freezer, and cellar for provisions.  Last night, I used some of these house-ripened tomatoes to make a simple pasta sauce:

4-5 large house-ripened tomatoes, cut into chunks
2 leeks (still going strong in garden)
1 package Andouille sausage cut into chunks ($3.99 from Trader Joe's)

Simmer all ingredients until flavors blend.  Use to top pasta or rice.  With the addition of some cheap pasta from the pantry, I had a meal of two dinners and two lunches for under $5.

The Analysis

Fast:  Yes, that last tomato harvest comes all too "fast."  Seriously, it takes no time to run out to the garden and fill a box with shiny green tomatoes when frost threatens.

Cheap:  Another few cheap meals are just what the budget ordered, and another way to get more veggies in our diet.

Good:  I can't really call the last tomato harvest "good."  I hate harvesting the tomatoes when the wind is blowing up a chill, and I hate the feel of cold tomatoes when I just spent the whole summer picking and eating them while they are warm.  But using the last of a precious resource is very good, indeed.  I'll probably have cooking tomatoes until the end of the month from this last harvest.
Pin It!

Tuesday, October 5, 2010

A Few Words About Plants

 In keeping with my tip round-up, today I have a few suggestions about plants:

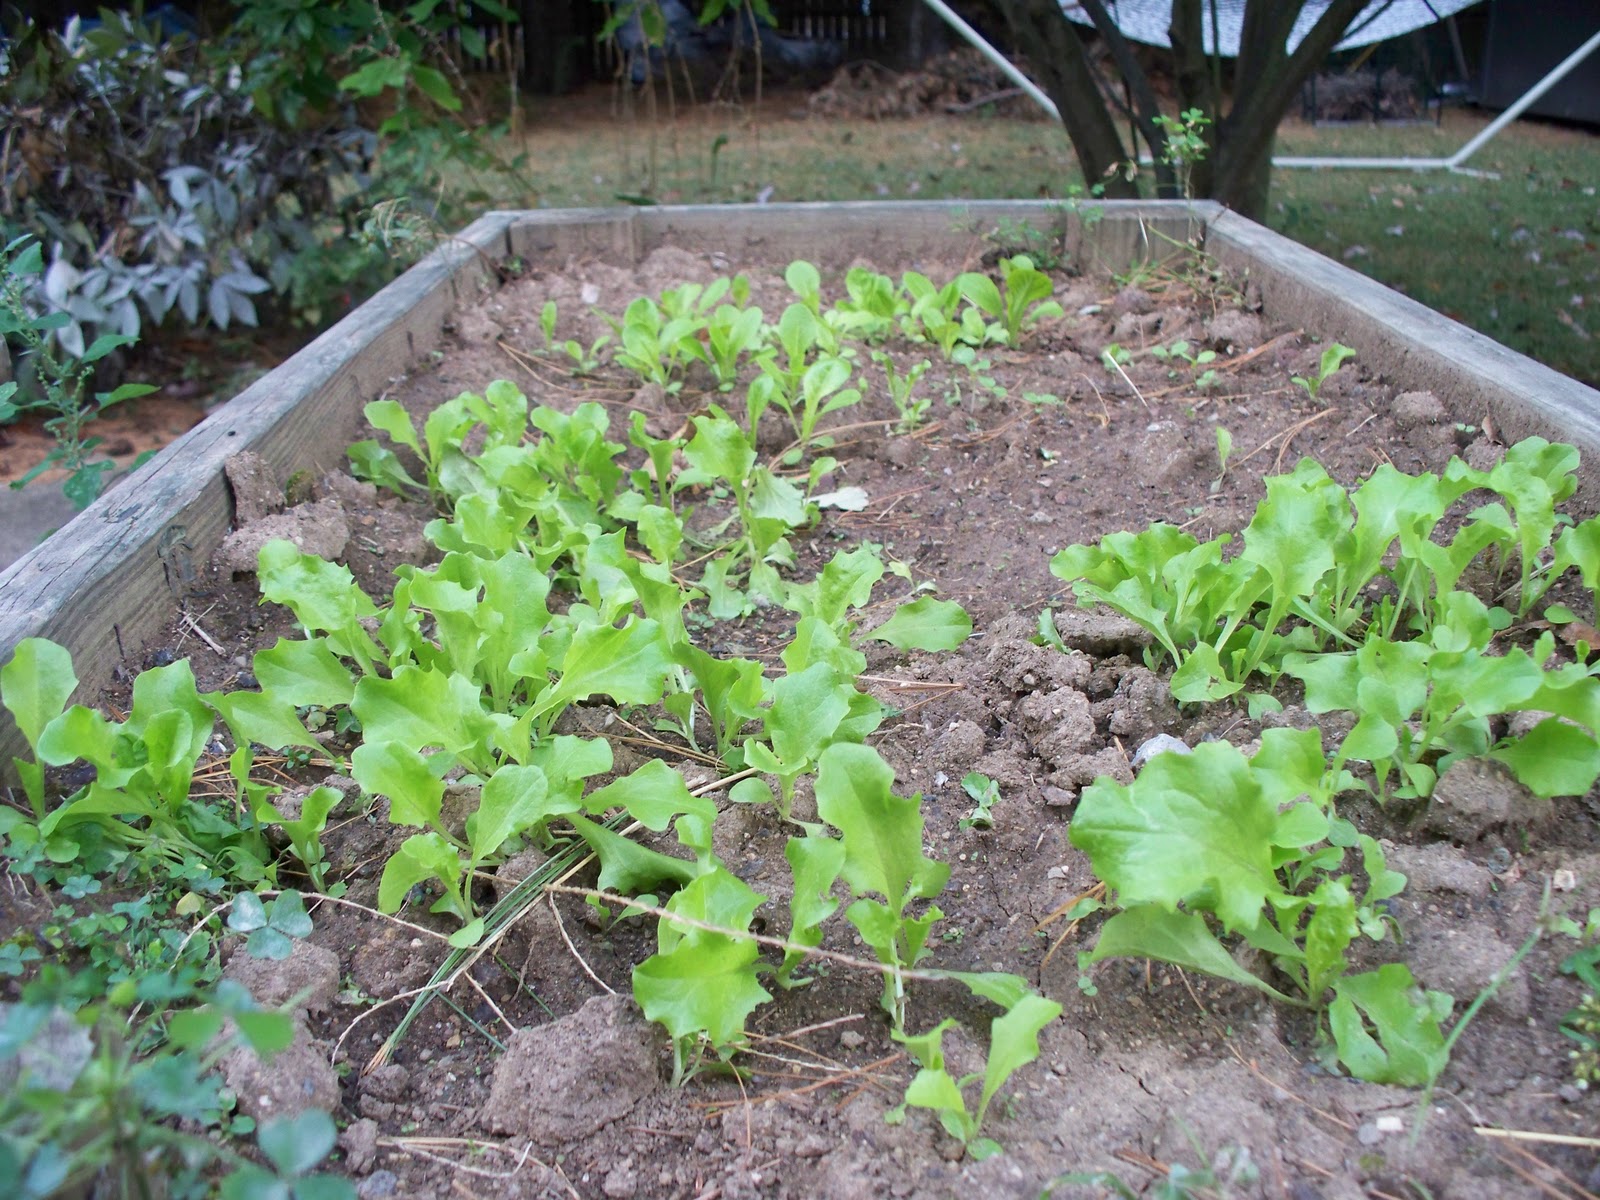
1.  Just because you can't grow tomatoes in the fall (at least at most North American latitudes) doesn't mean you can't garden.  Take a container of your choosing and throw in a few leftover lettuce seeds; there is plenty of time for an extra salad or two (or more) if you are careful about where you put the container and whether you cover it when it frosts.  The above lettuce bed is one that we scavenged from the curb when a neighbor was cleaning out a garage, and it should continue to produce lettuce for a few weeks yet, especially when we move it to the new patio/greenhouse (spoiler alert!).

2.  Herbs are usually pretty temperature sensitive, but that doesn't mean that you have to treat them with the care that you would an African violet.  Above you will see some mojito mint happily growing in a pot indoors.  Less than two weeks ago, I unceremoniously  yanked a root from the ground and laid it in this pot with some stem peeking out, and today I have enough mint to mix mojitos or put on baked fish.  You can try to bring any of your outdoor herbs inside; some will make the transition, some won't, but what do you have to lose?  One year I brought both rosemary and thyme inside; they ultimately died, but not before I got a few extra meals that included fresh herbs.

3.  While we are talking herbs, I encourage you not to yank your annuals out by the roots when they die back.  Last year, I got lazy and never managed to pull out the sage, but I mulched the bed.  Imagine my shock when the roots sent up new shoots and I had a bumper crop of sage this year with no investment in plants.  A friend had similar results with basil, which really surprises me.  This year I'll be cutting all my herbs back but not taking the root; if they don't sprout next year, I'll pull up the root.  In the meantime, anything that doesn't live will decompose and create compost for the soil.

4.  Lastly, think about what you can do to spread agriculture to your community, even in unlikely places.  Check out the work of organizations like Adopt A Farmbox, which provides raised boxes to schools and community organizations to grow their own food.  What would be better than every school in the country dedicating a little space and a few lessons to growing food?  I would celebrate the day that the lunch menu said "Salad grown by third grade classes," and the trays had something uber-local on them.  I'll bet the kids would eat their greens, too; certainly the third grade would.
Pin It!

Thursday, September 30, 2010

A Few Words About Water


I have realized that I have amassed quite a few little tweaks and life hacks that are fast, cheap, and good but are not full-scale projects, so I'm going to dedicate a few posts to some simple ideas.  The first is all about water.

1.  Of course, we've said it before and the frugal blogosphere will say it again, but please do everything you can to avoid buying bottled water.  It costs a lot to transport, both in money and environmental impact, leading to a big expenditure for you.  It also throws off a lot of trash, which you have to haul to the curb and someone else has to haul to the landfill or recycling center.  In this case, I'm going to advocate you spend to save:  Go out right now and treat yourself to a stainless steel or aluminum water bottle that you will fill from your tap and carry with you to work or wherever you need water.  If you don't trust your tap water (and most of us really have nothing to worry about), get whatever filtration system will make you feel secure about drinking your own tap water.  Long term, these purchases will save you money.

2.  While you're at it, stop buying bottled iced tea.  As you can see above, you can make iced tea in about 10 seconds of work and an hour or so of waiting, just by filling a jar with warm water and throwing in one industrial-sized tea bag.  (This is Lipton made for cold brewing, which I bought in bulk at Sam's Club.)  This batch of tea is probably 5 minutes into "brewing" by sitting on the counter; I was enjoying a glass (at work in my aluminum bottle!) about 20 minutes later.  Again, don't pay someone to transport water to you.  (For those of you extra-worried about bacteria growth in "sun tea," just let it steep in the fridge.)

3.  Finally, an odd water-related tip I read in a WWII-era home economics publication:  when you use a carton of cream (or half-and-half, or a can of evaporated milk), rinse the container out with an ounce or two of water, and add this reconstituted milk to your milk jug or use it in cooking as milk.  I thought this was a neat idea, and I've been doing this on the rare occasions that I have a container of half-and-half around.   It saves a couple of cents and gives me the jollies, which isn't a bad thing either.
Pin It!

Tuesday, September 28, 2010

Knitted Cowl


This questionable looking item above is a cowl.

For those of you not familiar with them, cowls are somewhere between a stand-alone turtleneck and a scarf.  If you knit them fairly narrow, as I did above, they cozy around your neck like a big turtleneck.  (This is critical for me, because if my neck and feet aren't warm, there is no hope for the rest of me.)  If you knit a larger circumference, you can pull it up over your head like a hood.

Plain English Cowl Instructions

You need:
1.5 skeins Lion Brand Nature's Choice Organic Cotton Yarn
Size 10.5 circular knitting needle with 24" cord
Size N crochet hook

Cast on 80 stitches.  This edge will curl when you wear it, which I think creates a neat look. 
Knit in the round until the piece is about 12 inches long, or however long you want it.  The longer it is, the more it will scrunch up around your neck.
Crochet off.  The piece above has a single row of double crochet, but in later versions I have done a double row, which seems to make that edge lay flatter when you wear it.  Obviously, you can wear either end at the top, or even wear it inside out.

You can cut the cost of this by choosing less expensive yarn, but I am addicted to this Lion Brand option.  It just feels so good in my hands! I started by buying it at my local yarn store for $7.49 a skein plus tax, making this cowl come in at $12.  I have since found several good online sales that bring the price per skein under $6.  Fabric.com currently has a good price, plus free shipping on orders over $35.  If you get the mailers from Joann Fabric, you will often see a 40% or 50% off coupon on regular-price items, which helps as well.

The Analysis

Fast:  I can finish one of these in two or three nights of knitting (at one or two hours a night), which means they are plenty quick to make a few for me, a few for hubby (they are unisex), and some for gifts.

Cheap:  As mentioned above, this cowl was $12, but I should be able to do future ones for around $8 if I'm careful.

Good:  As we head into fall, anything that adds some warmth allows us to keep that heat low or off for longer!

Fall Thermostat Challenge Update:  Typical for the Midwest, we just had a weekend during which I could hardly stand to turn off the AC, followed by a night during which I slept in socks!  So far, the whole-house heat and AC have been off 266 hours since Labor Day, or 11.08 days!
Pin It!

Friday, September 24, 2010

Grad School Casserole


The intoxicating thing about blogging about domestic issues is that one can make one's life sound as perfect as possible.  I figure this is what happened to Martha Stewart:  one day she was telling the neighbor how to repot African violets, and the next thing she knew she had a multimedia empire that required her to put little gingham hats on her Mason jars of home canning and tie them with rafia bows.

My friends, I promise you:  my Mason jars will never wear gingham hats.

Anyway, yesterday was one of those less-than-perfect days.  After a week of nearly no sleep and multiple client deadlines, I managed to get one of the worst allergy attacks ever.  I could hardly see or breathe for the majority of the day.  By the time I got home from the "second shift" job, I was pretty much ready to either call out for expensive, fatty junk or commit to making a dinner out of tortilla chips eaten over the sink.

Enter Grad School Casserole.

Developed back in the day that this was an economical meal or 5 for a graduate student, this is the go-to meal for complete melt-down days.  It is not healthy.  It is not even as cheap as lovingly sauteing veggies from the garden.  But it tastes like comfort food, is prepared from stuff you can easily keep on hand (because Heaven knows none of it will ever spoil with the preservative content), and it resembles a meal enough to keep body and soul together.

Grad School Casserole
1 Box Kraft Deluxe Mac n Cheese ($1.67)
1 Package Hot Dogs* ($3.99)
1 cup Kroger stuffing mix ($1.79 per box; 3 cups per box = 60 cents)

Prepare mac.  Cut up hot dogs.  Put in casserole dish, top with stuffing, and cover the dish.  Bake at 350 for 20 minutes until hot dogs are hot.

* I buy Hebrew National, a more expensive brand, because at least the kosher butchering process makes the company slow down during the meat production process, which means a cleaner overall product.  This is particularly important when you are buying what is functionally spiced leftover meat bits shoved in a tube.

Drink a lot of water, because you've just had your sodium for the week.  But, this casserole tastes like your favorite hot dogs and mac lunch from when you were a kid, and it keeps the family together long enough to live to fight another day.


The Analysis

Fast:  About 25 minutes, including prep and baking.  This is the point of this dish.

Cheap:  At $6.26, I've certainly made cheaper meals.  But it makes about five servings, and it is cheaper than the pizza I was about to order. 

Good:  Comfort food for those bad days and lunches the next.  If you want to reheat this one for lunch, you may want to add a splash of milk to keep it from drying out.
Pin It!

Tuesday, September 21, 2010

Zavory Peppers


Do you remember, way back in February, when I started my pepper plants?  Growing peppers is such a wonderful hobby for someone like me; it gives me some gardening to do just when I'm starting to be convinced winter will never be over, and then the little plants are pretty happy to be ignored until time for harvest.

This year, you may recall, I grew a new offering from Burpee called Zavory.  These are the pretty little red peppers you see at the top of the photos.  (The three darker green chiles on the left are Salsa Delight, and the lighter green one on the right is a Bananarama, both also from Burpee.)  At the time, I conjectured that the Zavory peppers would be hotter than I could handle, because my typical growing methods seem to produce very hot peppers.

Was I pleasantly surprised!  The Zavory have a little snap to them, but not a tremendous amount of heat.  Best of all, they have just the right spicy flavor to go perfectly on pizza, which is how we ate a handful of these this weekend.   Yum!

What did I do differently?
  • I started my seedlings in newspaper pots filled with potting soil rather than in peat pellets.  I think this allowed me to let them stay put longer before their first transplant, and it didn't stress the young seedlings with looking for nutrients.
  • I "abused" my peppers less.  I always say I abuse my peppers; I tend to expose them to the wind from a fan for several hours a day from the time they have their first real leaves until they go into the large outdoor containers where they live.  This year, I exposed them to shorter bursts from the fan to keep their stems strong and keep them from growing leggy, but I didn't make them stand up to wind all day.
  • I moved them outside to harden off earlier.  This spring had a number of early warm days, and the peppers got a much longer period of sitting on the patio during the day and only coming in at night.
  • I watered them much more regularly.
Combined, I think this kept my peppers from being overly-stressed, which I think keeps the capsaicin at a manageable level.

Ultimately, many things in the garden this year were disappointing due to some very erratic weather in the Midwest, and I didn't get nearly the harvest of many things I would have liked.  However, I got quite a few of these lovely Zavory peppers, and they are on my list for next year!

The Analysis

Fast:  Peppers are the biggest long-term commitment (you will note seven and a half month from  seeds to harvest here), but they don't require a lot of attention except during that time of year when you really need a garden plant to love!

Cheap:  Even with a relatively small harvest, I don't think I could have purchased the same quantity of Zavory peppers at the farmer's market for the cost of seeds.  For one thing, I didn't see any Zavorys at the market this year.

Good:  Seriously, these taste just like they were tailor made for a pizza. 
Pin It!

Thursday, September 16, 2010

Is Organization Frugal?

"That's so last season!  I wouldn't be caught dead in it."

"Use it up, wear it out, make it do, or do without."

Somewhere between these two is where most frugalistas (and frugalistos) live.  But it is easy to see how frugal living can tip the scale and send you right into accumulating too many things you will never use again.

For me, it was my clothes closet.  I love getting new clothes, something that hasn't changed just because I want to live sustainably.  However, a quick look at my closet this summer showed that I had gotten rid of very little since the early 1990s.  Clothing was shoved, stacked, and stored in there:  everything from current favorites to out-of-fashion but expensive pieces to cheapies that had seen better days.  It was time to take action.

I was helped by two powerful forces.  First is the recent proliferation of television shows about hoarding; after watching about two-thirds of an episode about these poor folks with disorders that resulted in the inability to throw things away, I invariably need to clean something out.  More than one episode of such a show has ended with me holding a full trash bag.

The second, more powerful force is my wonderful Mom.  She encouraged me to get rid of anything in my closet that I don't love and that doesn't make me feel good when I'm wearing it.  No matter how expensive or how un-used (or, conversely, how loved-to-death), if it no longer works, it goes.  When I needed a push forward, she would look at a piece of clothing with wide shoulder pads or an androgynous shape and parrot a commercial from a few years back:  "So, where did you park your DeLorean?"  No one wants to look like they are tooling around town with Marty McFly, so out the offending garment went.

This doesn't mean everything hit the trash.  I tried to clean in a sustainable way, including:
  • Items that were too worn to use became rags or quilt squares or hankies, as the fabric dictated.  I tried to limit this category so I wasn't just moving stuff from my closet to another pile.
  • Items that were still good but just didn't look good on me went to Goodwill.  For example, I don't know how many mock turtlenecks I had to buy to learn the lesson that these shirts make me look like I have mono-bosom.  Yuck.
  • Items that no longer work but are more valuable as a garment than a rag also went to Goodwill.  For example, wool jackets of a questionable cut were sent in the hopes that maybe they would be sold at deep discount to someone who needed the warmth more than the latest style.  However, I didn't send anything obviously dated that was also super-cheap, like a cotton blouse with shoulder pads.
All told, I took a substantial stack to the rag and fabric piles, and to date I have sent ten (count 'em, ten!) bags to Goodwill.

Is organization like this frugal and sustainable?  I think so.  Since the organization, I have been better able to find my favorite items, and I treat them better.  Now that clothes have room to breathe, I am less likely to pull something out of the closet only to find that it needs ironed before wearing.  I have also better been able to resist buying a new item because I didn't remember that I had one similar tucked away on the shelf. 

The organization has also carried over into my shopping.  Now, when I shop, I ask myself if I really love something, if it will look good on me, if it will make me feel good about myself.  If it is just OK or a "like not love," I put it back on the rack.  Someone else who loves the item can give it a home and "use it up, wear it out."  I will do likewise with my favorites before I shop for new ones.  I think that's sustainable.
Pin It!

Tuesday, September 14, 2010

Organize Those Coupons

I used to be a couponer of the first order.  Every week, I would clip the coupons from the paper (there was no such thing as online coupons at the time) and file them in a little expandable file that I kept with me at all times.  On the days that I was going to the grocery after work, I would take my shopping list and sort out the applicable coupons, noting a "C" and the number and brand of the item I had to buy.  So, if I wanted to buy toaster pastries and had a coupon for 50 cents off two boxes, the list would get a note that said "C Pop Tarts x2."

Did I mention that I had a really boring job at the time, and I was, um, multitasking at work?

Once I went full-time freelance, time at my desk was sacred.  If I'm sitting at my desk, I'm earning money, and couponing isn't typically part of the equation.  I still clip coupons from the paper and online, but it is increasingly hard to find the time to match them with my list.

So, I have devised the above system.  You will see that there is a single envelope for coupons.  This is because I no longer clip every coupon that seems promising such that I need to file them by category.  If I have clipped the coupon, it is because it is for something I would buy anyway.  This cuts waaaaaay down on the number of junk food coupons that accumulate; if a frozen dinner or convenience food isn't a good idea at full price, it isn't a good idea with a coupon.  (I make an exception for those favorite splurges that will get us out of the occasional jam.  For example, I try to make my own pizzas because I add more veggies and less meat, but having a frozen pizza or two in the freezer will save us from a complete meltdown on a really bad day.)

As far as grocery lists, you see three:  one is for Trader Joe's, the only place I can find a good selection of reasonably-priced organic meats and hormone-free cheeses, turbinado sugar, and cookies made without HFCS.  TJ's doesn't take coupons because they are almost entirely based on house brands, so when this list fills up, there is no need to sort coupons.

One list is for Dorothy Lane Market, our local upper-income, foodie-oriented bodega.  To save my budget, I only frequent DLM for locally-made organic butter and milk from grass-fed cows, plus some of the Bob's Red Mill grain items.  Buying anything else in DLM -- even a bottle of shampoo -- can be budget suicide, so unless I know I have a Bob's Red Mill coupon, I don't sort my coupons and I don't shop for anything other than the DLM-only items.

The big list is for Meijer, our local superstore.  Here is where the coupons come into play.  This list has everything:  food, health and beauty products, even basic automotive and household supplies.  When it is time for a Meijer trip, I sort the coupons, taking the ones for items on the list and the ones about to expire.  I add these last items to my list; remember, these are things I would buy anyway, so I will take the opportunity to stock up.  So, of all of my grocery trips, this is the only one that really involves couponing. 

I try to rotate among the lists to address the longest one, and I try to only go to a grocery store once a week.  Currently, our grocery budget for two people is around $100 a week, which sounds high until you realize that that is not just food (and really, the only food we are buying right now in any quantity is dairy) but also shampoo, make up, OTC medications, any household cleaners I don't make myself, ingredients for the ones I do, and the occasional one-off purchase like the injector cleaner I just bought for my car or the water bottle my husband just bought to carry drinks to work.  Not bad, I'd say.

The Analysis

Fast:  My couponing time is reduced to a couple of minutes of sorting before I do the big Meijer run, and I'm still taking advantage of the cents-off as well as the planning to get my items at the most economical locations.

Cheap:  Couponing is still one of the easiest activities for saving money, as long as you have a system that works for you.

Good:  I love a good organization system!

Fall Thermostat Challenge Update:  Thanks to a few cool days, the whole house AC has been off for 128.5 hours since Labor Day, or 5.35 days.  I had to turn it back on to combat the allergens, but I should be able to take another run at it soon.
Pin It!

Friday, September 10, 2010

The Value of Stretching


Stretching is something of a lost art.  Your grandmother or great-grandmother did it during the Depression and WWII, taking a little bit of rationed foodstuffs and turning it into enough food to feed a family.  In fact, home cooks throughout history have primarily stretched their food -- making do with the scarce or expensive items and adding in cheaper or in-season items to add bulk, volume, taste, or nutrition.  Cookbooks from most eras explicitly or implicitly refer to stretching; it is only modern cookbooks that seem to imply that you can't make dinner unless you have the exact quantities asked for, down to the last bay leaf and quarter teaspoon of lemon zest.

Some of my favorite stretching tips:

To Stretch Meat
  • Meat is the most often stretched foodstuff, because of scarcity in earlier eras and expense in all eras.  The best way to stretch meat is grind it up; buy a less expensive cut and grind it, or buy pre-ground chuck, turkey, or the like.  Stretch by adding approximately one egg per pound of ground meat and up to a cup of oatmeal, bread crumbs, rice, or cracker crumbs.  Behold, meatloaf!  Meat balls!  Just season according to your recipe.  This is the stretching tip you most likely remember from your granny, and it is the one you are most likely to still use, even if you don't think of it as stretching.
  • Slice your meat.  With a better cut of meat, prepare it and then slice it and use it as a garnish on pasta, rice, or salads.  You will want less meat when it visually takes up more room, and this also means fewer calories in your diet.
  • Use the scraps.  We keep a "stock bucket" in our freezer to collect trimmings and bones.  When it is full, I make stock and use that for a hearty soup.
  • Make a casserole from leftovers.  If you have a few trimmings from a roast or even a few hot dogs from your last cook out, you can add them to a casserole for a little extra protein and a meal with less meat.
To Stretch Carbohydrates
  • Carbs, like pasta, rice, or bread, are usually the thing we use to stretch.  However, in some seasons, they are the most expensive item on a very economical table.  When the garden is in full swing, suddenly that $1 box of pasta is your big expense for the meal.
  • Stretch pizza crust and most baked goods by adding shredded zucchini.  I like to take a Jiffy boxed pizza crust and add about a cup of shredded zucchini (about one medium) and decrease the amount of water called for.  Add a little extra flour if the dough seems watery.  Often, this makes a small box of pizza crust mix become enough for two pizzas.
  • Likewise, put a shredded zucchini in your next batch of bread and decrease the liquid a bit.  You will get more bread, and you have found a way to get rid of a zucchini and add some nutrition to your diet.
To Stretch Dairy
  • Dairy is expensive, especially if you want hormone-free or organic varieties.
  • Make yogurt.  Yogurt can take the place of many sauces, and it becomes a good way to get calcium without having to drink a lot of milk.  While an ounce of milk makes an ounce of yogurt, so no real change in volume, you tend to be happy with four to six ounces of yogurt and some fruit instead of an eight ounce glass of milk.
  • Buy stronger flavored cheeses.  That way, you will use less and still be satisfied.
  • Use cheese as a garnish on veggies, not as a main ingredient.
Pin It!

Tuesday, September 7, 2010

Basil Pesto


If I had to pick only two things to grow in my garden, they would be tomatoes and basil.  Tomatoes because nothing tastes like a home grown tomato, and basil because it functions almost as a cash crop for me.

Nothing could be easier than growing basil.  Packets of seeds of "Genovese" or "common" basil, the kind that is perfect for pesto and sauces, are readily available at the hardware and grocery store every spring for around $1.50.  (Yes, they are hybrids; if you want an all-heirloom garden, you will pay up.  But I promise, Genovese or common basil is the kind you want for pesto -- meaty, large leaves, strong aroma, dark green color.)  Start your seeds about 6 weeks before your last frost date; I usually dump about a quarter of a pack of seeds into each of four small pots and treat the resulting seedlings as four plants.  You could get more scientific.  Wait until your ground is warm and no threat of frost remains, and plant them in a sunny spot. 

You will wait forever to see a plant of any size, but when it starts to take off, prune the plant regularly at the leaf junctions, encouraging two more branches to sprout where you cut.  Pretty soon, you will have a basil plant of mammoth proportions.

I think the best way to preserve the bounty is by making pesto.  Pesto (coming from the Italian root for "paste," the same as pasta) is a sauce of any leafy green mixed with olive oil, salt, and frequently cheese and or nuts.  I use the term "pesto" to refer to basil and oil, to which I add salt when I cook.  I may or may not want to add cheese or other inputs, so I freeze it pretty plain.

In the store, small jars (3 oz.) of basil pesto are typically $3.39 (the most common price I saw when I looked this week at a few brands.  If you assume that each ounce requires 38 cents worth of non-basil inputs (like oil and salt), making your own basil pesto will save you 75 cents per ounce.  This can get into some serious savings quickly.  Last year, I froze 14 half pint containers of pesto (a half pint will cover a box of pasta, which is my most typical usage).  That means 112 ounces, or $84 in savings over buying a comparable amount in the store.  This year so far, I have put up 6 containers, for a savings of $36.  As you can see, most years the basil pesto alone will pay for a significant part of the garden seeds and plants (which typically run me around $250 a year).

To make pesto, wash your basil leaves and puree in a food processor with olive oil until you have a consistency somewhere between a sauce and a paste.  Put in a container and freeze.

You can use this to dress pasta, giving you a quick meal that also has a fair amount of leafy green veg in it.  Or, use it as a compliment to dipping oil for bread, or as a dressing between veg and bread on bruschetta.  When you use it, you can add salt, cheese, or nuts to your liking.  In the winter, I love to make a batch of pasta with basil pesto, sea salt, sun dried tomatoes, and a grating of Parmesan as a quick, healthy meal.

The Analysis

Fast:  Processing basil to be frozen takes a little time, but not as much time as, say, freezing strawberries or canning tomatoes.

Cheap:  See above.  Every 8 oz. container of pesto you freeze now saves you $6 over buying the cute little jars in the store.

Good:  Here's the kicker:  nothing tastes as good basil pesto frozen the day it was picked, so the expensive little jars don't even taste as good!

Fall Thermostat Challenge Update:  As of today, 6 hours saved.  Yesterday was a cool day, and we were in and out of the house doing home improvement, so it made sense to turn off the AC.  We turned it back on for night and for an expected heat wave.
Pin It!

Thursday, September 2, 2010

Frugality and Textbooks


(Full disclosure:  I am currently director of education for a small college, and I have spent much of my career working in and studying higher education.  My experience necessarily informs and colors my thoughts.)

If your back to school season includes college classes for yourself or a family member, you may have experienced sticker shock at the bookstore.  Because of relatively small print runs, among other factors, textbooks will never be as cheap as the latest Dan Brown thriller.  Additionally, some publishing companies appear to have cracked open their own marketing textbooks long enough to embrace planned obsolescence, releasing a new edition every year, obsoleting the old edition (which was probably perfectly fine) and killing the used book market.  What is a student (or parent) to do?

Choose your courses wisely:  I would never advise a student to choose their courses based solely on book costs; an education, no matter how expensive, is a bargain in improvements in earnings power and quality of life.  However, if you are ambivalent about your choice of elective course, you might let textbook cost be the deciding factor.  If you are deciding between courses to fulfill your literature requirement, Survey of Shakespeare at 2:00 p.m. with a $200 textbook may not be as good a deal as Intro to Dante at 8:00 a.m. with a $35 copy of The Inferno.  Set your alarm and save a little money.

Buy used:  Many college book stores offer at least a few used textbooks to round out their stock.  Get to the store early and select used books that are as unmarked as possible.  However, don't hesitate to buy new if your only other option is a book so highlighted that you will never be able to process the information on your own.

Talk to your professors:  Professors often make book adoption decisions without thinking about the price the student will pay.  Even the most well-meaning prof is usually wanting to get the information in front of students in a convenient way, regardless of cost.  And price sensitivity is often blunted by the fact that these profs typically have stable careers and paychecks, making it easy to think of throwing another $20 book on the pile just for completeness.  Talk to your prof and ask his or her honest opinion on your book-buying decisions, including:
  1. Which of these books do you think I will want to keep after the course is over?  Does your answer change if this is not my major?  (Consider buying new or gently used copies of references in your field.)
  2. Can I share a book with someone else in class?  With someone in a different section?  (If the prof gives open book tests, you won't be able to share a text.  Otherwise, you and a friend or roommate may want to split the cost and share the book.)
  3. How much of each of these books do you use in class?  Is there one or more I could use from the library reserve? (Professors often put selected readings on reserve in the library, or sometimes these readings are available online.  If your prof has adopted a book for one or two readings, try to get by with the library copy or an online source.  Or, look for another book that has the reading; the Declaration of Independence doesn't change whether it is printed in a $120 history survey text or on the back of a freebie Fourth of July pamphlet from your state senator.)
Start a book fund:  You know that textbook purchases are coming each term, so save for them like you would a vacation or a special treat (yeah, I know, not the same).  Sell your aluminum cans and put the money in a jar.  Let family members know how much you would like a gift card to your college book store or online store of choice.

Shop around:  The internet makes it much easier to compare prices, and you should do this on textbooks.  Many university book stores will charge the suggested retail price for textbooks, while many online stores, lacking the expensive bricks and mortar overhead, will charge much closer to their own wholesale price from the publisher.   A few minutes checking prices (which you can do from your smart phone while standing in the college book store) could save you several dollars or more on each book.
Pin It!

Monday, August 30, 2010

Yoga Socks


First of all, my apologies.  This is one of my feet.  Yes, I desperately need a pedicure and a paraffin dip.  This is what gardeners' feet look like at the end of the season.  [Hangs head.]

OK, now, on to the project:  this is one of my new pair of yoga socks. 

I mentioned this spring that I was teaching myself to knit.  Let me tell you a little bit about myself as a crafter.  I am not someone who uses my crafts to challenge myself.  When I embroider, I do not want to do it on 24-count Aida cloth in 37 very similar shades of green.  I will not be knitting Fair Isle patterns.  I will not be crocheting from patterns at all.

I craft to soothe myself, primarily, which means that the project must be 1) repetitive and 2) practical.  I embraced red work embroidery because I don't need to pay enough attention to change colors.  I like to crochet a rib stitch that I use on almost everything.  And with knitting, I like repetitive rectangles that I can create while watching TV, reading, walking around the house (yes, my new skill), or sitting at my computer thinking about a thorny work problem.

Yoga socks are the perfect project for this.  All you do is create a rectangle from sock weight yarn (although I have had good luck with worsted weight cotton as well), sew up the area under the arch and behind the leg, and wear.  They are ideal for yoga class, when you need contact with the floor for traction but still want to keep warm.  I have gotten rave reviews wearing them to belly dance class, especially from the American Tribal fans who love hand-crafted pom-poms, tassels, and other costume decorations.  And, they are great in the fall and spring when you really want to go barefoot but need a little something to keep cozy. 

(Note:  I write knit and crochet patterns in plain English, too.)
Cast on 50 stitches of sock weight yarn on size 3 needles.  This fits my size 6 foot well; you may need to add or subtract accordingly.

Knit to your heart's content, or until you have the length you desire.  Remember, you are going from the base of the ball of your foot to a bit up your calf, so this will be shorter than a standard sock.  I just knitted; you can add cables or intarsia designs or anything else you want.  Heck, this can be your swatch to test the gauge for your next sweater, if you like.

Bind off.  Turn wrong side out to sew.  Sew with mattress stitch about three inches of sock to form a tube; this will go under your arch.  Leave a three inch gap, and sew the rest up.

Turn right side out and go hit the mat!

The Analysis

Fast:  These are not a sit-down-and-do-them project.  These are the kind of thing you knit in spare moments while you are waiting for your family to be ready to leave the house, while you are watching TV, while you are standing at the bus stop with your kids or are on the train on the way to work.  These thrive on stolen moments.

Cheap:  These take less than a skein of sock yarn, so use up your yarn ends this way.  And don't feel limited to matching; what would be more fun than a crazy pair of yoga socks made of leftovers?  That means free!

Good:  These are a blessing in cold yoga studios or on cold dance floors.  They also make that transition from fall to winter a little easier to take.
Pin It!

Thursday, August 26, 2010

Fall Thermostat Challenge


I have a love/hate relationship with my house thermostat and all the heating and cooling equipment it runs.  On the one hand, hey, I've read The Long Winter; I know that without central heat I could be spending my winters sitting around the fireplace wrapped in quilts, praying for an early spring.  On the other hand, every time the heat or air kicks on, part of me thinks I should get back to work because there's a bill a-comin'.

Avoiding running either heat or air was easy this spring.  One day, it was warm enough to make it through with just passive solar heat and a nice pair of fleece socks, and I turned off the heat and never looked back.  Even on a couple of really chilly mornings, I felt like I could bring on summer just by refusing to turn the heat back on, and I opened the west and south facing blinds, put on a sweater, and said that summer was here whether the outside temperature knew it or not.  I made it a total of 49 days (7 whole weeks) running neither heat nor air.

Fall is trickier for me.  In the first place, seasonal allergies make it difficult for me to throw open the windows while everything alive is busy throwing pollen, ragweed, and mold into the air.  Secondly, I have no desire to mentally rush the onset of winter and sweat my way through the last few weeks of summer, waiting through the end of air conditioning season and going straight to a delayed heating year.  Finally, and this is one of those individual things that makes you crazy about your own house, but our master bedroom is the great heat collector of the whole house.  This is great in January, when a load of laundry in the laundry room downstairs can take the chill off the bedroom for several hours, in spite of the fact that my night time house heat is set at 55 degrees.  On the other hand, this means that we supplement that room with a window air conditioner in the summer, because that extra 5-10 degrees makes a huge difference in that room in July.

All of this is a very long-winded way of saying that today, I turned the whole-house AC off for an unseasonably cool day, and I don't plan to turn it back on until night (when I need to cool that bedroom).  So, here is my challenge for myself (and you, if you'd like to play along):

The Fast, Cheap, and Good Fall Thermostat Challenge
1.  Starting Monday, September 6 (Labor Day), put away your white shoes and get out a sticky note.  We are going to track the amount of time we can keep both the AC and the heat off, until the day that we can stand it no more and turn the heat on until spring.

2.  Tallies will be kept in hours.  I will probably be able to turn off the AC for 10-12 hours at a time during the day and live off the cool air that accumulated at night.  You may be able to stand turning off the AC at night and opening a window.  It is all up to your comfort threshhold and your allergies.  Remember, we're saving money and resources here, but not at the expense of our health and sanity!

3.  Single room electric heating and cooling devices, like fans, window air conditioners, and space heaters, are allowed, but only in one room at a time.  (That is, no fair turning off the whole-house air and turning on 5 window units.)  Non-electric options, like open windows and fireplaces, are strongly encouraged, as are passive re-captures of heat like venting a drier indoors or catching up on your baking.

4.  I will keep you updated with periodic tallies of my hours, and I encourage you to do the same, either in the comments section of this blog or the comment section on the Hilltop Communications page on Facebook.  I will let you know when I give up and turn on the heat for good.  For those of you in more southern parts of the country, I expect you will be able to post when you turn the AC back on early next spring.  I love stories like this, so share them.  Northerners, I know you won't have as long a heat-free season, but that is OK.  We are all doing what we can.

Are you ready?  Let's give those thermostats -- and wallets -- a well-deserved fall vacation!
Pin It!

Monday, August 23, 2010

August Pasta


There it is:  Still in the pan, with steam curling off.  August Pasta.  AKA, the cheapest meal of the year.

Even though this is not a gardening year for the record books, we still have an abundance of garden produce this August.  So, every August, I cook a meal or two that relies heavily if not solely on veggies.

What you see above is:

6-8 medium tomatoes, chopped (from garden)
2 medium leeks, chopped (from garden)
1 handful basil, chopped (from garden)
(You can also add peppers, zucchini, oregano, or pretty much whatever is ripe.)

Saute these until the flavor blends.  Mix with:

1/2 package angle hair pasta (Sam's Club, 89 cents per package)

Add sea salt and ground pepper to taste.  Serve.

That's right.  This meal comes in at 45 cents for the batch (remember, I paid for garden seeds and plants from the grocery budget in February, so the produce is a "pantry supply), or 15 cents for each of 3 big servings.  And, if you have lots of veggies, I can assure you that August Pizza and August Rice are equally yummy.

The Analysis

Fast:  The pasta version of this is the fastest, with just less than 20 minutes of prep and cook time.

Cheap:  45 cents a batch!  15 cents a serving!  Now that's what I'm talkin' about!

Good:  With produce this fresh, you don't really need oil or cheese to pump up the flavors.  It is low in calories but quite filling, and did I mention it is 15 cents a serving?
Pin It!

Thursday, August 19, 2010

WWII Chili Sauce


August is undeniably tomato month.  Although I think the heat and variable amount of rain has crippled our crop a bit, there are still enough tomatoes to put up a few of our favorites.  One of these is affectionately known as "WWII Chili Sauce."

This recipe derives its name from its origins in Grandma's Wartime Kitchen by Joanne Lamb Hayes.  Although Hayes has devised a way to make this sauce in about a half hour of cook time, I am going against the "Fast" of "Fast, Cheap, and Good" by reverse engineering it to cook longer, making for a thicker sauce and deeper flavors.  It is worth the investment of time.

DH loves this sauce.  On a cold winter night that he is cooking for himself, I can assist by thawing a pound of hamburger and letting him use this like sloppy joe sauce.  It makes a great topping for bread, noodles, or potatoes, and it makes about 4-5 servings of sloppy joe-style chili.

3 lb tomatoes
½ cup chopped onions
½ cup chopped pepper (I uses salsa delight and bananarama chiles, but the recipe calls for green bell peppers)
¼ cup cider vinegar
¼ cup packed light brown sugar
½ t. salt
¼ t. ground cloves
¼ t. ground allspice

Wash and stem the tomatoes, cutting into reasonable size chunks and cutting out bad spots. Place in large pot and cook until the tomatoes are juicy and boiling. The longer you cook, the more juice and pulp will be available to you.

When the tomatoes have released their juice, pass the juice and pulp through a ricer (also called a food mill) to remove the skins and seeds. Return the tomato pulp to the pan, and add the remaining ingredients. Return to a gentle boil, and cook until the sauce is as thick as you would like – depending on the tomatoes you have used and the size of the batch, this could take up to 2 hours.

Refrigerate for use within a week, or spoon into a sterilized pint jar, leaving 1/4-1/2 inch headspace, and process in a water bath canner for 20 minutes (25 minutes for quarts). Makes one pint.

The Analysis

Fast:  Well, I did make the cook time longer on this by virtue of cooking the pulp down, sending it through a ricer, and then cooking again.  I think it is worth it.

Cheap:  Depending on your garden, this could be quite cheap indeed, with the cost coming mostly or entirely from pantry supplies (like cider vinegar and spices).  I always have to buy onion, which are 75 cents each  at my farmer's market.  I grow tomatoes and peppers.

Good:  Once you've had this, I promise the sticky, HFCS-laden sloppy joe sauce in a can will hold very little appeal for you.  And, as a bonus, the house smells wonderful while you cook it!


Pin It!

Tuesday, August 17, 2010

Knowing How


My husband has a great story about an engineer who is called into the factory late one night to diagnose a problem with a machine that has stopped working, halting production.  (After observing my husband's work schedule, I might add that I am sure that it was late on a holiday or vacation evening, and that the engineer in question probably had to leave his wife to do this.)

He arrives and goes straight to the machine.  He looks at the workings, takes a few readings, asks a few questions of the operators and the skilled trades folks, and then takes out a Sharpie and makes a big black X on the side. 

"Open her up right there, and you'll see the problem," he says, giving directions about the part that needs replaced.  He then packs up and, five minutes after he arrives, departs.

The next day he sends a bill for $5,000, and the client is irate.  "What is this all about?  You were only here for five minutes and made an X!  I can't send this in for payment without some explanation of why it costs so much," the supervisor fumes.  So the engineer writes a revised bill and sends it right over:

Making an X:  $5
Knowing Where:  $4995

So, I hope you will see the connection when I point out that today's photo is of our air conditioning unit, which is humming along and cooling the house just fine, thank you.  That wasn't true a few days ago, when it stopped working in 95 degree heat.  Because my husband is, in fact, an electrical engineer, he went out, took a few readings, and diagnosed that we needed a new capacitor, which he ordered and installed.  Total cost, $37.  I'm sure I would have paid the HVAC service I use at least ten times that for the service call.

This is not to criticize the HVAC service or any other.  (In fact, my HVAC guys have talked me through a few crises gratis before coming out and charging me, so kudos to them.)  Instead, it is to point out that when you see the service charge on a bill, you are seeing the cost of "knowing how."  And this should give you a good idea of the skills you may want to acquire.  You don't have to learn electrical engineering, but can you learn enough basic wiring to install a new light fixture?  (Obligatory warning:  when messing with electricity, make sure you are doing it right.)  Can you learn to change the oil in your car?  Can you learn to make a meal so yummy you don't want to go out to eat as often?  Can you sew on a button and mend a hem?  Can you care for your body and reduce your health care costs?

Take a look at that service fee on your next bill, and see what skills you need to learn.  Can you be the one that "knows how?"
Pin It!

Thursday, August 12, 2010

Sustainable Tool: Mortar and Pestle


A few years ago, Hurricane Ike barreled up from the Gulf and continued north until it hit Ohio as a Category 1 Hurricane.  Most of you probably laugh at the idea of a category one storm being memorable, but let me assure you that a mostly-landlocked Midwestern state has done very little hurricane preparedness work.  We were left without power for nearly a week, and that event kicked off my interest in finding tools that can be used off the grid.

One of my favorite such tools, although it wouldn't have done much in a temporary power outage like Ike caused, is the mortar and pestle.  You may recognize the iconic shape from apothecary signs at your local pharmacy, and that is no accident.  A mortar and pestle is the original grinding tool.  It can be used to grind and compound (mix) medications, hence the link with pharmacies, but it has traditionally been used to grind herbs and spices and crack grains and nuts.  I use mine several times a week during food preservation season for just these tasks.

I can't tell you the pleasure that this tool brings me.  It allows me to quickly and easily grind, powder, and crush herbs, seeds, and herbal medications in a way that has been done for millennia.  Think of that -- you are doing a task that someone could have done before electricity, before the railroad, even before writing.  This tool is so basic, just picking one up links you with history.  (That kind of gives me a little chill, but I am a history nerd that way.)

It also does the job well.  I recommend you buy one made of stone; mine is marble, but there are granite ones available.  Get one with a smooth interior, although it doesn't have to be polished.  Place a little of what you are grinding inside, then take the pestle (which I just learned derives from the Latin for "pounder") and start by pressing against your substance, then working up to something slightly more intense than tapping.  You don't want to imitate the Flintstones and pick the pestle up and slam it against the mortar. 

Also, with a mortar and pestle, you can forget about the conventional foodie recommendation to buy a separate coffee grinder and use it just for grinding spices, so the spice flavor doesn't contaminate the coffee.  With a stone mortar and pestle, you can grind any flavorful substance and then wipe it clean with no flavor residue.  You may want to use a drop or two of dish washing liquid if you just worked with hot peppers, but otherwise you can clean your mortar and pestle with water and a clean towel.

I have a possibly unreasonable love for this tool.  With proper care, it will be with me for a lifetime.  Maybe in a millennium, someone else will think of me while they preserve their food using a mortar and pestle.

Search Amazon.com for mortar and pestle
Pin It!