Friday, January 21, 2011

Scared Spinach


It is cold here.  I mean 5 inches of snow yesterday, 4 degrees this morning cold.  The kind of cold that makes people like me want to huddle in front of a fire and weep until spring.

So naturally, a couple of weeks ago, I planted spinach.

I put the pots of spinach out in the sunroom to see if they would sprout, knowing that it would take a while, but also knowing that as of yet the sunroom has never dropped below 50 degrees during the day, no matter how cold it is outside.  I had hope.

Yesterday, I went into the sunroom to find that the spinach had sprouted, but all of my little newborn seedlings were root-tail up, with no leaves to be seen.  I figure the poor things started to sprout, took one look at the snow outside, and decided they wanted to go back to bed too.

So I threw some extra humus on top of them and brought them in the house to a cozy windowsill, where today they rewarded me by showing some leaves.

The lesson?  Never argue with the wisdom of a plant.
Pin It!

Wednesday, January 19, 2011

Fleece Socks


By far one of the best projects I have undertaken is making fleece socks for myself and my family.  This project, like so many others, had its roots in an emergency that I was unprepared for, and I learned my lesson accordingly.

A couple of years ago, we had a sewer pipe that runs under our house break.  That would be bad enough under normal circumstances, but the pipe that broke was the one that was embedded in the slab portion of our tri-level home.  As we diagnosed the problem, worked through the insurance coverage, and then invited the nice men with the jackhammer into our house, we were without water to the kitchen for four months.  Even worse, the repair portion of the festivities occurred in the dead of winter, which meant that my downstairs door was left open for most of December as the repair men (who were surprisingly neat for people who were taking a jackhammer to a 12 foot path through the house) ran cords and such out the door to their truck. 

The house was freezing for several weeks, and I got really obsessed with things to keep my feet warm.  I ordered sheerling-lined slippers and knitted, lined socks, but the thing that really helped was a pair of fleece socks I found online.  They retailed for about $15, and I literally wore them and then washed them to wear them again.  I feel kind of bad that my repair men had to look at me wearing the same sweatshirt and socks every day for about six weeks, but I promise I was doing laundry regularly.

I can't afford an entire wardrobe of $15 pairs of socks, so I learned to make my own.  I use Green Pepper pattern 837, which includes sizes for children, youth, women, and men.  A little experimenting led me to alter the pattern to have a longer leg portion.  I also made alterations on the larger sizes to create a wider footbed and wider heel, to accommodate different foot shapes and the fact that fleece can shrink a tad, no matter what they tell you.  The project also improved my sewing skills, as I learned how to work with stretchy fabric and to ease during sewing to accommodate a three dimensional shape (the foot).

My family was incredibly gracious in allowing me to experiment on them to get the patterns just right, and last year I made about 35 pair of socks for myself, Mr. FC&G, and my parents.  This year, I made several pair for the craft fair and for Christmas gifts. 

The Analysis

Fast:  Even with pattern alteration time, you should be able to make a pair of fleece socks in under an hour.  I probably have the process down to 30 minutes.

Cheap:  Unless you are really trying to showcase a design or match plaid, you should be able to make a pair from less than half a yard of fleece, which you can get dirt cheap from the remnant bin at your local fabric store.  Usually, I can make a pair for less than $2 in fleece costs, although I sell them for more than that to factor in the production effort.  (I sell for $12 a pair, which includes sales tax, because I want to make my socks a better bargain than the mass-produced versions.)

Good:  Fleece socks got me through a really bad winter (you can see my entire wardrobe of them hanging on the line above), but my father gave perhaps the best testimonial when he said that his feet were warm in the winter for the first time in his life. 

Pin It!

Monday, January 17, 2011

Garden Porn


They know how to target us when we are vulnerable.  It has been so long since we've had the real thing, we are dying for a little peek.  And then you open the covers, and there it is:  page after page of plump, rounded flesh and young, tender limbs.  And the prose accompanying it -- "stringless, meaty, round, deep green, very tender pods...."

Beans, people!  It is time for the seed catalogs to arrive, also known as garden porn.

If growing your own veggies is a staple of sustainable living, then growing your own from seed is a further step toward frugality.  In general, even with some across-the-board price increases I've noticed this year, you can pretty much depend on getting a packet of seeds for the same amount you will pay for one or two plants of the same veggie at the greenhouse.  So, if you take care to start your seedlings right, you can dramatically reduce the cost of gardening. 

I generally patronize four companies each year:  Burpee, Stark Brothers, Seeds of Change, and Richters.  All of them have given me great service and great products each year.

My workhorse company is Burpee.  I think Burpee has gotten something of a bum rap from serious gardeners who don't like to think they are buying seed from the same company that puts those racks of hybrid seed in the hardware store.  But, if you are a new gardener, that is exactly what you should be buying -- inexpensive hybrid seed of veggie varieties that are typically very easy to grow.  Later, when you start saving seeds, growing different varieties for different purposes (like paste tomatoes for canning), and generally choosing varieties for their suitability in your microclimate, you will want heirlooms, but your first few gardens should probably lean on inexpensive seed that will let you feel OK if you fail.

But Burpee isn't just hybrids in the hardware store.  This year, I noticed a great deal more heirlooms -- some on every page.  I ordered mostly heirloom seed for my garden from Burpee.  There is a respectable array of organic seed too.  The order came extra-quickly, so I will be able to start my peppers a little early this year.

Stark Brothers is my source for fruit trees.  I got my key lime and my nectarine trees from them (both dwarf), and this year I plan to round out the "orchard" with a lemon and a couple of apple trees.

Seeds of Change is my organic seed source.  They have a number of varieties of seldom-seen plants (like purslane), and they are committed to organic gardening.  That's worth supporting.

Richters is my source for herb plants.  I got my mojito mint and my feverfew from them, and this year I'm thinking about some St. John's Wort. 

I really encourage you to grow something to eat this year, directly from seed.  Pick your favorite veggie, a hard-to-get herb, or something you've never had before.  Watch that little darling go from a tiny pot on your windowsill or under a grow light to something that cheerfully gives you pounds of food.  And join me in my little addiction; you won't be alone.

The Analysis

Fast:  Nothing about gardening is terribly fast, but this one is about the journey as much as the destination.

Cheap:  A single pack of seeds will more than repay you in veggies.  Just looking at some of my Burpee's purchases, a pack of Crimson Giant heirloom radishes, $3.25, will give me more radishes than I can possibly eat, even if I split it into two plantings.  A packet of Sweet Banana heirloom pepper seeds, also $3.25, will likely give me a pound or two of peppers, enough for pizza toppings all summer and a pint or two frozen for winter.

Good:  The healthiest veggie is one that you have grown under conditions you control and harvested minutes before you want to eat it or preserve it.
Pin It!

Thursday, January 13, 2011

We Did Our First Craft Show


In early December, Mr. FC&G and I did our first craft show.  And while I would hardly consider myself a craft show expert now, I do think it fits nicely with some of the aims of sustainable living.  The best part of the endeavor is that it was a way to make a little money from our handmade items while selling them in a very local context.  What you see above is the earrings my electrical engineer hubby made from resistors.


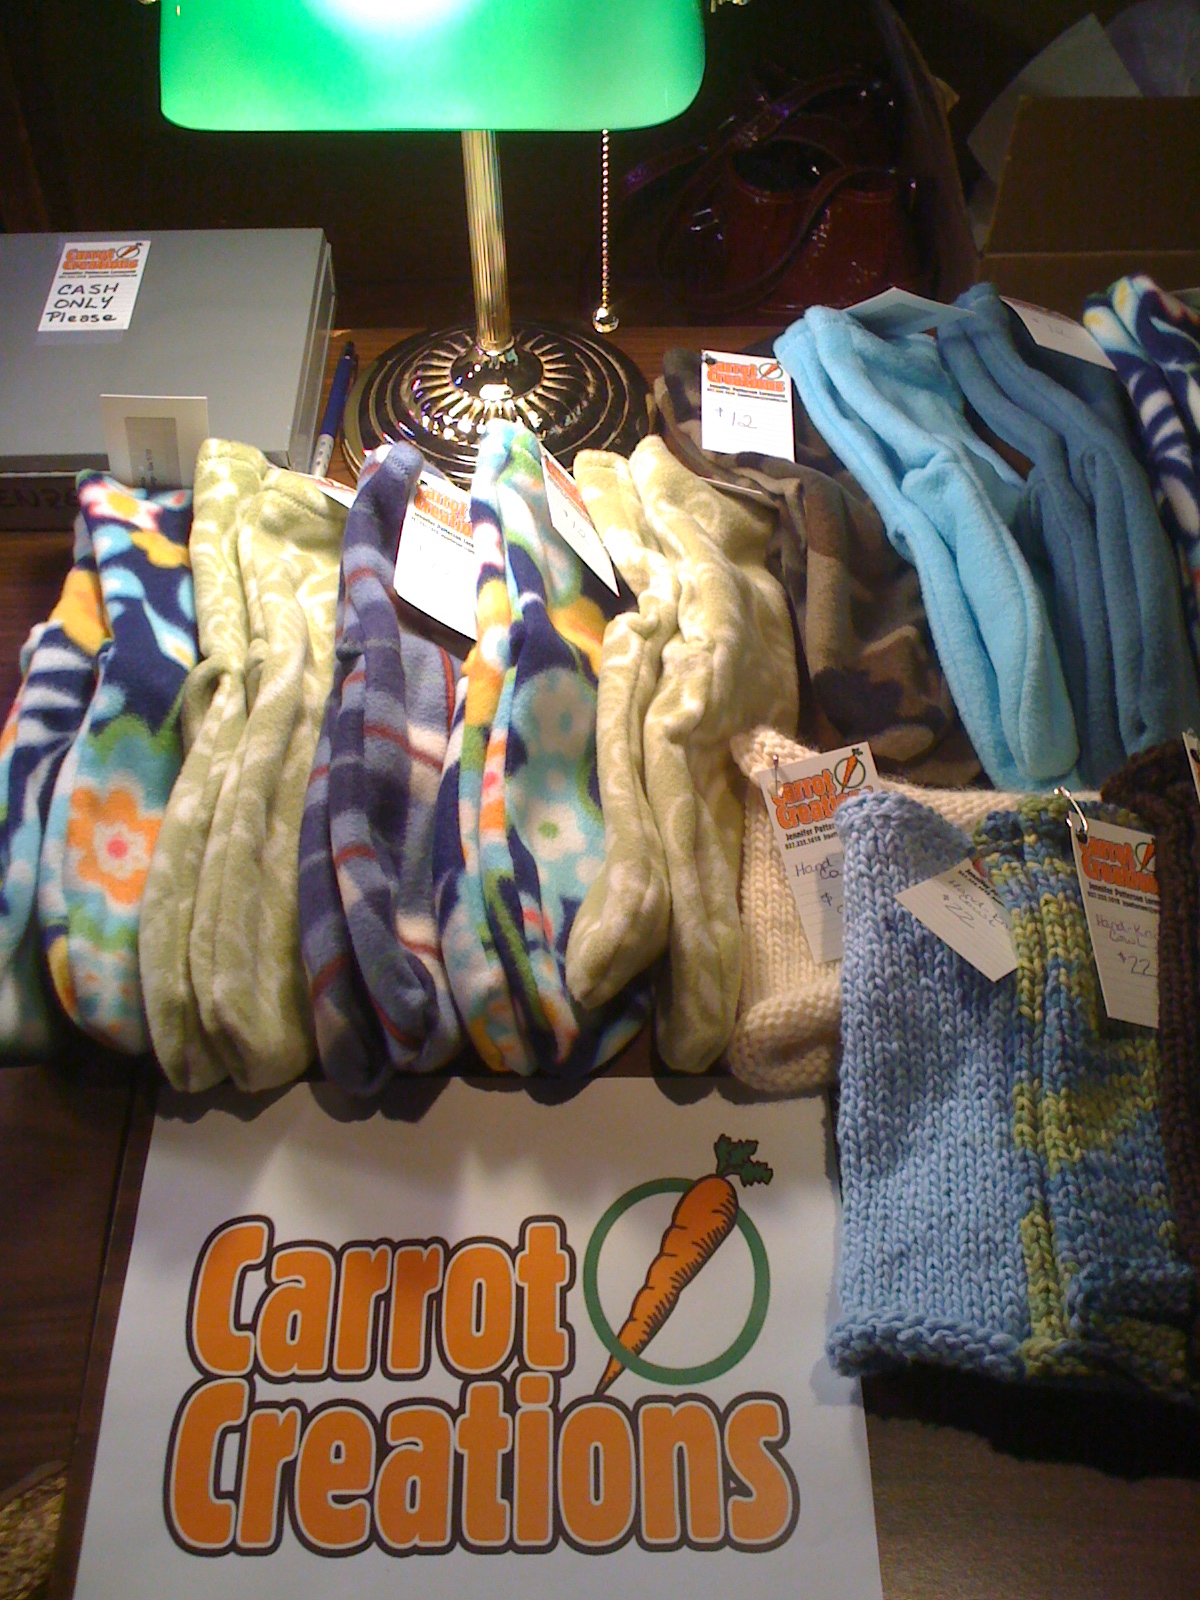
What you see here are the piles of fleece socks and hand-knitted cowls that I made.  This certainly gave me an outlet for my knitting and fleece addiction.  It also gave us the excuse to launch our brand for these sorts of things.  We are now Carrot Creations, so named because of a running joke that carrots are the finest of all veggies and that everything good can be shorthanded into being called a "carrot."  I think the addition of the new logo on the sign and the price tags gave things a professional look.

So what did I learn from our endeavor?  A few things from this first time out:

1.  Find a show with low or no table rent.  I was lucky that a friend recommended this one, which was a small, friendly show with no table fee; the added traffic drove people into the business that hosted the show, so it was a win/win.  Some shows have substantial fees, and these will be worth it only if we have a lot of inventory that we are sure will sell.

2.  Have a variety of items.  Three was a good number to get people to reach out and touch things, and we did have about 10 percent of the people who visited actually buy something.  I was also challenged to alter my already-altered sock pattern to have S/M/L sizes for both men and women, and that seems to have worked well.

3.  Take something to keep your hands busy.  I knitted a cowl, of course.  People seemed more comfortable if it didn't seem like I was ready to pounce hungrily on them. 

4.  Investigate sales tax.  Before we did this show, I applied for a vendor's license, and I priced my items to include sales tax on a fair price.  This is easy to do with the tax tables in front of you.  I always set a nice round price so I didn't have to make a lot of change, so that meant that my pre-tax prices (which the customer never saw) were always odd (like $10.42), but that's OK.

5.  Price to sell.  For me, this was part of my FC&G philosophy.  I looked around at comparable prices in catalogs, then figured out how to sell my items for less than typical retail.  For example, fleece socks are typically $15 in catalogs, plus tax, shipping, and handling.  I sold mine for $12, including tax.  A little smart shopping for fleece and some production efficiencies on my part meant that customers got some of the savings passed onto them.

Our next step is to start an Etsy store, but we are not very far along in that process.  In the meantime, if you are interested in anything you see here, feel free to email me.  I can check stock, email photos, and arrange for payment.  This will all be easier when we get that Etsy store set up, and I will certainly announce it here when we do!
Pin It!

Tuesday, January 11, 2011

Fleece Package Bows


Forgive me for giving you a frugality hint that may seem better suited for the pre-Christmas season, but this is really a multi-season tip, and it is simple:  use your fleece scraps for reuseable package bows.

What you see above is a scrap of fleece I thought was particularly pretty.  Since fleece doesn't fray, it doesn't need to be hemmed, so all I did was cut a straight strip off a remnant that I had no other use for.  The stretch, in this case, goes lengthwise down the piece, which seems to work well for tying a snug bow.  I used this one on Christmas and DH and I loved the look, so I plan to be on the lookout for other scraps that will make interesting reusable bows and ribbon.

By the way, take a look at that package.  My mother's frugal idea was to pre-wrap several shirt boxes (or at least the tops) a few years back.  We just open up the lids of these boxes, insert our present, and presto -- a wrapped gift in a reuseable box.  As the pre-wrapped boxes take some wear and tear, we unwrap the top and rewrap it, but we are getting a few years' use out of the wrapping paper instead of just one.  This works best for gifts within the family, where we all know the system.  Others still get gifts that they can rip open to their hearts' content, although they may also get a fleece bow.

The Analysis

Fast:  Reusable wrapping materials mean gift wrapping goes faster, a nice thing at Christmas but applicable all year long for birthdays, anniversaries, and other holidays.

Cheap:  Every time I use a fleece bow, I save money on not buying a disposable ribbon and bow.  I've already purchased the fleece, so there is no new investment.

Good:  I like the look of the unique bows as well, so I think this one is a win in all three categories!
Pin It!

Friday, January 7, 2011

Pumpkin Ravioli with Sage Butter


For New Year's weekend, I decided to go all out and make pumpkin ravioli with sage butter using as many locally-sourced ingredients as possible.  It was a pretty time-consuming if yummy task, so I also devised a week-day version that comes together more quickly:

Pumpkin Ravioli with Sage Butter:  The Long Version

1.  Prepare pumpkin puree.  I had already done this step a few weeks ago when I decided it was finally time to do something with the pie pumpkins I had cellared from the fall farmer's market.  Five pie pumpkins at 50 cents each gave me four pints of pumpkin puree plus a bunch of seeds to toast.  I needed a pint for this recipe, so that is about 60 cents worth of pumpkin.

2.  Prepare ricotta.  Making ricotta is insanely easy, and I will cover that for you in a future post the next time I make a batch.  This is where the "as local as possible" comes in.  Rather than buying pre-made ricotta, I made my own from hormone-free milk.  The milk was not local, unfortunately, but by making my own cheese I brought one of the processing steps home and eliminated some of the transportation and manufacturing costs.  Ricotta from a half a gallon of milk came in under a dollar, and I used about half the batch, so maybe 50 cents of homemade ricotta.

3.  In a food processor, mix pumpkin puree, ricotta, salt, fresh ground pepper, one clove of garlic, and a dash of nutmeg.  The garlic came from my own garden via my cellar.

4.  Make ravioli.  Basically, these are the same noodles you saw in sage noodle soup, minus the sage.  Roll out sheets of pasta dough, cut into large squares, and put a dollop of the filling in every other square.  Moisten the edges with water and place a clean square of pasta dough on top and seal the edges.  Although my flour and semolina were from the store, I used local eggs, and again, I removed a processing and transportation step from the equation, making these more local.  Cutting and stuffing the ravioli takes some time, though!  I estimate total cost for the pasta at under $1.

5.  Drop ravioli one by one into boiling water and extract them when they float; it takes about 3-5 minutes depending on the thickness of your ravioli.  I do these in waves and take the finished ravioli out with a slotted spoon and place them in a heat-safe bowl on the back of the stove while I cook subsequent batches.

6.  Meanwhile, make sage butter.  This is just butter (about half a cup) with a tablespoon of dried sage in it.  I used fairly expensive but completely local butter, and the sage came from my garden.  Total cost was probably $1 for this.  Dress ravioli with sage butter, toss, and serve. 

This version of the recipe was yummy, but boy did it take some time!  So, I devised a short version that takes out the ravioli step, which is the most time consuming:

The Short Version

1.  Make your pumpkin puree and your ricotta on another day.  The puree will keep indefinitely in the freezer, and the ricotta will keep a week or two in the fridge.

2.  Spray a baking dish with olive oil.  Preheat oven to 350 degrees.

3.  Cook lasagna noodles.  You will probably need about 8-10 to use up your filling mixture.

4.  On each noodle, spread a layer of filling.  Sprinkle with additional ricotta.  Roll up and place seam side down in baking dish.

5.  Sprinkle each roll with sage and top with your favorite cheese.  You might use mozzarella if you want a mild flavor or sharp cheddar if you want a contrast.

6.  Bake about 20 minutes until cheese is melted.

The Analysis

Fast:  The long version took me a couple of hours to make, including time out for the use of some adult language when my pepper mill cap broke, sending peppercorns all over the kitchen.  Nonetheless, I think I now know why ravioli is a special-occasion dish. 

Cheap:  By relying on my own herbs and pumpkin from the farmer's market, I kept costs way down.  Making my own ricotta also saved money.  Total cost for the long version was just over $3.

Good:  The long version with homemade ingredients is far superior to any other version, but it does take some time.  The short version does a nice job of preserving the pumpkin flavor while being a bit easier to put together.
Pin It!

Tuesday, January 4, 2011

Steam Away that Soap Scum


One job I really despise is cleaning the shower.  There are few jobs worse, in my opinion, than scrubbing off dirt and soap scum in a damp, confined space.  Add to this the expense of cleaners, which typically come in an ecological nightmare of a container made of metal and plastic and containing a mix of noxious chemicals and propellants, and this job is pretty low on my list. 

Now, in the interest of full disclosure, I must admit that I do occasionally use those expensive cleaners.  For all their lung-burning faults, they do tend to loosen the scum enough to clean it off.  However, to reduce the use of those chemicals, we use a steam cleaner to clean our shower.  You will see DH (or at least his arms) doing the work above.

Steamers are a great way to clean bathrooms.  They heat and direct a burst of steam at whatever you are cleaning, and ours came with a variety of attachments that let you scrub or scrape or otherwise direct the flow of steam.  Although the initial investment in the equipment will typically set you back around $100 (our unit was a gift from my folks), they require only electricity and water after that, and you get sanitized surfaces with no chemical fumes or residue.  (Warning:  Although you can use your steamer to clean in and around your toilet, don't direct a long-term burst of steam at the gap where the toilet meets the floor, because you could accidentally melt the wax washer if you heat it up too much.  However, a quick run around that area is enough to get the job done and won't harm anything.)

Now, these steamers are not perfect solutions to the cleaning dilemma, as they do take time to set up and heat up.  However, if we do a super-good cleaning of the shower once a month with the steamer and then are diligent about rinsing the shower down once a day with the hand-held shower head (I do this after my shower each day), we have a pretty clean shower, and we only occasionally resort to the canned chemical cocktail to get the job done.

The Analysis

Fast:  Using a steamer is nowhere near as fast as spraying a burst of foam at the problem, but it certainly does a better job.  This is a moderately big cleaning job that takes some time.

Cheap:  Once you have the equipment, you are talking about pennies of electricity and water per use.  You should eventually recoup your investment in foregone chemical cleaners.  The more you use it, the faster it pays itself off.

Good:  Perhaps the best part of the process is knowing that you have a sanitized shower with no chemical fumes or residue.
Pin It!

Thursday, December 30, 2010

Getting Started with Sustainability in 2011

Amazingly, it has been a year since I started this blog; hopefully, you have enjoyed reading it as much as I enjoy writing it.  We will certainly be continuing our journey into sustainable living in 2011, but I thought it may be useful as the last post of the year to do something that is part retrospective and part overview.

If your New Year's resolution is to live more sustainably, you may wonder where to start.  For me, I think the best place is with ideas that fix a problem you currently have, minimize something you don't like to do, or maximize something you do enjoy. 

For example, I have frequently explained that the gas bill around here drives me batty.  Somehow, it just becomes the ultimate in paying for something that I've already used up by the time the bill comes -- yeah, I was warm one day a month ago when the heat was running full blast, but now the bill is here and I hate to pay it.  So, the ideal way for me to make changes in how sustainably I lived was projects that kept my house and me warm without running up a monster gas bill. 

So, if you are just starting out, here are some common goals and feelings you may have, along with some ideas to improve your life by living sustainably:

I hate paying the heat bill, but I hate being cold.
I have an expensive food treat that I want to use to its best advantage.
  • Feature an artisinal cheese this way in summer or winter.
  • Feature a special meat next to piles of veggies.
  • Stretch the expensive food.
I want to explore herbal remedies.
I hate buying cleaning products.
I hate buying personal care products.
I want to start preserving food.
I want to lower my food bill.
I want to boost my sustainable cred with some resource-friendly projects.

(Note:  This is not an exhaustive 2010 index, but I did try to include the posts that attracted the most discussion here, on my Facebook page under Hilltop Communications, or in person.)

Happy New Year!  Let's make 2011 even more sustainable!
Pin It!

Wednesday, December 29, 2010

I made dinner for $1.09.


Monday night, I made dinner for $1.09.  I was incredibly proud of myself, and I think this little triumph illustrates a couple of principles about how I live sustainably.

First, the details:  This is really the winter version of this recipe, which has consistently been one of the favorites among blog readers.  This time, I used pesto frozen in September and sundried (actually, dehydrator-dried, but "sundried" sounds better) tomatoes.  I also used a lovely block of artisinal asiago cheese that was part of a holiday basket sent to me by a client (thanks, guys -- you know who you are!).  Therefore, total cost to me was $1.09 for a box of Meijer pasta, which I thought was highway robbery (I stock up at 79 cents per box) but which got much better once I had made my el-cheapo meal.  I've gotten 5-6 servings out of this; if you are doing the math, we are hovering around 20 cents a serving.

My sustainability lessons?

First, the practical one:  If you have a recipe that works for you in the summer, do everything in your power to find a winter version.  Would I have preferred to make this with fresh basil and fresh tomatoes, standing barefoot in my kitchen with the still-warm veggies in a basket by my elbow?  Absolutely.  But I know that the combination works, so I dried as many tomatoes as I could, and I made pesto like it was going out of style.  It tastes almost as good when I make it while I have a fire going and a nice pair of fleece socks on my feet.

Second, the philosophical lesson:  There is no room for absolutes in the sustainability movement.  The sustainability movement is gaining ground in this country, but still it seems that the most interesting media coverage is of people who have taken a locavore pledge that prohibits food from a distance.  One of my favorite books, Animal, Vegetable, Miracle, examines a year without non-local food, and many others have taken a pledge that if the food comes from more than 100 miles (or 50, or 200) away, they won't eat it.  I try to do likewise as much as possible.  Certainly, I prefer food that is hyper-local; that is, I think the best food is that which you walk into the backyard to obtain.

However, we do have a transportation network in this country, and I have no problem with using it to transport the occasional treat, like artisinal cheeses from Amish Country or maple candy from Vermont or citrus from  Florida.  The key concept there is "treat" -- the occasional box of something that is specific to a certain part of the country, sent by mail or FedEx, or tucked into luggage.  A little taste of somewhere else that punctuates a diet that is overwhelmingly local.  A small nugget of something specific to its own locale that is so precious by its unfamiliarity that you stop and taste and discuss.  Something different that throws your own local efforts into relief so that you appreciate every element anew.

We appreciated this meal that highlighted a gift not just for its budget-saving properties (perhaps least because of that), but because it was a rare treat that we savored.  If  I found a stack of this same cheese sitting heaped up at my local Wal-Mart, having been trucked from its origin to a distribution center to my local store, I would not appreciate it as much.  If I bought it every week, I would miss out not only on its specialness but on the joys of making my own ricotta and patronizing local cheese makers.  For something this good to become ordinary would be a crime -- and it would be unsustainable.
Pin It!

Tuesday, December 28, 2010

Student's Ragout AKA Stewed Students


One of the best ways to save money when cooking at home is to look for what I call "peasant meals."  If you can find recipes that were made by poor but busy people, you ae almost guaranteed a yummy and cheap meal.  A good clue to whether your recipe is a "peasant meal" is if it takes a cheap cut of meat and simmers it for a long time to make it tender.

This is the case with Student's Ragout, which I believe I found in Mother Earth News a year or so ago; unfortunately, I cut the source citation off the top of the recipe, and I can't find it on the web site.  (So at least I tried for proper attribution here.)  It is an easy and filling recipe that tenderizes a tough cut of meat and creates tons of leftovers. 

The recipe supposedly was created by French (I believe) students who needed a cheap, easy, and flexible meal they could make for themselves on a budget.  Given my work in higher education, it is only natural that the name of this dish immediately morphed into "stewed students" around here in tribute to the students who do such a good job of keeping me on my toes.

2-4 slices bacon  (I like to splurge on Trader Joe's Applewood Smoked Bacon)
1 pound round steak, flank steak, or cube steak cut into bite-sized pieces
1 medium onion
4-8 medium potatoes
2-3 carrots
1 clove garlic (optional)
sage, salt, and pepper to taste

Some recipes call for cooking the bacon first; often, we just layer it in the bottom of the pan, then add layers of meat, potatoes, carrots, and onion.  (Layer in order of tenderness of the ingredient.)  Add garlic, sage, and salt and pepper, then cover with water until just about level with the tops of the potatoes.  Cover and cook on medium until meat is cooked and veggies are tender, about 45 minutes.  (If you feel like things are burning rather than simmering, you may need to add water as you go.)  Don't mix the ingredients until they are done.  You see it above, served with some green veggies from the sunroom (yes, we still have lettuce growing in December this year!).

Makes 4-5 servings.

This is a great SOLE recipe for (not so) Urban Hennery, because we were able to use meat from our freezer (locally sourced, no hormones), the last of the cellared potatoes and onions and the last frozen carrots, and our own garlic and sage.  (I cooked this with the last onion, although the holidays have gotten my posts out of order a bit, so I have already written about switching to store onions.)  Really, the only thing that was not local was the bacon, and it was more sustainably produced that most store bacon.  If ever there was an excuse for loading up the freezer and the cellar during the fall, it is this recipe.

Nearly-vegetarian option:  This recipe works just fine without the steak, leaving you with bacon and veggies.  In fact, I sometimes do one pot of meaty ragout for hubby and one pot of low-meat ragout for me, which means we have leftovers for nearly a week!

The Analysis

Fast:  This is moderately time-intensive, as you do have to chop all the ingredients and then let it simmer.  But it sure isn't difficult work.

Cheap:  Cheap is the point of this one.  Load up on root veggies from your garden or farmer's market and some inexpensive cuts of meat, and your only financial splurge will be the bacon.

Good:  It is a balanced, filling, sustainable meal, which is welcome on a cold day.
Pin It!

Wednesday, December 22, 2010

Sustainable Steak and Eggs


It is three days until Christmas, ten days until New Years, and five weeks until I can plant the first pepper seeds.  However you count it, in the Midwest it is time to hunker down and face some cold weather.  So, I thought the next few recipes would all be "snow shoveling" recipes -- things that are hearty and warm and rib-sticking. 

Today's meal idea is courtesy of Mr. FC&G (also known as my husband), and it is this week's SOLE (sustainable, organic, local, and ethical) recipe for (not so) Urban Hennery's Dark Days Challenge.  It is also quite frugal, which makes it a winner all around.  I speak, of course, of steak and eggs.

"Wait," you say.  "How is this pile of protein frugal, let alone sustainable?  Has the weather gotten to you already?"  (Indulge me, readers; I sometimes have conversations with you.  You are very witty, and you always ask just the right questions.)

In this case, sustainability and frugality are all about sourcing ingredients from the right places.  Think for a minute about summer.  You can buy organic produce from the big box retailers, and if that is your only option, I hope you are doing so.  But that produce is often fairly expensive and typically comes from far away.  Contrast this with the most local produce, that which you grow yourselves.  As you may remember, I spent last summer putting together plates of veggies with just a touch of artisinal cheese or meat and having lunch for under $1.  In many cases, local means frugal and sustainable.

The same is true for steak and eggs, lovingly prepared by Mr. FC&G.  The eggs we get from a local farmer at Bluestone Farm (sorry no web link).  At $1.50 a dozen for these orange-yolked beauties, hubby fried up three for just 39 cents.

Beside that sits a piece of sirloin tip steak that we also sourced locally by buying a quarter of a beef back in 2007; that was pretty much the last piece of that meat, so you can see that we don't go through it very quickly and we get the most out of every piece.  We bought that particular load of meat before I started blogging (and before I started putting little sticky notes with prices on everything), but I remember it being around $4-5 a pound.  Now, we get our meat from a local butcher who processes only hormone-free, sustainably raised meats (Landes Fresh Meats) for perhaps a little more per pound.  Regardless, this little bit of leftover steak surely came in at under $2.  Total meal cost for hubby:  under $2.50 and probably under $2.

Now, this plate of protein is not for everyone; in fact, if you are vegetarian (or mostly, like me) or vegan, you are probably thinking this is a pretty unappetizing idea.  But for the carnivores among us, it demonstrates an important point:  even a meal that has a reputation for being expensive can be had on the cheap and virtually guilt-free if you take some time to support your local merchants and farmers. 

The Analysis

Fast:  I'm pretty sure that Mr. FC&G cooked up his breakfast-as-dinner in under 15 mintues from leftover steak and farm-fresh eggs.

Cheap:  As I said above, certainly under $2.50 for this plate; what would you pay even in a greasy-spoon diner?  Would the quality be as good?

Good:  I can't vouch for this one, but Mr. FC&G seemed to be fortified enough to go run the snow blower after dinner.  Works for me!
Pin It!

Monday, December 20, 2010

Hand Warmers


Welcome to my final installment of Do Something Sustainable for the Holidays!

If you celebrate Christmas, you have less than a week to put your gifts and treats together, and today's idea is a familiar concept in stocking-stuffer size:  hand warmers.

These little gems are a small-sized version of bed warmers, just for your pockets.  I took two 4.5 inch squares of fleece per hand warmer, sewed them up like a pillow, then filled with rice and spice (a rhyme, no less!).  These I filled with rice and sage, which made my pockets smell a bit like Thanksgiving stuffing; as I've mentioned before, lavender and cinnamon/cloves are also nice additions.

Microwave these for a minute and slide them in your coat pockets for a little bit of warmth while you are out in the cold.  I actually wound up walking to my destination one 20 degree day last week, and my hands remained toasty on the entire trip thanks to these little guys.  That's why I wanted to recommend them to you as a last-minute sustainable gift!

The Analysis

Fast:  I sewed and filled this pair in about 20 minutes.  Since they were for me, I seemed the top with the machine; if you are giving them as a gift, you may want to hand sew the top with blind stitch, which will take a little longer.

Cheap:  Fleece from the remnant bin, homegrown sage, and bulk rice -- these are literally pennies a piece.

Good:  Warm hands made a mile and a half walk pleasant in cold weather.
Pin It!

Thursday, December 16, 2010

The Sustainable Bookshelf: Holiday Gift Edition

As part of my series Do Something Sustainable for the Holidays, I thought I would present you with a roundup of my favorite sustainability books.  These are some of the ones that I want in hard copy on my shelf just in case I'm ever without the ability to use the internet or an e-reader, although you certainly could buy an e-reader version or check them out from the library if you are wanting to be even more frugal.  However, I think any one of them, in hard copy, could make a great gift for the sustainably-minded on your list.


Mini-Farming:  Self-Sufficiency on 1/4 Acre is my new gift for myself.  It covers the basics of space-conscious gardening, seed saving, preserving, and raising chickens for meat and eggs.  While it is not an exhaustive resource for a beginner, it does serve as a kind of catalog of what can be done in a very small space, allowing the reader to choose the projects he or she wishes to attempt.  It also makes a subtle but compelling case that those of us on suburban lots could sustain ourselves by our own efforts if the need arose.


The Omnivore's Dilemma is the classic of the modern sustainability movement, and it presents a highly-readable and in-depth argument against the modern food establishment and toward a greater connection with what we eat.  In spite of the indictments against some of our society's agricultural misdeeds, it emerges as an optimistic account of the things we can do to live more sustainably and reap more enjoyment in the process.  This is a winter must-read, if only because it will have you reading the seed catalogs and dreaming of your spring efforts.


Speaking of things that have you jonesing for spring, Animal, Vegetable, Miracle remains one of my favorite books.  In fact, it spends whole weeks sitting on the ottoman where I can reach it and read the bits associated with either my current season or the season I wish I were in.  The book is organized into months and accounts a year in the Kingsolver family's life as they attempt to live nearly solely off the products of their own land and community.  However, unlike some of the "stunt journalism" that sets a writer up to live sustainably with very little experience or knowledge, these folks aren't kidding:  they've farmed for years.  Therefore, there is very little angst and a lot of joy described here. 


Think you can't sew?  If you have a sewing machine and can run a fairly straight stitch, you can do most of the projects in this book.  Projects range from the simple (like napkins and pillowcases) to the slightly-more-intermediate (wrap skirts and PJ pants).  Patterns are included.  I love this book for the inspiration it gives me for projects to try with a yard or two of remnant fabric and a couple of hours, tops.


Stitch 'n Bitch taught me to knit, plain and simple.  After years of trying to knit using the kinds of books you get in the yarn store -- and failing miserably -- this book had me knitting in a couple of nights.  This would be a great gift wrapped with some nice knitting needles (bamboo is sustainable) and some organic cotton yarn.


I learned to crochet from my mom, so I have been doing that for years.  Therefore, I can't vouch as personally for Stoller's ability to teach crochet.  However, what I can tell you is that, with all due respect to those who favor the hook or the sticks, some things you knit and some things you crochet.  Some yarns look prettier knitted, some look better crocheted.  Sometimes you want the texture created by one, sometimes the other.  Learn both.


I hope this helps your holiday shopping! 
Pin It!

Tuesday, December 14, 2010

Veggie Pizza


For me, winter is the busy time of year.  I'm working both jobs (writer and college administrator), and both are busy.  For whatever reason, December through February is just the prime money-making months in my writing biz, and they coincide with the second quarter of college, during which I not only have administrative duties but I also teach two classes.  It makes me yearn for the easiness of summer, when both jobs are at their low and I spend some time every day in the garden.

However, while making hay while the sun isn't shining, I need some easy meals.  Like most of us, I fall back on pizza.  But pizza doesn't have to be fatty, non-local, expensive, or delivered.  My go-to is the veggie pizza, and it is also my attempt at (not so) Urban Hennery's Dark Days Challenge (cooking SOLE:  sustainable, organic, local, ethical).

The crust is something I'm pretty proud of.  Yes, I start with a 37 cent Jiffy mix (not organic, but no HFCS), but I add a half a cup of flax seed meal to boost the omega-3 content and give it some body.  It really is yummy.

For sauce, I use the Meijer Naturals brand, which does incorporate some organic ingredients (specifically sugar, which is a good one if you are only going to pick one organic ingredient) plus has no HFCS and no GMOs.  I have to buy sauce this year because the garden tomatoes did so badly, but I think this is a responsible choice.

Toppings:  onions, sun dried tomatoes from the garden, sometimes peppers frozen from the garden, and Trader Joe's quattro frommagio cheese from cows that receive no growth hormones.  The only thing here I feel really guilty about is the onion:  I bought several farmer's market onions this summer and cellared them, but "some" is not really a great plan with the number we eat.  It is only December, and I have already weakened into buying store onions.  Next year, more onions, regardless of cost!

The Analysis

Fast:  If you keep your ingredients on hand, you really can have a pizza ready in the time it would take to wait for delivery.

Cheap:  The cheese is the expensive part, but I don't want to eat growth hormones if I can help it.  Nonetheless, the dependence on garden veggies instead of meat keeps this pizza under $6, and it is much better for you than any you could order.

Good:  I have come to think of pizza as a way to get veggies in my diet.  Get the base crust down in your repertoire, and you are ready to pile it high with veggies and have a quick meal any time.
Pin It!

Friday, December 10, 2010

The Feverfew Chronicles, Continued


Earlier in the year, I told you about feverfew, and how it helped my regular headaches.  I thought that those of you pondering growing this herb would like an update.

I tried to dry the herb all summer because I knew I would need a supply when the plants were not productive, and I wanted to be prepared.  My research suggested that the herb would stay effective even when dried.

As the weather cooled, I noticed the fresh leaf of the herb was growing less effective for me; in the meantime, I was skipping "doses" because it would be cold or rainy and I didn't want to slog into the yard to get some.  My headaches came back, although not quite as frequent as before.

To combat this, I brought some clippings into the house and put them in a jar of water in the fridge, as you do with any herb you want to use fresh for several days.  I didn't notice those leaves being very effective, but I did notice the stems start to look like they were wanting to root.  I took the jar out of the fridge and let them do so for a few days, then planted them in fresh compost.

Voila!  Just about a month later, I have new feverfew shoots coming up out of this plant.  I have been nibbling around the edges of the older growth, and it tastes fresh and bright.  (As much as feverfew can--it still tastes like medicine.  I tell DH that it tastes like not having a headache.  And fresh certainly tastes better than the dried stuff.)

The best part is, this new growth is oh-so-effective.  I'm back to having a headache maybe one day a week, when my norm without it is more like 5-6 days.  Happy, happy!

Also, just as I suggested to you back in the original post, I told my doctor about it.  He had not heard of feverfew, but he asked some really good questions and made a note to investigate it.  He was fully supportive of my using the herb.

The Analysis

Fast:  I don't know quite how to assess on this dimension, but eating some feverfew is certainly as quick as popping an OTC pill.

Cheap:  Once again, I didn't start this project with the idea of monetary savings, although they are certainly possible if they keep me from buying ibuprofen at the rate I once was.  (Seriously, I've purchased one bottle since spring.  That is really unusual in this household.) 

Good:  The true cost I am avoiding is wear and tear on my body from pharmaceuticals.  This article from  Mother Earth News puts it best:

"Rather than herbs being too weak, many drugs are too strong, causing side effects ranging from annoying to insufferable. Do no harm is the first axiom of medicine. This means that treatment should begin at the lowest possible effective dose. Why use a bulldozer if a broom suffices? Herbs should be prescribed first. Only those who truly need stronger medicine should use drugs, which cost more and have a greater risk of side effects. Unfortunately, American medicine does the opposite. Doctors prescribe drugs first, and only when the drugs are intolerable do some doctors suggest herbs. We don’t need medicine that’s stronger. We need medicine that’s smarter. For many common ills, herbs are cheaper and smarter."
Pin It!

Tuesday, December 7, 2010

Fleece Patchwork (Un)Quilt


2015 Update:  This has been one of our most popular articles to date and is certainly our most popular pin on Pinterest.  If you got here through a pin, welcome!  Please take a look at our book, which has this idea and others in a handy bound format for your use:  Fast, Cheap, and Good

In today's installment of Do Something Sustainable for the Holidays, I'm going to encourage you to make a quilt.

No, I haven't gone round the bend here.  I am in love with this fleece patchwork quilt pattern, which is really quick and easy because there is no actual quilting involved -- that is, there is no batting between the layers and no top stitching.  Therefore, it might best be called a fleece blanket, but I like the idea of calling it an (un)quilt.

You already know of my love for the remnant bin at my favorite fabric store, Joann Fabric and Crafts.  The prices there are amazing; bolt ends and miscuts are sold at whatever that day's sale is on the fabric, plus 50% off for remnants, plus whatever coupons you have.  I can regularly score a yard of fabric for around $2.

For this project, all you need are remnants in fleece patterns and colors you like, plus a cut of fleece for backing.  Follow these simple steps:

1.  Cut the patchwork fleece into squares.  I use a 4.5 inch square quilting template because I like the look of random patches of regularly-cut fabric.  But feel free to get more complex or to try patterns like 9-patch squares (my next attempt).  Just remember that the more complex your patchwork, the more time it takes.

2.  Sew your squares together.  For me, I sew 14 squares to get the width; this is about five feet in width.  I like this width for a fleece quilt because bolts of fleece come in 58-60 inch widths, so this will fit the backing without piecing two cuts of fleece together to make the back.  That is difficult and unwieldy.  Five feet wide also allows me to put the quilt on my side of the (king) bed without disturbing over-heated hubby.

3.  Sew your width strips together to make about six feet in length.  Again, six feet is two yards of fleece, which is an inexpensive backing.  Alternately, you could patch the back as well, but that would be more work. 

4.  For this quilt, I bought a piece of bluish grey fleece for the back that was two yards long and about 60 inches wide.  It cost (after sale and coupons) about $14.  Place the backing and the topper with right sides together and machine sew on three sides, like you are making a pillow case.  For the fourth side (which would be open on a pillow case, turn the edges in and sew both sides together.  You can do this on your machine (remember, that is four thicknesses of fabric, so you may want to change to a heavier needle) or by blind stitch (which I'm going to do on my next quilt).

Voila!  A soft, warm "quilt" that really relies on the warmth of air sandwiched in two layers of fleece instead of the normal cotton and batting sandwich.  If you are crafty, you could easily sew one of these up as a Christmas gift (a lap quilt also would be nice and take even less time), or you could start one to keep your own toes toasty in the bitter months to come.  (This is particularly nice if you are participating in The Crunchy Chicken's Freeze Yer Buns Challenge.)

The Analysis

Fast:  In quilt-time, this one comes together in a jiffy.  Cut squares while you are watching TV at night, and then sew together in a few bursts of sewing.  I like to work on one of these while I'm writing, because it gives me a chance to turn away from the computer and think for a few minutes while I assemble a few squares.

Cheap:  I put my first fleece quilt together for the cost of $14 for two yards of backing fleece, plus whatever I spent on remnants.  With the remnant bin full (as it is right now with everyone using fleece to make gifts), you should be able to bring this project in under $30 with some smart shopping.

Good:  The fleece quilt is one of the (very) few things I actually like about winter.  It is so soft and warm, it follows me everywhere:  downstairs onto the couch during the day, and upstairs onto the bed at night.  I can't wait to finish another.
Pin It!

Wednesday, December 1, 2010

Sage Noodle Soup


What is it about photographing soup that is so difficult?  Sometimes I contemplate having DH make a special bottom-lit soup bowl so you can see all the goodness in clear soups.

Anyway, I wasn't planning on posting this recipe until a couple of Facebook friends wanted a copy, and I realized it was a good one to share.  I also realized it was a good one to kick off (not so) Urban Hennery's Dark Days challenge.  This cool challenge asks us to commit to making one meal a week that is sustainable, organic, local, and ethical (SOLE) -- since sustainability is in the title of this blog, I expected it to be a snap!

However, it is hard to meet all these criteria.  For example, while I think cooking at home, making your own soup noodles, and using home-grown herbs to make a meal are all sustainable, I have to admit that I used packaged chicken broth.  This is probably a bad choice, because we all know how badly CAFO chickens are treated (that is, not typically ethically).  I have been trying to make more of my own stock, but right now I only have ham stock in the freezer (not what I wanted for this) and a box of chicken broth in the pantry begged to be used up (at least that is an ethical move -- not wasting food).  I have also had no luck finding local sources of any kind of flour or grain, let alone semolina, in spite of the fact that I'm willing (eager!  jonesing even!) to get a grain mill and grind my own.  (This is the kind of project that usually gets me in trouble.)

Anyway, I think it is a good first attempt, and I'll keep you posted on future endeavors; in the meantime, visit (not so) Urban Hennery at the link to the left.

Sage Noodle Soup

Sage Noodles:
1 cup regular flour
1 cup semolina flour
2 eggs  (local farm-raised with lovely orange yolks)
1 t. salt
sage to taste (I used about 1 T of the dried from the summer)
water to make thick paste

Turn out on floured board and kneed in the flour until no longer sticky.  See the basic method here. Roll with rolling pin until about 1/2 inch thick and cut into whatever size you like (although I like about an inch by an inch and a half for soup). Cook by boiling until they float in the rapidly boiling water. (I cook mine separately so the leftovers don't create bloated noodles by leaving them in the soup. This also keeps the starch that boils off the noodles out of the soup, so you have a clear soup.)

Soup:
While this is going on, bring the following to a boil and then reduce to a simmer:

1 qt. chicken stock
1 onion, diced
1 pint frozen corn (that's what I had from the summer; it is good with carrots or peas too)
1 T. sage
1 T. marjoram (both spices dried from the garden; you can sub thyme or oregano for the marjoram if you like)
Optional--a few diced green chiles, for heat (about 1-2 T -- these were frozen from my garden)
salt and pepper

When corn is cooked and onions are translucent, place some of the noodles in each serving bowl and top with soup. Repeat as needed. (I usually double this recipe so I have leftovers. If you do, you only need to double the soup and not necessarily the noodles.)
 
The Analysis
 
Fast:  I made this batch of soup in under an hour, which is a long prep time for me but very enjoyable on a cold Sunday afternoon.  You can make the soup part in the crock pot if you prefer, which means that part can cook while you are at work.
 
Cheap:  By having an inexpensive local source of eggs and a lot of herbs and peppers at my disposal, this was not an expensive recipe.  (Full disclosure:  It was even cheaper because my mom gave me a few boxes of chicken broth she wasn't going to use by the expiration date.)  I think that making my own chicken stock in the future is a good next step to frugal soup.
 
Good:  The sage noodles really boost this soup from ordinary to special.  I am really working on natural healing endeavors right now, and there is a reason that chicken soup is called "Jewish Penicillin."  The onions, peppers, sage, and marjoram all have properties that will help out if you have a cold or flu. 
 
I think the next herb noodle project will be thyme noodles with fresh thyme (grown locally -- in my foyer!).  I can't wait to have some of those with some smoked cheddar on top!
Pin It!

Monday, November 29, 2010

Apple Butter Bread


Welcome to our newest challenge:  Do Something Sustainable for the Holidays.

The holidays always present their own time, budget, and sanity challenges, and it is hard to continue to practice sustainable living skills when the garden is finished (for most of us), the weather is cold (ditto), and every message in the world seems to say that your life would get better and your holiday merrier if you just spent a lot of money.

To counter that, between now and New Year's I will be suggesting a few ways you can Do Something Sustainable for the Holidays.  Note that we aren't going to try to do everything; just a few things that keep your sustainable living principles in focus during this busy time. 

Today's idea is
Apple Butter Bread

I've adapted my recipe from the following inspiration:  Rose Manor

1 1/2 teaspoons baking powder
1 teaspoon baking soda
1/4 teaspoon salt
1/2 cup butter (local if you can)
1 cup turbinado sugar
1 egg (local if you can)
1 cup apple butter (local if you can)
1 3/4 cups all-purpose flour
1 teaspoon vanilla extract
2 tablespoons lemon juice
2/3 cup evaporated milk (one 5 oz. can)

Combine ingredients and bake in two greased loaf pans at 350 for 25 minutes, or until a toothpick inserted comes out clean.  (You will note that I pared the original recipe down to one mixing bowl, and I have no negative effects from this time-saving move.)
 
I chose this recipe because I am in possession of some amazing local apple butter from the Aullwood Audubon Center and Farm, where my in-laws are regular volunteers.  A pint jar makes two batches, or four loaves.  For that matter, so does the large (13 oz) can of evaporated milk, with a few ounces left over that you have to put in your morning coffee so it doesn't go to waste.  (I'm always thinking about you, readers!)  Use local butter and eggs if you can, too, and you have a really local recipe.
 
The bread freezes beautifully, so for about an hour of effort you can double the batch, make four loaves, and have three in the freezer.  This means you have something already made to take out and serve to guests, take to the office pitch-in, or eat on Christmas morning. 
 
The Analysis
 
Fast:  For an hour's worth of effort, you can have a large chunk of your holiday baking done and have the results be sustainable to boot.
 
Cheap:  This depends heavily on the price of your ingredients; I got off pretty cheaply by having an inexpensive source of local eggs and the gift of apple butter.  Regardless, it won't be an expensive recipe, and you probably have most of the ingredients on hand.  (Many places have fruit butters for sale, although my preference, if you can, is to showcase a local product.)
 
Good:  This bread is yummy on its own and also good warm with butter.  I plan to try a pumpkin butter version in the future.
Pin It!

Thursday, November 25, 2010

Happy Thanksgiving


Happy Thanksgiving to all the Fast, Cheap, and Good readers!

(The picture above has nothing to do with Thanksgiving; it is just a pretty shot of a bridge at the Japanese Tea Garden in San Francisco this summer.  I wanted to share it with you.)

Today is an oasis of quiet before the seasonal storms of merriment, religious significance, and outright consumerism our culture seems to put on the five or six weeks between Thanksgiving and New Years.  Today, I'm not addressing any of that.

Rather, I wish you a holiday filled with joy; a day spent with family and friends (and don't forget, a holiday spent with a good book and a cozy fire also counts as time with friends!); and a celebration that makes you feel thankful for the blessings you have.

Let us all take this time to realize that, regardless of our circumstances or how tough the year may have been, we are all rich if we take the time to find and acknowledge our wealth.  Today is a day to take stock and gather strength before we head back out into the world to make our way.  We'll do it together, readers, and this holiday season and 2011 can be more sustainable, more independent, and more fulfilling than years before.

Happy Thanksgiving!

(And watch for the next post, when I will announce my new challenge:  Do Something Sustainable for the Holidays.)
Pin It!

Monday, November 22, 2010

Sustainable Tool: The Santoku Knife


As an avid gardener, food preserver, and almost-vegetarian, I chop a lot of veggies.  And, I have amassed a lot of paring knives, ranging from expensive to dead cheap.  (In fact, my favorite paring knife is one that DH picked up at a big box retailer when he was out of town on business; I think he said it cost $3.)  On top of that, like most brides, I registered for the obligatory butcher block knife set when we married.  So, like most people of my age, I now have a drawer full of knives, each supposedly doing a different job, and each taking up space and having cost money.

All I needed to start was a santoku knife.

The santoku knife, as you see above, is a Japanese-inspired (the real ones are Japanese), relatively flat-bladed knife with these little divots along the side.  The divots are what is magic; they keep the knife from sticking to the food, and therefore you can slice much more easily through whatever you are cutting.  Although I gather it is primarily a vegetable knife, it is definitely my first choice for cutting cheese or meat these days.  In fact, I usually don't put this one in the dishwasher but instead just wash it off and put it back in the drawer.  (I know, I know: you shouldn't put knives in the dishwasher at all.  But I am usually too lazy not to, so I have to work with my own reality here.)

I wish I had known about the santoku knife earlier, before I started amassing a collection of knives for all occasion.  If you are reading this and just starting to amass kitchen tools, I recommend you acquire knives in the following order:
  1. A santoku knife.  Pick a medium sized one that fits comfortably in your hand.
  2. A paring knife.  There are still a few things too small to do with the medium santoku.
  3. A bread knife.  The serrated edge will cut bread, cake, and other such things.
  4. A set of (usually six) steak knives.  This gives you good meat knives for four people with two left over to use to cut meat in the kitchen.
That's it!  If you are just setting up housekeeping, you can certainly get by a long time on just the first two, then add the last two.  You only need specialty knives, like a meat cleaver, if you are doing a specialty job frequently.  For example, I would keep my strawberry knife with the little curved tip, because it does such a good job of hulling strawberries and cutting stem ends out of tomatoes with minimal waste.

The Analysis

Fast:  Your "fast" benefit here is that you will have a far easier time cutting things with a santoku, so you save time there.  You also will have an easier time finding it in a drawer if you limit your knives.

Cheap:  I got the above knife for about $7 at Meijer.  You can spend a ton, but you really don't need to. (Don't tell the foodies I said that!)  If you are starting out, you can probably get the first three knives for under $25 total; this is a good thing to put on your wish list too, if you have people wanting seasonal hints. 

Good:  Limiting clutter with a good-feeling tool is always a pleasure.
Pin It!

Monday, November 15, 2010

The First Lime

By George, I did it.  I grew citrus in Ohio!

As you can see above, I just harvested the first key lime from my dwarf tree.  It is nestled next to an apple for perspective.

I have long joked that, one way or another, I was going to grow citrus in my back yard before I die.  This really only allowed for two options:  move to Key West (still an option, I hope), or find a way to grow a dwarf variety of a citrus tree.  (The third option, which is to single-handedly bring on enough global warming to change the climate here, I deemed unaccepatable and irresponsible for a number of reasons.)

Last year, I bought a dwarf key lime tree from Stark Brothers.  The dwarf variety is a full-sized lime tree grafted onto dwarf root stock; you can see a notch in the trunk where the graft occurred.  The tree will grow in a small planter, but you have to be careful not to bury that notch, or you will get a full-sized tree.  I planted mine in a 12" planter filled with compost, and this spring she bloomed and ultimately set limes.  The tree lives happily outside during summer, and it moves inside to the south-facing dining room window in winter.

This is the first lime, which I photographed for you (you are always on my mind, dear reader!) and then proceeded to make a mojito.  The flavor of this fresh little lime, untainted by pesticides or herbicides and oh-so-fresh, was so complex I was able to leave the lime juice out of the recipe.  It was absolute bliss, and it came from a lime that I grew in our own little "micro-orchard."

The Analysis

Fast:  Limes take several months to mature, from blossom to ripe fruit, but you don't really have to do anything to them in this period.  I like to stop by and periodically encourage the tree to produce mojito fodder, but that is an optional step.

Cheap:  It will take many limes to offset the price of this tree, but if I plan to use these mostly for mojitos (and if you doubt that, you haven't been reading this blog for long), I will probably realize savings pretty quickly.  By using these limes, I will not be buying the expensive bottled lime juice, and I won't be buying a bag of key limes, only to use two of them and see the others go bad.  Since I am growing my own mojito mint, I'm really down to just buying rum and club soda, and making simple syrup.

Good:  A mojito is a luxury, and an occasional one at that.  But sustainability isn't just about finding ways to get your necessities in a resource-friendly manner.  Rather, it is about using sustainable principles to achieve both necessities and luxuries.  And what could be more luxurious than coming home from the second-shift job on a cold winter day and seeing a ripe lime on the tree, just begging to become a little taste of the tropics?
Pin It!

Thursday, November 11, 2010

The Key West Sunroom/Greenhouse

For a while, I've been alluding to the addition of a sunroom to our house. This sunroom/greenhouse is affectionately known around here as the "Key West Room" because of our use of the island as inspiration for the decor. I have promised you a post on the project, and here it is! I wanted to talk you through our decision-making process for this major home project, and hopefully you can decide what will and will not work for you in a similar situation.

First, let me acknowledge that adding onto a house is not necessarily economical; every estimate I have seen indicates that home owners will only rarely recover 100% of the cost of an addition or renovation in the resale of their house, and I'm sure that is true in this housing market. However, we opted to add this sunroom because it would extend the true living area of our home, which is the kitchen, family room, patio (now sunroom) and gardens. We opted for a sunroom instead of, perhaps, a pool or a media room, because it would be a highly functional space. We also opted to wait until we had met certain financial goals we had, and until we had the money in hand, so that is why we have owned this house for ten years without adding a sunroom that we knew we wanted.

The footprint of the new room already existed on the house. The back patio was already covered by existing roofline, and the concrete pad of the patio nestled under the roof in an "L" of the house. Therefore, we were literally two walls short of a room. The concrete pad even already had a footer in place, so, by keeping to this existing footprint instead of extending out into the gardens (heaven forbid!), we had the most economical option possible.

We chose a patio room company that had two options: a three-season room wall system and a four-season system. The four season option was sturdier and better insulated, so we opted to go that direction. The room could easily be heated with a space heater, or baseboard heat could be installed if we wish. However, we don't intend for the room to be additional winter living space, so we have not gone that route.

We chose walls that were part slider and part transom window. The transoms allow us to better control air flow, and they should allow us to use the room effectively on rainy days. We have already enjoyed using the room on a cool day with just one or two transoms open for ventilation.


The walls are a unique configuration designed by my husband. Each wall has a sliding panel and a fixed panel. DH requested that the fixed panels include the UV protection and the sliding panels allow full spectrum light. That way, in the cool months, we can position our indoor crops and seedlings in front of the full spectrum windows and use the space as a greenhouse; these windows will also allow for more passive solar heat to come in to warm the space. During the summer, when the sliders are back behind the fixed panels, the UV protection of those panels will keep the room a bit cooler. A ceiling fan we already installed will also help with ventilation.


So far, the room is functioning just as we intended. In lieu of a "Fast, Cheap, and Good" analysis, let me offer the following benefits from the addition of the room:
  • Because of the unique combination of window glass detailed above, we have extended the growing season considerably. As I write this in mid-November, we have a large raised planter box full of lettuce growing happily, along with some mojito mint and some rosemary. I expect to be able to start my seedlings earlier in the spring and to start more of them as well, so I should get a jump on the season and be able to depend less on purchased garden plants. (Starting a whole garden worth of seedlings was tricky when I was trying to do it all under grow bulbs and south-facing windows.)
  • The room is acting now as a heat collector and a really good buffer between the family room doors and the outdoor temps. I have noticed the family room, to which this room connects, being warmer and cozier.  On some warm days, we have opened the interior door and allowed the sunroom to heat the family room.
  • We will be adding a removable clothes line to run diagonally across the space, so I will still be able to hang sheets and other large items to air dry. They should dry more quickly than in my lower level laundry room on drying racks.  This will save a little money by allowing me to avoid running the drier.
  • By choosing the four season wall option, we qualified for a tax credit. This lowered the price of the room dramatically. (The credit should be just shy of 20% of the room's cost.)
  • I also paid for the room on my LL Bean Visa card and earned reward certificates; with these, I was able to get a set of flannel sheets for our bed (retail price $65.90) for only $5.90. So, that will keep us warm this year as well.
  • Finally, we joke around here about the savings realized by not having to buy antidepressants in the winter.  Truly, for us, having a sheltered space to take in more winter sunlight and garden plants makes a huge difference in mood and quality of life.
Pin It!