Friday, July 29, 2011

Let's Talk About (Squash) Sex


One of the most frequent things I am asked, when conversations turn to the garden, is how I know whether the blossoms on my pumpkins, zucchini, and butternut squashes are male or female.  And I just love to talk about (squash) sex!

Now, this is still a PG-rated blog, so I'm not using this as a euphemism, for all of you who are taking "hide the zucchini" a little too literally.  No, I mean the fact that not all squash blossoms are created equal.  There are males and females, and, like all organisms with two sexes, you need both to get a baby.  In this case we want our baby to be a bouncing one pound zucchini or five pound pie pumpkin, so it helps to know if your squash plants are setting up the proper conditions for procreation.

The above picture is of a male zucchini blossom.  See how the flower is lifted up on a fairly thin stem?  This stem will never produce a zucchini fruit; its purpose is to get that delicious pollen out for the bees to pick up and deliver to female flowers.  Therefore, this is the male.  You can often see the male flowers bloom in the mornings because they are so much more apparent than the females.  It is also typical for a squash plant to put out many males before it produces any females, so the bees get used to where to go to get their pollen.  Some years, I have had plants with only males, and then I did not get any squash.


Now, this is a female.  In this case, it is a female pumpkin blossom.  It has been fertilized, which I know because I have watched it get slightly bigger this week.  The fruit, in this case a pumpkin, sits behind the blossom and waits for the blossom to be fertilized.  If it is not, it will yellow, dry, and fall off.  If it does, you can see it start to plump up, and it looks green and healthy when the blossom falls off, as this blossom did when I moved the leaves to take a picture.

So now you know!  If this is new information to you, remember that you are never to old to keep learning about sex!
Pin It!

Wednesday, July 27, 2011

The Green Thing


I received this email forward the other day, and although I typically don't share such things on this blog, I think there is a great point implicit here.  How many aspects of our lives have been distilled down into a choice between conveniences that we have been told are necessities, and a potentially self-conscious choice to be "green" (or "frugal," or "traditional," or pick your adjective).

So many of our aims of living a sustainable life could be accomplished just by looking back a generation or two and seeing if, perhaps, there is an advantage to doing things the "old fashioned" way.  Maybe the prior generation knew a thing or two about how to get things done.  Maybe there is something to be learned.

Innovation is great; it is why the human species continues to evolve and progress.  But continual innovation for its own sake can have consequences, as we increasingly rush to make more money to afford more stuff that gives us the time to make more money.  Is it possible that we have pursued making living so convenient that we have actually forgotten how to live?


The Green Thing

In the line at the store, the cashier told an older woman that she should bring her own grocery bags because plastic bags weren't good for the environment.

The woman apologized to her and explained, "We didn't have the green thing back in my day."

The clerk responded, "That's our problem today. Your generation did not care enough to save our environment."

He was right -- our generation didn't have the green thing in its day.

Back then, we returned milk bottles, soda bottles and beer bottles to the store. The store sent them back to the plant to be washed and sterilized and refilled, so it could use the same bottles over and over. So they really were recycled.

But we didn't have the green thing back in our day.

We walked up stairs, because we didn't have an escalator in every store and office building. We walked to the grocery store and didn't climb into a 300-horsepower machine every time we had to go two blocks.

But she was right. We didn't have the green thing in our day.

Back then, we washed the baby's diapers because we didn't have the throw-away kind. We dried clothes on a line, not in an energy gobbling machine burning up 220 volts -- wind and solar power really did dry the clothes. Kids got hand-me-down clothes from their brothers or sisters, not always brand-new clothing. But that old lady is right; we didn't have the green thing back in our day.

Back then, we had one TV, or radio, in the house -- not a TV in every room. And the TV had a small screen the size of a handkerchief (remember them?), not a screen the size of the state of Montana.
In the kitchen, we blended and stirred by hand because we didn't have electric machines to do everything for us.

When we packaged a fragile item to send in the mail, we used a wadded up old newspaper to cushion it, not Styrofoam or plastic bubble wrap.

Back then, we didn't fire up an engine and burn gasoline just to cut the lawn. We used a push mower that ran on human power. We exercised by working so we didn't need to go to a health club to run on treadmills that operate on electricity.

But she's right; we didn't have the green thing back then.

We drank from a fountain when we were thirsty instead of using a cup or a plastic bottle every time we had a drink of water.

We refilled writing pens with ink instead of buying a new pen, and we replaced the razor blades in a razor instead of throwing away the whole razor just because the blade got dull.

But we didn't have the green thing back then.

Back then, people took the streetcar or a bus and kids rode their bikes to school or walked instead of turning their moms into a 24-hour taxi service.

We had one electrical outlet in a room, not an entire bank of sockets to power a dozen appliances. And we didn't need a computerized gadget to receive a signal beamed from satellites 2,000 miles out in space in order to find the nearest pizza joint.

But isn't it sad the current generation laments how wasteful we old folks were just because we didn't have the green thing back then?

Pin It!

Monday, July 25, 2011

Zucchini Pie


Another zucchini recipe!  And why not?  This is the season of all things summer squash, and I love zucchini more than I ever would have thought possible when I was a kid.  (For that matter, I don't think I knew what zucchini were as a kid.)

Today's recipe is another favorite around our house, and we make this dish at least once a week when the zucchini are in season.  It is a great way to introduce a vegetarian dish into your diet if you don't normally go veggie, because the texture of the zucchini is very hearty and toothsome.

FC&G Zucchini Pie

1 double pie crust
1 medium zucchini, sliced
1 medium onion (or equivalent), sliced
1 head garlic, chopped
1 handful fresh thyme, chopped
1.5 cups cheddar or cheddar blend cheese
1/2 cup yellow mustard

Mix veggies in a bowl to combine the zucchini and onion with the thyme and garlic.  Let sit while you make the pie crust.

In a deep dish pie pan, lay bottom crust and coat with the yellow mustard.  Layer the veggies in, and top with the cheese.  (You can alternate cheese and veggie if you have a lot of veggies to use up.)  Top with pie crust.

Bake in 350 degree oven until crust is done and veggies tender, about 40 minutes.

Fast:  Mr. FC&G and I work together on this; he makes his famous flaky pie crust, and I chop veggies.  Then it is just sit and wait until the pie is done.

Cheap:  With all of the veggies coming from the garden, the only costs associated with this dish are the cheese and the flour and lard needed for the crust.  This dish regularly comes in at around $5 and provides about 4-5 servings.

Good:  This is a great way to use your summer zucchini and get a lot of healthy squash and root veggies in your diet.  It reheats very well; I think it is even better the next day.  To really maximize your oven time, make a batch of zucchini bread to bake alongside the pie.
Pin It!

Friday, July 22, 2011

Zucchini Orzo with Garlic and Basil


Thank God for zucchini this year!

To my everlasting shame, I am one of the few Midwesterners who cannot always reliably grow zucchini.  Every year I listen to person after person chortle about drowning in zucchini, leaving bags of zucchini hanging on mailboxes and front doors, and feeding zucchini to every unsuspecting animal they have.  Meanwhile, I'm out there counting male after male among my zucchini blossoms and praying for a female to show up and give me some decent fruit.  (Maybe I watch too much?  Perhaps my zucchini need more reproductive privacy.)

Anyway, this year we are finally getting the zucchini I was denied last year, and I'm sure not wasting a single fruit.  I'm freezing it, plan to make relish from it, and we are having it in some form for dinner every night.  One of my favorite ways is Zucchini Orzo with Garlic and Basil.

This is an adaptation of a recipe from Barbara Kingsolver's Animal, Vegetable, Miracle, one of my favorite ultra-realistic books about gardening.  I reread it about once a season, and it has gotten me through many a February as I live vicariously through her tales of canning tomatoes and planting garlic.  I've adapted this recipe to better fit our tastes and our garden.  Your house will smell like a fine Italian restaurant after you cook!

Zucchini Orzo with Garlic And Basil

1 package orzo pasta
1 package (5oz) or equivalent shredded Parmesan cheese
2 cloves garlic
2-3 medium zucchini, shredded
big handful of basil, shredded
olive oil

In a saute pan, saute chopped garlic in olive oil while pasta boils and you shred the zucchini.  When zucchini is shredded, add to garlic and saute until wilted.  (The more you saute, the more it cooks down, a helpful tip if you are trying to "hide" zucchini from a picky family member.)

To garlic and zucchini, add cooked orzo, Parmesan, and a big handful of chopped basil.  Saute until mixed and cheese is melted.  Top with fresh cracked black pepper and serve.

The Analysis

Fast:  This cooks up in about 20 minutes, so call it 30 minutes from garden to table.

Cheap:  If your garden gives you the veggies, then you will only be buying orzo and Parmesan, which makes this ultra-cheap.  It gives 4-5 hearty servings, depending on how much zucchini you put in there.

Good:  Did I mention I love this stuff?  I love any mac-n-cheese dish, and this is a nice, light, summery version of mac-n-cheese.  I need to freeze some shredded zucchini so I can make it once or twice over the winter as well.

(Note:  What follows, for those of you reading on the actual blog page rather than the RSS or email feed, is an affiliate link for Animal, Vegetable, Miracle.  If you decide to add this to your winter survival library and use this link, I'll get a small cut.  If you don't, please visit a local bookseller and keep those dollars in your community!)

Pin It!

Monday, July 18, 2011

How Much Does a Garden Grow? Garlic


It is time for another report on the profit or loss from the harvest of a crop!  Today, we'll take a look at garlic.

Garlic is a great thing, in my mind.  For us, it is one of the few plants that will grow in this very narrow band of rocky soil I am gradually improving.  It also gives me something living to look at well into the winter and then again early in spring, so I feel like I am always gardening.  It also tastes wonderful and keeps forever, and it is so healthy, it is great to have plenty on hand to slide into recipes.

However, last year I royally screwed up.  I over-ordered seed garlic from Burpee, and then, panicked that it wouldn't come in time for planting (it did), I also ordered from Seeds of Change.  So, I had way too much seed garlic, and I planted only a portion of it.

The crop this year was plentiful -- 55 heads of garlic -- but the heads were small, coming in at 1 pound, 10 ounces total.  The Meijer organic equivalent is three beefy heads totalling 3 ounces for $1.99, or 66 cents an ounce.  That means my garlic crop is worth $17.16.

I figure that I planted about that much seed garlic in monetary value, so I'm going to call this one a wash. 

Had my crop yielded larger heads, I would be way into profit by now.  I think that will happen as the soil in that bed improves and gets less rocky.  I also think that, since I don't use nearly 55 heads of garlic in a year (I sold a few heads last year and gave several to my mom, and I still have 2010 garlic we are finishing), we will never be buying seed garlic again.  So, while this is a wash now, it will be a money-saver later.

The Analysis

Fast:  Garlic grows over the winter and matures in mid-summer, which, while not fast, is certainly pretty effortless.

Cheap:  As you can see above, due to my errors and some soil problems, this is not a money-saver yet.  But it will be.

Good:  Fresh garlic from the field is unbelievable.  It does lose some of that fresh flavor as the winter goes on and it sits in storage, but it is still pretty fine.

2011 Tally to Date: 4.81 lbs of crops; $4.69 saved
Pin It!

Thursday, July 14, 2011

Why Are We Ashamed of Sustainability?


Have you heard about this one? A woman in Oak Park, MI, is facing possible jail time over the fact that she constructed some raised garden beds in her front yard, apparently in defiance of code that says that front yard vegetation must be "live" and "common."  Click here for the city's response, in which they seem to argue that people move to Oak Park because what they prize is lawn after lawn of closely manicured grass punctuated by the occasional hosta and marigold installation.  When it comes to the kinds of things, like gardens, that might actually get the residents out front of their homes, talking with one another while they enjoy their lawns in their own way, "the average citizen would prefer to see such décor contained to the back yard."

That's fine.  I have long defended the right of people to select their living environments based on any criteria they see fit.  I once owned a condo in a complex that specifically prohibited holiday lights up after January, and I was pretty happy about it.  I'm pretty sure my mother-in-law would live in any neighborhood with an ordinance prohibiting geese that wear seasonal outfits.

The larger problem here is not whether communities can make ordinances regarding what decorations can be on a property; they can.  What bothers me is that this is just one of many such stories that indicate a national fear that appearing to grow or raise your own food or undertake other sustainable activities is something shameful that will bring down the property values.

Look at these:
  • According to this link, a visible clothes line can bring property values down by 15 percent, because air drying your clothes is "unsightly."
  • Right here, we see one of many ordinances forbidding backyard chickens, in spite of the fact that raising chickens is a time-honored way of cutting food bills.  During the Great Depression, many people kept chickens in their garages, along with meat rabbits.
  • Speaking of, other municipalities in fact do forbid meat rabbits, considering them "livestock."  However, pets are OK.  So, keeping a parrot is probably OK, as is a pot-bellied pig, but forget about raising rabbits or chickens for consumption.
The takeaway?  It seems to all come together to indicate that if you spend your time and money watering, fertilizing, and manicuring a patch of grass, if you nurture your exotic flowers that were never meant to live in your climate, if you dry all of your clothes in the clothes dryer and bring all of your veggies home from the big box grocers in plastic bags, you are everyone's ideal neighbor.  But if you take steps to live more sustainably, growing/raising some of your own food and attempting to live a little bit lighter on the budget and the resources, it lowers property values and makes you some kind of problem neighbor.

I will renew my urging from last year to consider planting something edible in your front yard.  Make it pretty if you wish, but grow something there you can eat.  And while you are at it, hang a few clothes out to dry while you play a game of catch with your kid on the front yard.  It is time for suburban America to stop being driven into their back yards with every act  of sustainability.
Pin It!

Tuesday, July 12, 2011

Blueberry Jam: Worth the Time?


I love to make jam.  One of the great pleasures of the summer for me is going to the farmers' market or the u-pick (because we don't grow enough fruit to preserve) and picking up enough ripe fruit to preserve in those little glass jars.  It is no wonder that most writers will tell you that jars of jam look like jewels; just put one in your kitchen window and let the light sparkle through it to see why it is so fascinating.

Lately, however, I have read blog posts that suggest that making jam just doesn't make sense financially.  True, I would probably make it even if it didn't make financial sense -- hey, a hobby is a hobby --but let's put it to the FC&G test.

(Note:  This is not a jam-making tutorial, as there are plenty out there.  My "secret" recipe can be found in the box of Certo pectin.)

I purchased a quart of fresh, farmers' market blueberries for $4.75 a pint or $9.50 total.  This seems pretty expensive on the face of it, especially when you are accustomed to seeing those little cup sized jewel boxes of berries in the store on sale, but these were perfect, picked that morning, and uniformly blue.  And they didn't travel hundreds or thousands of miles to get to my table.

The berries were the most expensive part of the project.  I did a back-of-the-envelope calculation that the remaining ingredients (3.5 cups of sugar, a pouch of pectin, and a splash of lemon juice, plus new canning lids) brought my total ingredients to $15.50.

The batch gave me five full half pints of jam, plus a half a jar that got devoured on fresh bread in a few days.  Let's call that 44 ounces of jam.  That means my batch cost $0.35 an ounce, or $2.80 for a half pint jar.

So how does this compare with purchased analogs?  Well, typically I see those half pint jars at the farmers' market for $4.50 or $5.00, or $0.56-$0.62 an ounce.  Now, granted, you are paying in that case for the jar, ring, lid, and label, because you aren't going to give any of those things back for reuse (and you can't reuse the lid and label anyway).  So, that price you see is probably pretty fair; if you are going that route, be happy to purchase a good, locally made product.  I will be happy that I could save money with my own canning supplies.

How does this compare to the store varieties?   I checked out a few brands at the store, and true blueberry jam is relatively hard to find.  However, the brands I did find came in at between $0.50 and $0.56 an ounce.  You get a jar in this case too, but it is not one that is easily reused and you definitely can't use it for canning.

So there you go.  I saved an average of $0.20 cents per ounce or more, for a total savings on my jam production of $8.80.  Given that I can put up a batch of jam pretty quickly (figure on an hour from start to finish, and part of that is sitting on my duff waiting for the canner to do its work), I've made that much money per hour after taxes.  So, in a way, this is much like landing an hour of paid work at $12 or so an hour and then letting the government take their share.  While its not the hourly rate I charge in my "day" job, I wouldn't turn it down.  And I have the blueberry jam for my winter biscuits and bread to prove it.

The Analysis

Fast:  Once you get your canning mojo going, you can make it through the jam-making process pretty efficiently.  An hour for five jars in your pantry and a partial on your table is not bad.

Cheap:  Thanks to using my own jars and my own time, I've saved a respectable $8.80 and potentially kept a jar from a commercial producer out of the landfill.  I've also not contributed to making blueberries take a long, lonely flight from Chile in a refrigerated airplane.

Good:  I do believe the homemade product tastes much better, as the jam is made within hours of picking the berries.

Welcome to everyone who is finding me through the BlogHer network!  I am pleased to be a new affiliate; take a look at the blue bar at the top for links to interesting content and the option to share Fast, Cheap, and Good through Facebook and Twitter.  I'm happy to have you here; have a look around and let me know what you think in the comments section!
Pin It!

Wednesday, July 6, 2011

Salmon Patties


July is a great time to save a little money on the food bill.  If you garden, your garden is full; the farmer's markets are too.  And all of these lovely new veggies look great beside some inexpensive proteins to round out a meal, giving you some cheap eats to offset that huge air conditioning bill you are no doubt running up.

Today's recipe is courtesy of Mom FC&G:  Salmon Patties

1 can or pouch salmon (6-7 oz) -- look for wild caught domestic if you can
1/2 sleeve of saltine crackers, crushed
1 egg
1 t. Worcestershire sauce
1/2 t. mustard powder (I often up this to 1 t.)

"Sort" the salmon to remove any skin or bones that have been included in the package.  (You could use the flaked leftovers from fillets you grilled, as well.)  Mix with the rest of the ingredients and form into about 4 patties.  Fry in olive oil until golden brown on each side, about 3-5 minutes per side. 

Serve with sauteed garden veggies -- use whatever is ready in your garden.

The Analysis

Fast:  These patties are ready in a jiff!  Experiment with the salmon you use; I have unfortunately found a trade-off to be made between brands that are "clean" (don't include a lot of bones and skin) and brands that are domestic, wild caught product. 

Cheap:  As a meat-stretcher recipe, this probably comes in at under $3.  If you have some garden veggies to flesh things out, you will probably get 3-4 servings of food for under $4 total.

Good:  This has always been one of my favorite recipes, so of course I love it and wanted to share it with you!
Pin It!

Monday, July 4, 2011

Sauteed Root Veggies


I tend to think of root veggies as winter fare, but then I start to do serious summer harvest, and I remember just how tender and sweet new potatoes and new carrots are.  As today was our first potato harvest, I thought I'd share a great way to prepare these.

Sauteed Root Veggies
New potatoes
New carrots
Any other dense veggies you may have pulled from the garden; the other night, we added the first zucchini and the last of the peas

Garden garlic -- 2 cloves
Garden dill
2 T. butter
Salt and Pepper

Melt butter in a saute pan and add chopped garlic.  Add diced veggies in order of how long you want them to cook; for the above photo, I chopped potatoes first, then carrots.  Salt and pepper liberally, then add chopped fresh dill.  Saute until desired tenderness.

The Analysis

Fast:  This takes about 20-25 minutes to cook, and you can pretty much chop while you cook if you do your veggies in the order of density.

Cheap:  Since we had potatoes, carrots, garlic, and dill all in the garden or pantry, I only paid for butter and seasonings.  That's my kind of dish!

Good:  The garlic and dill really made the dish for us.  It turned this from your generic mixed veggies or hash browns into something really special.  I've made this twice in three days.  (Note, for those wondering:  the purple bits are the lone blue potato that we harvested today.)

Have a Wonderful Fourth of July!
Pin It!

Friday, July 1, 2011

Homemade Soda Pop


Say what you will about the unhealthiness of soda pop, there is something undeniably summery about a big glass of root beer or sarsaparilla after a few hours of gardening.  (In fact, that might be one of the best anti-obesity messages out there:  go ahead and have a pop -- right after you've weeded the garden for an hour.)

Soft drinks are at once a part of American culture (think of all the rec rooms that are decorated in Coca-Cola advertising) and a part of the American problem.  And while I acknowledge that it would be both cheaper and healthier to restrict ourselves to water and unsweetened iced tea, I still love a glass of pop now and again.

Here's a good solution if you want to have your pop and your sustainability too:  Lehman's and others sell the syrup for homemade soda pop.  You can control the sweetener this way, an important issue since both HFCS and aspartame have both come under fire for possible health consequences.  Also, you are paying to ship a tiny little bottle instead of participating in the shipment -- in large plastic bottles, often -- of gallons and gallons of what is primarily water.

Cost wise, this is favorable.  A gallon of this mix will take about $1.90 worth of syrup and about 80 cents worth of sugar, plus a little yeast if you want to carbonate the mix (I usually don't, because I actually like flat pop).  That translates to about $1.15 in inputs; let's call it about $1.25 per 2 litre bottle if you follow the instructions in the box for that project.  That is on the high side, when you can get pop on sale for 99 cents per 2-litre, but it is very favorable if you compare to specialty pops that use cane sugar and come in specialty flavors, often for $1.00 per 12 oz. serving.

The specialty flavors are what make this project fun.  Sarsaparilla, spruce beer, and ginger beer are all unique flavors that I love -- in fact, it is worth keeping a bottle of the ginger beer around to mix up in the event of upset stomachs.  We are not big fans of the cola flavor, although I think that is because we have all been trained since infancy to like the flavor of Coke or Pepsi, and these are close but not exact.  However, Mr. FC&G has been looking for a cola with a drier flavor, and I think he can find it here by tailoring the mix to his liking.

The Analysis

Fast:  Takes practically no time to mix up, although you do have to allow 4-6 days if you want the yeast to add fermentation. 

Cheap:  While probably not cheaper than the mainstream pop varieties, certainly a financial win over the specialty flavors, and with the ability to choose your own sweetener.  And, just as important, you aren't contributing to the shipment of water over long distances, one of the least sustainable practices ever.

Good:  Treat yourself to some of the classic flavors that you don't usually see bottled in stores, or keep some around to mix up a treat.  A little box of extract is certainly easier to keep than a case of pop, and the flavors will be the talk of your next cook-out.
Pin It!

Tuesday, June 28, 2011

How Much Does a Garden Grow? Spring Peas


Welcome to the first official installment of "How Much Does a Garden Grow?"

In mid-March, just before we headed off for a much-needed week in the subtropics, Mr. FC&G and I put up the pop-up greenhouse over the garden soil, let the soil warm up, and planted peas and carrots.  We returned to find pea sprouts, and we harvested peas all through June.

Today, I took down the pea vines.  I could have left them for a few more days and a few more pods, but they were getting woody, and besides, the cucumbers growing right beside them desperately need the trellis to grow up.  Peas were always intended to be a spring crop that would make way for the summer cukes.  Today, I realized the cukes were heading toward the squash and zucchini and reaching out their little tendrils, and I had to do something before I had menage-a-squash on my hands.

Upon doing the math, I realize that the peas were a much greater success than I expected.  At one point, I was afraid that it would be a better economic deal to just eat the pea seeds from the pack rather than go to the trouble of growing them, but I was quite wrong.

I planted about two-thirds of a pack of Sugar Bon peas, for which I paid $3.25.  From that, I harvested 3.18 pounds of peas, which we ate both as young pods and mature peas.  I could have upped my poundage by letting them all mature, but the pleasure of peas comes from munching them in both forms.

In the first part of the season, I could find Sugar Snap peas at Meijer for $2.49 a pound.  I could not find an organic version when I looked, nor did I see any readily displayed at the farmers' markets when I went.  So, had I wanted to purchase 3.18 pounds of peas this year, I would have paid $7.94 for them, and I would not have had an organic option that I could easily find.

Subtract the cost of my seeds (which I will plant the remainder of this fall, but I will subtract the full cost because I could not buy a partial pack), and I saved $4.69 by growing peas myself. 

Mr. FC&G just breezed by and commented that the peas also netted us "sanity," by which he means that he could start throwing me in the greenhouse barefoot when I became moody a good month or two earlier than usual.  He is also correct in pointing out that we would not have purchased peas at all, so growing our own enticed us to consume additional nutrients and fiber. 

The Analysis

Fast:  As long as you warm the soil for germination, peas are a fast-growing crop, and easy to grow.

Cheap:  As you see above, a $4.69 savings resulted.

Good:  Fiber, nutrients, and yummy spring goodness. 

2011 Tally to Date:  3.18 lbs of crops; $4.69 saved
Pin It!

Monday, June 27, 2011

How Much Does a Garden Grow?


When we were newly married, I did a back-of-the-envelope calculation to determine how much money my garden saved us from our normal grocery bill, and I came up with close to $1,000.  At the time, the garden was much smaller, as were food prices, but I was using garden food to replace a lot of expensive prepared and packaged food that I had gotten used to as a single person.  Therefore, it was easy to say that having a garden shaved about $20 a week off the grocery bill for 50 weeks of the year.  Now, with a much larger garden and food prices through the roof, I thought it was time to do a different sort of calculation.

This summer, I will be running an experiment and a blog series called How Much Does a Garden Grow?  Each column (and a summary at the end of the primary garden season) will examine how much (in pounds and in some cases raw numbers) of each crop I am able to bring in and attempt to put a retail price on each crop.  I'll compare this retail price to the investment in seed/plant costs where possible and determine whether each crop is a money-saver or not.  At the end of the season, we should have a pretty good idea how much produce my garden generates and what the retail value is.  A few ground rules, if you plan to follow along:

  1. I will not be collecting weight data on leaf veggies and herbs, as that could get slightly insane.  Suffice it to say that I will note which leaf veggies we grew and whether it was a good year for them (so far, not so much).  I will also try to do an end-of-season tally of dried herbs and spices and give you a cost guess-timate for what those filled spice jars would cost me at the store.
  2. I will not change my gardening behavior.  That is to say, if I eat peas or strawberries or cherry tomatoes while weeding, I will not be weighing those.  If I eat a bunch of them, I'll put my thumb on the scale at the next weighing or something.  But I don't want to give up that pleasure for the experiment.
  3. I will collect at least one comparable price for each crop at a retail establishment.  When possible, I will get the price for the organic version of the crop, since we grow organically; when I can't, I will note that.  When possible, I will also get a farmer's market price for the crop and will report that too.  However, the price I will use for comparison is the one most readily available at my handiest retail source -- likely a grocery store -- because I want to know what this produce would cost me if I simply shopped for it without additional effort in my day.  My garden is ultra-handy, since it is right outside my door, so I want to compare with a source that feels almost as handy.
  4. I will discuss how the garden changes our eating habits.  As a preview, consider veggies like zucchini.  If I'm having a good zucchini year, we will make zucchini pie in place of making or (shudder) ordering a pizza or going out.  If a $5 zucchini pie (counting price of cheese and crust), which generates at least one dinner for two and a couple of lunches, replaces an $18 trip to Noodles & Co. (our go-to desperation dinner), then I will include that in the commentary.
  5. I will also occasionally feature value-add projects, like food preservation, and talk about how much those projects save (or don't).  However, the final tally will be poundage and total price of garden output.
  6. I will not make a regular point of discussing investment of time.  Gardening is my summer hobby.  I would garden even if it cost me money overall, which I'm sure it doesn't.  If I didn't garden, I would do something else -- probably, take more dance lessons, which would be a really expensive substitution!  Therefore, I'm not going to tally my hours and try to get a living wage out of the project.  However, I will comment here that, if one so desired, gardening would be a more-than-adequate substitution for time exercising in the gym.  I'm not going to put my gym membership on pause (which would drop it from $35 a month to $10) because I like to swim and take the exercise classes, but if I wanted to, I could easily pause my membership at minimum for the months of May-September for a savings of $125.  That will not be in the final tally either.
At the end of this, I hope we all have a better idea of how much a suburban garden will grow, what crops are the best money-savers, and which are a labor of love!  If you have other ideas for data collection, please leave them in the comments!
Pin It!

Friday, June 24, 2011

Sustainable Glassware for Leftovers


Note:  See here for a correction about the foraged wild strawberries.

Like many of you, I'm trying to reduce the amount of plastic in my life, particularly that which comes into contact with my food.  Plastic, particularly that which contains BPA, can leech hormone disruptors into your body, certainly not a good thing.  Plus, I have always thought I could taste the plastic when something acidy (like soda pop) is stored in it or when it is used to microwave -- and if I can taste it, there is something there I don't want to eat.

However, we all keep turning to plastic storage containers for leftovers -- they are cheap, stackable, sealable, and transport easily to work or into your microwave.  I've looked for a substitute, and luckily market forces are on my side this time.

What you see above are glass containers with sealable plastic lids from (bottom to top) Pyrex, Rubbermaid, and Ziplock.  All of them go from freezer to fridge to microwave to oven to table (sans plastic lid, of course).  All have the benefits you want plastic for -- that is, the sealable lid.  But all of them allow you to remove the lid, reheat the food, eat, and go about your merry way.

Are they perfect?  No.  They will set you back a bit more money than plastic substitutes, although they will last longer and stain less.  They do have plastic in the lid (although at least one of the above said it contained no BPA), so I'm careful to let my leftovers cool before I put them in so there is no condensation off the lid.  And of course I don't cook with the lids on.

However, they are easily stackable, and they come in a variety of sizes if you are packing leftovers for lunch.  I commend these companies for responding to consumer demand and trying to give us options that are healthier.

The Analysis

Fast:  In some ways, these are -- if not faster -- easier to use than plastic containers because they have more structural integrity and are easier to hold and to stack in the fridge.

Cheap:  No, these are not cheap.  Even with coupons you can spend $5-$8 for each of the sizes I show above.  Theoretically, they will last longer than plastic and therefore have a lower cost per use, but if you are on an extra-tight budget the price of these could be a barrier to entry.  I like to pick them up one at a time when I have a coupon and some extra in the grocery budget.

Good:  While not a perfect solution, these go a long way toward letting you keep your food out of contact with plastic.  And that's something worthwhile.
Pin It!

Tuesday, June 21, 2011

Oregano Blossoms


One of the best parts of gardening is being able to select your fruits, veggies, and herbs at the stage at which you like them best -- if you love green tomatoes or baby zucchini, they are there for you without the need to pay a premium price.

One of the luxuries I like is dried oregano blossoms to use as the herb oregano in lieu of just using the leaves.   The blossoms, picked just before they open into a pretty white flower, have a really intense oregano flavor and smell, even when dried.

This year is shaping up to be a great year for this sort of thing.  We had a long rainy spring, followed by a heat wave, which means that many of my young herb plants are misreading the signs and thinking it is time to bolt -- that is, shoot up and blossom so as to produce seeds.  My young oregano plants are sending up stems with blossoms on them, and I picked a bunch this morning to dry and save to use as an herb this winter.  It helps the plant be more productive, and it gives me the luxury of using almost exclusively blossoms in my cooking.  You can bet that isn't usually one of your options on the grocery spice rack!
The Analysis

Fast:  Pick a few stems, rinse, and pop them in the food dehydrator; in a few hours, you have concentrated herb goodness!

Cheap:  Drying food and herbs is one of the cheapest methods of preservation out there.  To maximize the electricity used with an electric dehydrator, I try to make sure I have at least 3 of the 5 trays full.

Good:  If you are growing oregano this year (and it isn't too late to start for most gardeners, as it grows quickly), try saving some of the blossoms.  You'll be pleasantly surprised at the intensity.
Pin It!

Thursday, June 16, 2011

In Praise of Volunteers


My cilantro reseeded itself last year, giving me quite a free crop of the herb (and, soon, coriander) without any intervention from me.  I have dill coming up on its own all over the property.  I found a leek growing in the leek bed that I didn't have to purchase, and the tired old potatoes that I planted after cleaning out the potato bin have sprouted and show every sign of generating potatoes.  And this is all not counting the tomatoes that grow up everywhere I have spread finished compost -- I have a row of 10 of them I have transplanted into the garden, and there is a new little tomato sprouting out of the compost at the base of nearly every carefully-nurtured "purebred" seedling that I have planted in the garden.

In my world, these are called "volunteers," plants that so badly want to be part of your garden that they don't wait for you to ask them.  I once read a blog where the writer spoke of painstakingly "weeding out" all the volunteers so that they didn't disturb her perfect greenhouse plants. I think Mr. FC&G had to revive me with smelling salts.  I was horrified.

For me, volunteers are free food.  Not only free, but free food from plants I didn't have to start from seed!  Epic win!

One of the traditional objections to volunteers, especially volunteer tomatoes, is that they don't breed true to the mother plant unless you are careful about growing only heirlooms.  And even then, they don't necessarily breed true.  I actually love this part; we typically get a variety of volunteer that is clearly the result of the crossing of some long-ago grape tomato with a juicy slicer; the tomatoes are the size of golf balls, pleasingly round and red, and very juicy.  I have a hard time bringing any of those in from the garden, because they seem like a ready-made snack while I'm out working.  Seeing the crosses that develop, suited just for your own microclimate, is part of the fun.  And if you are worried about accidentally growing a sterile hybrid, think of it this way:  a plant that doesn't produce viable seeds this year won't be a volunteer "problem" next year.

I have so many volunteer tomatoes this year that I could probably have grown exclusively volunteers and still had close to 40 healthy plants.  I still like to start my seeds myself in the winter, but I am always excited to see what the volunteers will bring and enjoy guessing about their parentage. 

Now, if you will excuse me, I need to go harvest some dill and coriander for the spice rack, from the plants that required nothing from me but a helping hand at harvest and the willingness to allow some seeds to remain on the plants to go into compost.

The Analysis

Fast:  Certainly, a plant that pops up on its own and gives you food is not a time-consuming endeavor for the gardener.

Cheap:  Again, volunteers are free food.  Can't get better than that!

Good:  Allowing plants to adapt to your microclimate and return year after year is a net gain for all.
Pin It!

Monday, June 13, 2011

Dried Strawberries


Saturday, Mr. FC&G and I made our yearly sojourn to the u-pick strawberry field.  The farm has had a tough year; the variable weather has made the berries small and sparse on the plants.  But the plants were sending out lots of runners, and I think there is hope for next year's crop to be much more robust.

Once we got home, I started the process of preserving the berries.  We had plenty of jam, so no need to make more.  Ditto on preserves.  (The difference between jam and preserves is the amount/source of pectin.)  We even had some frozen ones left from last year, so I froze fewer than usual.

So, I decided to dry some berries as an experiment.  I dried two trays in my food dehydrator, which gave me about a half pint of dried berries, and I think I'm going to have to (gasp!) disagree with the wisdom of my beloved Putting Food By and say that this is a must-do!  The berries are concentrated sweetness, and I'm envisioning adding them to a batch of muffins for a wonderful treat.

To dry, simply wash and hull the strawberries and cut them in quarter inch slices.  Place on the dehydrator trays and dry for 4-6 hours, until rubbery.  I store my jar in the freezer to further keep them stable, but obviously I could keep them on the shelf if need be.

I think food dehydrating is a great skill to explore; it is especially helpful given the skittishness of the grid around here these days.  With the power going out every time we get severe weather (and severe weather seeming to come more often), dried and canned foods will be the ones I am not worried about losing.

The Analysis

Fast:  Not as fast as freezing (because of time spent slicing berries) but faster than making jam, this is a good preservation technique.

Cheap:  The only input other than berries is electricity, and even that is not needed if you have (or build) a solar drier.

Good:  Seriously yummy.  Can't wait to try them in muffins!
Pin It!

Friday, June 10, 2011

The Havahart Trap


I've made no secret of our rabbit problem around the micro-farm.  Seriously, these little guys (and gals, most often) are so cute in the spring, but by summer they become an army of defoliators.  Something had to give.

Enter the Havahart trap.  This little beauty is available from one of my favorite stores, Lehman's, and it performs as advertised.  The bunny enters the trap, trips a bottom plate, and finds himself confined by two end pieces that drop, enclosing the trap.  He is unhurt, leaving him for you to do with as you wish.

We caught our first rabbit the other day, and we immediately took him for a little ride out to a nice country field, where he could make new friends and life a happy life.  If you so decided, this would also be a good trap if you wanted to catch your prey live and later consider it what one of my sustainable living books euphemistically describes as "added protein" from your garden.  Your call.  We decided on catch-and-release.

At $50 for the rabbit size, this may be the ticket to keeping the rabbits out of the garden.  And with food prices spiraling out of control in the store, we could recoup that investment very quickly.

The Analysis

Fast:  The trap is easy to set up and safe to use.  There is nothing sharp or dangerous to hurt you or your prey, and it is easy to carry away without ever touching the animal inside.  A foot lever allows you to release your bunny once you get to his new home.

Cheap:  I consider this a good investment in gardening. 

Good:  The best thing about this trap is that it allows you to treat the rabbit very humanely.  I realize that, in the best of all possible worlds, the bunnies would prefer to live out their lives eating my tomatoes, but barring that, this is a good option for relocation.
Pin It!

Monday, June 6, 2011

Not Nonna's Ricotta Cheese


A couple of years ago, Mr. FC&G and I started to make our own cheese, using Ricki Carrol's Home Cheese Making as our guide (there's an affiliate link below).  Although we haven't yet progressed to hard cheeses like Cheddar, we enjoy making our own mozzarella when we can find milk that is both hormone-free and not ultra-pasteurized, a harder task around here than you might think it would be smack in the middle of the Midwest.

Anyway, when we mentioned this to Mr. FC&G's father, he told us that he remembered his Italian grandmother, Nonna, making her own ricotta from the whey left over from cheese-making.  Ricotta means "recooked," and it is a way to strip the last proteins from the whey in order to get every available bit of cheese.

My father-in-law said that Nonna would just reheat the whey to nearly boiling, then "throw in some vinegar" and get ricotta.  So, the next time we made mozzarella, we got the whey up to a good simmer, and introduced a tablespoon or so of cider vinegar.  A little ricotta formed, but not much, so we figured we were doing it wrong.

"He said, 'throw,'" Mr. FC&G said.  "Let's try that."

So, we took aim and threw the vinegar at the whey.  Nothing.

"Nonna was Italian; she surely said something special during cheese making," I ventured. 

"Mangia!" we yelled, the only Italian we knew.  Nothing.

"Perhaps Nonna was actually Greek," we guessed, yelling "Opa!" at the whey as we introduced the vinegar. 

Nothing.

"Maybe Nonna was really a sailor," I suggested.  And we swore heartily at the whey, which responded by producing nothing.

By now, we had a pot of really vinegary whey, and we gave up.  The next time out, we made Ricki Carroll's whole milk ricotta, and it worked perfectly.  We figure that ricotta really is a super-low-yield cheese, made even lower in yield by the fact that modern rennets and acids strip nearly all of the protein from the milk on the first go round.  We've made whole milk ricotta ever since, and we always think of Nonna.

Not Nonna's Whole Milk Ricotta
Up to 1 gallon whole milk (It doesn't matter if it is ultra-pasteurized, thank goodness.)
1 tsp. citric acid, dissolved in 1/4 cup water

Combine milk and dissolved citric acid, and heat until milk is between 185 and 195 degrees.  As it reaches its final temperature, you will see ricotta form.  The whey will be clear and yellowish.

Remove ricotta with a slotted spoon and drain in a fine sieve over a bowl until you reach desired consistency.
And think of Nonna while you do it.

The Analysis

Fast:  You can make a batch of ricotta in under 30 minutes.

Cheap:  Your ricotta will be cheaper than store-bought.  Use the leftover whey in any baked good that asks for water, such as bread. Your bread will have a crispy crust and a more robust flavor overall.  That's a double savings.

Good:  Personally, I will eat homemade ricotta when I won't eat store bought, so I obviously think it tastes better.


Pin It!

Friday, June 3, 2011

The Bean Bench


The only thing I regretted about the addition of the Key West sunroom was that one of the new walls eliminated the little stoop that I used to sit on to do little garden tasks, like snapping beans, braiding garlic, or stripping the flowers off dried lavender.  It was a sunny, sheltered little spot that I really enjoyed.

Lucky for me, our suburban neighborhood seems to be really good about sitting useful but unwanted things out to the curb.  We've salvaged a large footed planter bed that way, and we just got rid of an unwanted patio chair by sitting it out by the curb.  Everyone seems to drive by the freebie item for a couple of days until it is clear that it is up for grabs, and then someone claims it.

Last year, after the sunroom was installed, I expressed the need for a bench on which to sit and snap my beans.  Lo and behold, the next week a neighbor set out an old rocker bench, on which the bottom rocker was broken.  After we drove by it for a couple of days, we picked it up.

Mr. FC&G removed the bottom rocker, and then the weather turned cold.  The icy winter did a nice job of removing any remaining stain on the bench, and I had plans to paint it in March or April.  But we did not have two days of good weather back to back for over two months, and then my schedule got busy as well.

Finally, I manage to get four cans of spray paint (two of which we bought with a gift card) and I gave the bench a couple of good coats and moved it by a sunny wall just outside the sunroom.  For a total expenditure of $8.50 in paint, I now have a lovely little bench to sit on while I snap my beans.

The Analysis

Fast:  The project did take a little time for removal of the broken parts and painting, but it was all a pleasant task.

Cheap:  A total investment of $17 in spray paint, for which we only were out of pocket for $8.50.  I could have purchased cheaper paint, but I did want the kind and coverage that came in the spray cans.

Good: This is now one of my favorite outdoor spots, and certainly adds a bit of charm to the container garden area.
Pin It!

Tuesday, May 31, 2011

Foraged Berries and Other Frugal Things


Note as of 6/23/11:  Live and learn:  I may have a crop of faux strawberries here, although I do note that mine are somewhat sweet and make a good preserve.  However, the presence of the yellow flower makes me think that these may be of the faux variety, so be aware if you experiment with your own yard.

I promised myself I was going to explore foraging for edible greens and such, and this holiday weekend was the perfect time to add another foraged product to the diet.  (The first, you remember, was dandelions.)  This weekend, we got serious about foraging for wild strawberries.

Wild strawberries look exactly like domesticated strawberries in miniature, which makes them an easy choice for the novice forager.  However, we were cautious, and you should be too:  we read extensively on identifying wild strawberries, and then we spent all last season eating one at a time to be sure they were what we thought they were and we had no adverse reactions to them.  (Note:  You must make your own foraging decisions; I'm not advocating this practice unless you are 100% sure.)

You will note the characteristic strawberry leaves, the tiny blossoms, and the mature berry that looks just like a domesticated strawberry, but smaller.  The leaves at the top encase the berry until it is ripe, and then they burst open to show the mature berry.  The berry is not as sweet as a domesticated strawberry. We foraged in our own yard, as we have many areas of wild strawberries since we don't treat our lawn for "weeds" and we mow fairly high, allowing the ground-loving berries to grow.

I gathered about an ounce of berries, which amounted to maybe a third of a cup in volume.  I put them in the strawberry shortcake batter, and the baking made them a bit sweeter.

Other frugal and sustainable acts for the holiday weekend:
  • We mailed a shipment for Carrot Creations, which adds a little extra to the vacation fund.
  • I caught a good sale at JoAnn's for some fabric and yarn for new Carrot Creations projects.
  • We returned an ink cartridge to Staples for a $2 credit on my reward card.
  • We got the materials for painting a salvaged garden bench and constructing new tomato cages, with most of the supplies paid for by a gift card we had received.
  • We sold a bag of books back to the half price store and put $5 in the vacation fund.
The Analysis (Wild Strawberries)

Fast:  You won't find a ton of strawberries in your yard, most likely, so this is a quick project.

Cheap:  Foraging = free!

Good:  I'm always pleased to find a free food source, and I also think it is a good intellectual exercise to learn more about living off your own land, no matter how small or urban your plot is.
Pin It!

Thursday, May 26, 2011

Not Quite: DIY Dishwasher Detergent


One of my continual fascinations, as you know, is attempting to discover cheaper and better ways to accomplish a goal, usually through doing something myself or eliminating a purchase.  This winter, my focus turned to trying to replace commercial dishwasher detergent, as this can cost nearly $4 a box and is a pain to lug home from the grocery store.

I researched online, and most sources suggested a 1:1 mix of baking soda and borax.  This makes sense, but it set off a long research project to determine whether I thought using borax to clean dishes was safe (even though that is one of the uses listed on the box).  I determined that I felt comfortable, and I gave it a try.

And the results were:  OK.  Not great.  Not a substitute for the real thing.  Good enough to get us through in a pinch if we run out of store-bought and don't want to make a special trip, but not good enough to be a total replacement.

(Note:  Things do not get better if you add a drop or two of liquid dish soap to the dispenser.  Let's just say you have a Brady Bunch-esque situation on your hands, and leave it at that.  Those of a certain age will know what I mean!)

To make matters worse, I have also uncovered, through reading other blogs and then experimenting with a cheap, phosphate-free store brand, that it may be the phosphates that account for so much of the cleaning power of my favorite OTC brands of detergent.  Crud.  I wanted to avoid phosphates if possible, so now I feel like I need to figure out what I want to avoid more:  phosphates, or hand-washing dishes.  Believe me, the choice is not an easy one.

The Analysis

Fast:  DIY dishwasher detergent is a snap to mix.

Cheap:  It is also far cheaper than the store brand.

Good:  However, it doesn't work all that well.  I'm going to keep a container of it around for days when I'm just running a load of glasses and relatively clean plates, or for when we run out of store-bought.  However, it isn't a substitute for my old faithful.  Sigh.

Readers:  What do you do?  Do you have a DIY recipe that really works?  Do you have to handwash your dishes, and if so, is that really less expensive? 
Pin It!

Monday, May 23, 2011

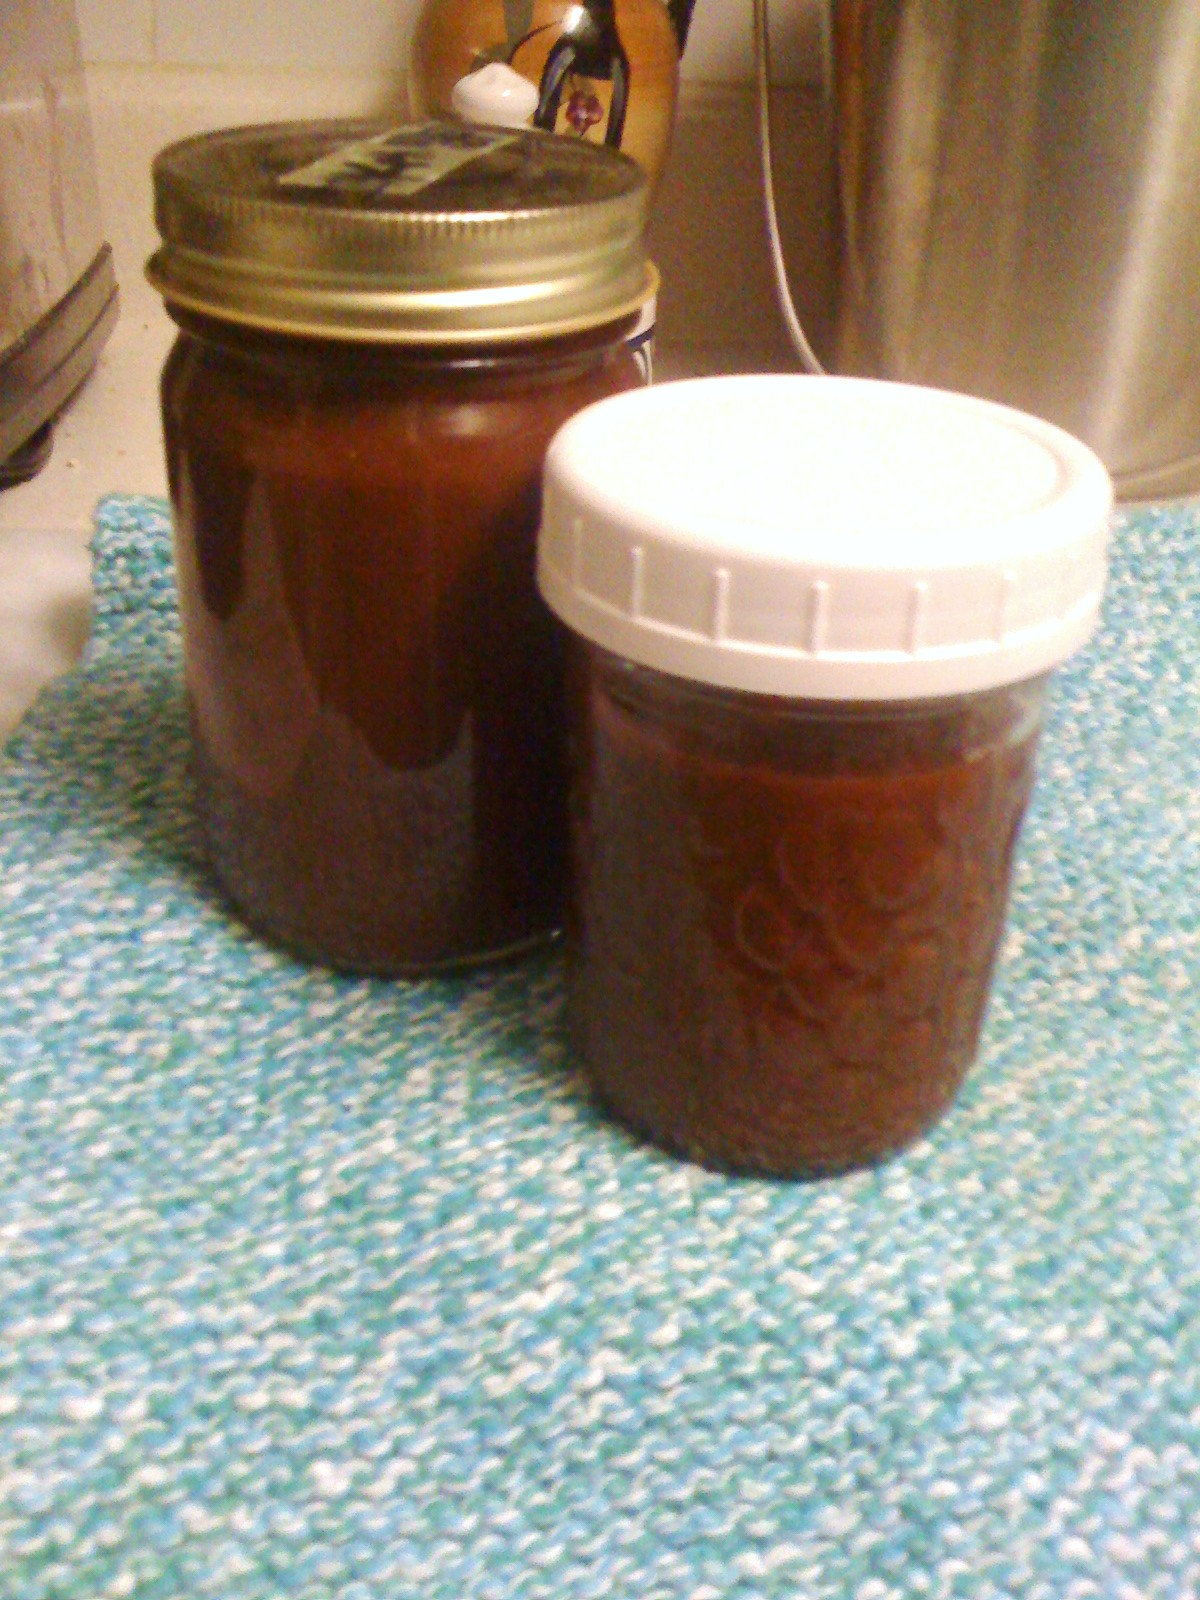
Homemade Ketchup


Making your own ketchup is one of those homemaker stunts that seems impossibly hard core, kind of like making cheese.  But both of these processes are actually pretty easy -- with an edge to ketchup, because you can put it on the stove and forget it while it cooks down and you do something else. 

Ketchup is fundamentally spiced tomato sauce; that's all.  My recipe is adapted from the Everyday Cheapskate.  I've modified it to take out the corn syrup (who needs that?) and to reduce the water and therefore the cooking time. 

Ketchup

1 6-oz can tomato paste (go ahead and splurge on organic, because this is worth doing "right")
2 T white vinegar (you can use cider vinegar in a pinch, but don't omit, because this make it safe to can)
1 T brown sugar
1 t molasses
1 t garlic powder
1 t onion powder
1/4 t allspice
1 t salt
1 can water (rinse out all the remaining tomato paste with this)

Combine ingredients in sauce pan.  Cook until desired consistency, which should take about 20 minutes for this amount.  If you desire a longer cook time to better blend the flavors, add more water at the beginning and cook down. 

Pour into glass jars and store in fridge.  It will keep for a few months, but don't let it languish for a year like you might do with store versions that contain preservatives.

If you choose to can it, double or triple the batch; or go even further and get the super-big cans of tomato paste to put up several jars.  (This batch makes just over a half pint.)  Can in half pint jars; if you are a single person household or a family that doesn't eat a lot of ketchup, consider canning in the half-cup jelly jars.  Process in a water bath canner for 20 minutes.  Cool and store.

The Analysis

Fast:  I cooked a double batch in about 25 minutes, exactly the amount of time it took me to frost and decorate a cake for a family party.  If you choose to can a batch, it will be a bit longer, but this is a great mid-winter canning project since it doesn't depend on fresh veggies.

Cheap:  Catch a sale on organic tomato paste, and this will be way cheaper than store ketchup.  Not to mention, you won't have to read the label to make sure there is no HFCS.

Good:  Mr. FC&G and I like the flavor of this much better than store-bought.  It is a bit deeper and more nuanced.  And, of course, I get serious homemaker cred for making my own ketchup!
Pin It!

Friday, May 20, 2011

The Busiest Time of the Year

T

My apologies for the slimness of the posts this week.  Mid-May is always a challenge, bringing with it the confluence of busy times with three of my jobs:  a flood of work for Hilltop Communications, the pre-graduation excitement and craziness over at the college, and the planting season for the sustainable living garden, which provides probably 80% of our veggies for the year.  Every spare minute is spent doing something.

So, while I take a short break today, I thought I'd share with you how the tomatoes I planted last week are fairing.  That little guy above you last saw looking like this. He did get a little sunburn on the lower leaves, and he wasn't happy about the week of 42 degree temps that followed the planting, but as you can see he is getting new growth and is settling in pretty well.  The lesson is to not despair when your tomatoes show a little transplant shock; they almost always come out of it.

Tonight I plan to make Stewed Students for dinner, with the addition of some cilantro that has sprung up and grown like crazy.  And, I foresee a few more hours of broadforking the garden and planting tomatoes.
Pin It!

Wednesday, May 18, 2011

Sustainable Bookshelf: The Self-Sufficient Life and How to Live It


Some books are for pleasure reading only, but the purpose of my Sustainable Bookshelf recommendations is to give you an idea about the books I want to have around, in hard copy, just in case some emergency required us to get back to basics a little more quickly than we intend.  Luckily, The Self-Sufficient Life and How to Live It is both.

This beautiful book literally functions as a coffee-table book for me, not only because the illustrations are beautiful and plentiful, but because, combined with the text, they give all the basic information one needs to feed oneself, maintain one's home and environment, and generally enjoy life.

The book is divided into short sections that each treat a single project, like jam-making, that one might want to tackle to live in a sustainable manner.  The illustrations perfectly compliment the copy, giving you all the views you need when attempting a project unfamiliar to you.  (This is true of most of the DK books out there, so kudos to this publisher!)

I really recommend the purchase of this beautiful book.  It is a joy to read, and it is nice to have around when adding new projects to your sustainable living routine.

(Note:  the above is an affiliate link, which constitutes the only pay I get for this review.  Click on it to purchase if you want to support FC&G, or check out a local bookseller -- they'd appreciate your support!)

Special offer from Carrot Creations!  I am so sick of spring rain and 42 degrees, I am holding a sale.  If you would like a beat-the-blues pair of cozy fleece socks, a pair of kicky yoga socks, or any other sustainable living item from our Etsy store, use the code RAINSTINKS for an extra 10% off your order!  This offer is good through May 31, 2011.
Pin It!

Friday, May 13, 2011

Planting Tomatoes


So, yesterday I talked about hardening your seedlings off.  Today, I want to tell you how I plant sensitive plants like tomatoes, just in case you are planning a gardening weekend.

Once your plants are hardened off, dig a hole deep enough that you will bury the roots of your tomato plant and most of its stem; tomatoes will grow additional roots along the stem that you bury.  Don't do this with other plants, because they don't do the same thing.  Make the hole about twice as wide as it is deep.

Take the dirt you removed and put it aside; it is a nice addition to the potato patch to hill the potatoes.  Instead, fill the hole with sifted finished compost (humus) and top dress the soil around the plant as well.  The compost provides nutrients, helps the health of the soil, and also provides a bit of protection against diseases and noxious bugs.  The top dressing will allow nutrients to sink into the soil with each rain.

The Analysis

Fast:  It takes a little extra time to sift the compost (ain't it purty?), but it is worth the effort.

Cheap:  My 83 cent tomato plants stay 83 cents, since I have added no chemical fertilizers or commercial soil

Good:  Now, it is just a 70 day count down until tomato juice, salsa, sauce, and yummy sliced tomatoes.
Pin It!

Thursday, May 12, 2011

Hardening Off Seedlings


If you are like me, you have been nursemaiding some garden seedlings throughout the long winter, making sure they are warm, well-fed, and in comfortable pots.  With spring finally here and the last frost date past for zone 5B/6 (maps differ about which zone we are in), it is time to plant the tender crops, like tomatoes, zucchini, cucumbers, and peppers.  I will be rolling these out into the garden over the next couple of weeks, time permitting.

First, however, the plants have to be hardened off.  All this means is that the plant has to be given the chance to get used to being outside in the sun and wind before you plunk it in the ground.  This is not a difficult process, but it can be scary your first time out. 

First, make sure your seedlings are well-watered, look healthy, and are of a size that you wish to plant in your garden.  Hopefully, you have been slowing exposing them to open windows and increasingly direct sun just as a result of the change of seasons.

Then, take your seedlings and put them outside in a place where they will get part sun, part shade, and some breeze if possible.  Above you see my tomatoes sitting by the house on our bench, getting a lot of sun but the occasional shadow from the house.

Leave them there for 2-4 hours the first day, checking occasionally that they don't look wilted or burnt.  You will know a sunburn if the thin, tender leaves become papery, dry, and a little brown.  If that happens, bring the seedlings inside immediately.  The plant will recover from a burnt leaf or two, but just like you, they don't want a sunburn all over.

The next day, increase the time outside, and do so again for another day or two, until you would feel comfortable leaving the plant outside all the time.  And there you go:  your seedling is "hardened off" and ready to go into the garden.

The Analysis

Fast:  Hardening off is the last step in growing your own plants from seed, and it really doesn't take long.

Cheap:  This is all part of the money-saving strategy of growing your own garden plants.  This year, it looks like I will have more than two dozen tomato plants grown from about 5 packs of seeds (because I wanted different varieties).  That means I'm getting each plant for about 83 cents, which I could not do at a commercial greenhouse.

Good:  There is something very satisfying about starting from seed and ending with the crop.

Check back tomorrow, when I will share my tomato-planting process.
Pin It!

Monday, May 9, 2011

A Difference in Philosophy


Our yard is never going to win us any awards for "Suburbanites of the Year."  As you can see above, I have a patch of violets that blooms every spring.  Clover grows outside the garden, often distracting the bunnies for a bit and keeping them (temporarily, alas) out of my tomatoes.  Wild strawberries grow everywhere, showing off pretty red berries.  We eat the young dandelions, and just this weekend I discovered a small patch of low-growing, white flowers that were so pretty. 

However, this means that our yard is not an uninterrupted swath of evenly-textured, supremely manicured blue grass or the like.  Don't get me wrong: we mow.  I think it is an implicit agreement (actually, backed by law around here) that if you live in a suburb, you need to keep your lawn under control, and that means mowing.  However, I hate to "weed and feed," because that would destroy my little patches of flowers and edible greens, all while dumping a load of nitrogen and herbicides on our yard to run into our gardens and ultimately into the groundwater. 

However, I missed the discussion on this topic the other day when I was at the gym and Mr. FC&G answered the door to find a representative from a local lawn service who saw the dandelion fluff in our yard (it had rained for a week, mind you) and thought we were ideal candidates for a little chemical treatment.

"I can make your yard look a lot thicker," he told Mr. FC&G.  Being a kinder soul than I, Mr. FC&G refrained from pointing out that the last thing we needed after a month of near-daily rain was a lawn that grows faster and thicker.

"It's a difference of philosophy," Mr. FC&G said.  "We like our violets and our clover, and we don't want to put chemicals down to get rid of them."

Undeterred, the rep pulled out his trump card:  "But what about all of these dandelions?"

Mr. FC&G thanked him and sent him on his way.  The poor rep is lucky I wasn't home.  I would have told him, in regards to dandelions, "that's not a weed, son, that's a crop!"

The Analysis

Fast:  Skipping that weed and feed step certainly is a time-saver.

Cheap:  It also saves a ton of money.

Good:  It is, indeed, a difference of philosophy.  Yes, we live in the suburbs, and we mow.  But there is no reason that we can see to force a grass to live in monoculture when there are so many lovely "weeds" that are doing no harm by growing in our yard.  I'll pick my violets, enjoy my clover, and eat my dandelions. 
Pin It!

Friday, May 6, 2011

The Ultimate Fuel-Efficient Vehicle


Last year, I wrote about my intention to walk occasionally to my second-shift job.  That idea worked for a few weeks, until we went on vacation and I hurt my knee doing so much touristy walking.  (My knee is great that way.  I can dance competitively and spend the weekends hauling compost to the garden, but it will balk at too much low speed walking.  Go figure.)  That was the end of the walks to work for the summer.

The walk is nice, but there was another reason that it wasn't working as well as I would have liked:  it took about a half hour each way on the mile and half trip.  This meant that I needed to find an extra hour in my schedule on days I wanted to walk, which philosophically shouldn't be a problem, but in reality meant that I couldn't walk on days that I planned to leave work at 5:30 and be at a dance class at 6:00, for instance.  It also limited the distance I could "commute" by walking.  I could make it to the college, but it wasn't terribly realistic to walk to the grocery store that is less than a mile further on, then make a 45 minute trek back home carrying a bag of frozen food.

Enter my new bike!  Those of you who live in biking-friendly communities already know how absolutely cool it is to do your local errands by bicycle, but Midwest suburbs are not particularly known for creating an environment that encourages biking.  I understand that; these suburbs are built to be fairly spacious, and bike paths and bike lanes cost money, but it means you have to get creative about your routes.  I actually sat and read Ohio law until I was confident that I was OK riding on the sidewalks.

Anyway, the biking is working out beautifully when it is not raining, which has not been very often recently.  However, every day that it is 60 or above and I need to go to the college or grocery for a few things, I ride.  Since those two errands constitute about 50% of my time driving a car, I'm substituting a little bit of fresh air and emissions-free exercise for the cost of gas and wear on my precious, almost-but-not-quite-a-classic car. 

The Analysis

Fast:  It takes about 5 minutes to drive to the college, with most of that being taken up backing out of the driveway and parking once I get there.  It takes 10 minutes to bike, with 7 minutes of that being actual ride time.  (Yes, I timed it.)  Even on the busiest days, I can find an extra 5 minutes on each leg of the trip so that I can bike.

Cheap:  The last time I was at the gas station, gas was $4.14, so a 3-mile round trip saves me 52 cents.  It will be a long time to pay for my bike this way (which was $165, including the snazzy basket, bell, and water-bottle holder).  However, this is more about the principle of the thing.

Good:  I can't tell you how much I'm enjoying the little mental break that biking affords me.  I put my iPhone in the bottom of my basket with the volume at full blast so I can hear a little bit of music while I ride, and I take off and enjoy the scenery.  It is a good lifestyle improvement, and I think this one will stick.
Pin It!

Tuesday, May 3, 2011

Worrying about Potatoes


It is a lazy writer who stoops to describing recent rains as "Biblical" in nature, but that is seriously almost the only adjective I can think of.  It has rained here in Ohio for days and days.  If you have a basement, it has flooded at least once.  We do not, but we've already cleaned a flood out of the garage once.  The people whose hobby it seems to be to create lawns that look like golf courses are cursing  the 8-inch high grass in everyone's yard; it is simply too wet to mow.

And I have been worried about potatoes.

I planted my seed potatoes about a month ago.  (This is after an embarrassing incident on vacation in which I was checking my email while sitting on the beach and saw a shipment notice.  Without thinking, I blurted out,
"Drat, the seed potatoes are sitting on my porch!"  I think this may have branded me a rube in paradise.)

I planted them as soon as we got home, and then it started to rain.  And I became convinced that I had just purchased $55 of really expensive compost in the form of seed potatoes.  I have been walking around the house fretting ever since.

But what you see above, in the midst of the mud and the weeds I can't go into the garden to get, is the first sprouts of potato plants.  See the pretty teal leaves?  They are all over my potato "patch."  It looks like at least half of my crop has sprouted, and if I can ever get out there into the garden, I will plant a few more potatoes I have sitting around that need a place to go.

We may get our potato crop yet.  Sometimes, the best thing you can see after a rain is not a rainbow, but a potato plant.
Pin It!