Monday, February 28, 2011

Time to Use the Broadfork


This weekend was unseasonably warm for late February in Ohio, but we weren't complaining.  We lost a few tree limbs in the ice storm a month or so ago, and we spent the day chopping those into brush and logs.  The logs, which are pine, I have plans to turn into my own DIY fatwood for the fireplace. 

And then Mr. FC&G discovered that the ground was just the right texture for using the new broadfork.  We tested it out when we ordered it in the fall, but now is definitely time to use it.  The soil is damp but not soggy and not frozen, and using the fork was a pretty pleasant experience (for the turn or two that I took -- I went inside to make dinner while the hubby got down to the serious business of preparing the soil for planting).  It made it easy to turn even stubborn, heavy Ohio clay.

I have to say, the soil looks beautiful, all dark and crumbly where the covering of fall leaves has decomposed and left us with a bumper crop of humus.  He was careful to work backwards down the rows so as not to step on and compact any of his hard work. 

The Analysis

Fast:  Mr. FC&G informs me that this is not a quick process.  However, he had forked several rows in the time it took me to get dinner, so it didn't seem too slow to me.

Cheap:  Definitely.  Once we bought the fork, there are no further investments.  No tiller rental, no gas, no oil.  I suppose we do have to count the calories needed to feed Mr. FC&G as he man-powers this tool.

Good:  We both feel so good about this low-cost way to break up the soil without disturbing the various soil strata unduly.  Our garden should be healthier every time we use it!
Pin It!

Thursday, February 24, 2011

Recapture Your Dryer Heat


One of the more interesting aspects of running this blog is that I wind up photographing my laundry room perhaps more than is healthy.  But today, I want to show you a project that has worked extremely well for us:  our mechanism for venting the dryer inside the house to recapture all of that heat.

We actually have been using this system for about a year; I have held off writing about it until I could test it in all seasons, because one of the traditional problems with venting a dryer inside is build-up of humidity and, therefore, mold.  But in our situation, we have that well under control, and I think many of my readers could do likewise.

What you see above is a baffled vent box.  It is just a plastic box that you put in your dryer vent tube; it has a flippable baffle inside so you can close it and send the air outside or open it and direct the air into the house.  It also has a removeable vent screen to catch any lint.

By itself, this is a good idea.  You can vent to the outside in the summer and to the inside in the winter.  However, if your dryer is in an enclosed space, as mine is, the humidity will quickly build up on the walls, removing the wallpaper at the very least.  So, Mr. FC&G added a refinement to our system:


This is an air circulation fan.  Obviously, it fits in the corner of a doorway.  What you can't see is that you can position the fan in a couple of different ways so that you are either blowing air into the room or drawing it out.  We draw the air out into the hallway and therefore up into the main part of the house (since the dryer is on the lower level and heat rises).

With the introduction of this fan, humid air doesn't collect in the laundry room; rather, it goes into the main part of the house.  While a laundry room probably can't handle the humidity from a load of laundry, the whole house certainly can.  In fact, a couple of loads of laundry vented inside during the winter helps reduce the need for a humidifier (or bathing in a whole tub of baby oil, if your skin gets dry like mine).

Some caveats:
  • Keep an eye on the humidity level in your house if you are venting inside.  You will notice variance depending on outdoor temp and dampness of your laundry.  For example, I can do probably three loads of jeans, towels, and other heavy clothes when the temps are in the 20s outside, because the house is so dry.  Come spring, a 60 degree day may not allow me to vent very much inside because the humidity gets unacceptable.
  • Consequently, use the baffle on the vent intelligently.  Perhaps you will want to dry a jeans load for 20 minutes or so with the baffle set to vent outside so you can get the worst of the moisture out, then vent inside for the rest of the cycle.  Experiment with your clothes, your dryer, and your house.
  • Speaking of houses, this really works best when you can distribute the heat and humidity through the whole house.  The doorway fan is one tool you have, but you can supplement by turning your whole house fan (not heat or AC) on to circulate air.  Also, you may not be terribly successful if your dryer is in an enclosed basement rather than an open lower level like ours.  My parents report that using just the vent baffle box in a basement many years ago resulted in an unacceptable level of humidity.  Those of you who have tri-level homes, as I do, or similar house plans may find this system easier to use.
The Analysis

Fast:  I think Mr. FC&G installed this entire system in about an hour, but he's handy like that.  (And he dances a mean tango, but I digress....)  However, the fan mounts on screws, so I could probably do that part.  The tricky part is climbing behind the dryer to access the vent tube and install the baffle box.

Cheap:  Yes, I should have kept the receipts.  My memory is that the entire system cost less than $50, and we do have the option of moving the doorway fan up to our bedroom over the summer to draw some of the heat out of there.  (Keep your naughty comments to yourself on that!)

Good:  This project brings the satisfaction of reducing the heat bill a bit and knowing that we aren't paying to dry a load of clothes, dumping all the heat outside, then paying again to heat the house.
Pin It!

Tuesday, February 22, 2011

Freezing in Jars


I have written about my efforts thus far with Rodale.com's Plastic-Free February.  I mentioned that one could freeze in Mason jars, but what I didn't mention was that I had never actually done so.

I suppose I've been conditioned.  I open a freezer and, like most people, I expect to see paper, cardboard, or plastic wrapping, but glass seems like it would expand and break.  However, I know Mason jars can handle extremes of heat -- they even say "can and freeze jars" on the boxes, for heaven's sake.  So, this weekend, I froze some stock in Mason jars, and I am pleased to say it turned out fine.

What you see is my finished stock.  Note that I left over an inch of headroom for expansion, which turned out to be perfect.  I also did have to use plastic jar lids, but those won't be touching the food, unlike the freezer boxes I had been using.  (Does anyone know of some reusable zinc screw on lids?)

I think it is a worthwhile switch to get your freezer food out of plastic as much as possible.  And, if you get rid of those plastic boxes, that is one less thing to fall on your head when you open the cabinet door!

The Analysis

Fast:  Freezing in jars was actually quicker than ladeling into boxes because I could use a canning funnel to help.

Cheap:  I already had the jars.  If you don't, the jars will cost more than the boxes but should last longer.

Good:  A little less plastic touching our food, and a little less endocrine disruption.  (Plus, need I remind you that this particular project --  freezing about 4 quarts of stock -- saved me about $10-12!)
Pin It!

Friday, February 18, 2011

Coupon Alert: Ronzoni

Just an alert for all of you couponers who like to stock up:  Ronzoni pasta has run a nice lot of coupons lately, especially for their Healthy Harvest, Garden Delight, and Smart Taste brands.  (Some of the coupons are available online here.)  My local Meier is running a 10/$10 special right now, so in combination, you can get your boxes of pasta for 50 cents apiece.  I just stocked up on 8 boxes. 

These grocery specials often run out at midnight Saturday, so I wanted to warn you before the weekend if you want to lay in a supply for cheap.

I feel some Fast, Cheap, and Good pasta meals on the way!
Pin It!

Thursday, February 17, 2011

Rogue Purslane and Food Price Insulation


Everywhere I look, I see reports of anticipated increases in food prices once again.  As you probably recall, food prices spiked when the price of oil (and therefore, gas) made transportation costs increase, and it seems that manufacturers and retailers largely never got around to bringing prices back to normal levels once their cost of inputs decreased.  Funny how that often works.  And now, weather related difficulties are piling on, and we are getting warnings of yet another set of increases.  (Temporary, I'm sure.....)

So yet again, let me encourage you to insulate yourselves a bit from these price increases and grow some of your own food.

Above you see the pot of spinach I started about a month ago; it has also sprouted what I believe is some rogue purslane that I seeded into this pot and never saw sprout until this round of seed-starting.  (There, I've admitted it:  sometimes I'm not real diligent about emptying my pots, washing and conditioning them, and starting afresh with each crop.)  This pot of greens is pretty happily sitting on the sun porch now that the temperatures have moderated a bit, and I should have some spinach leaves in 3-4 weeks.  A small pot like this won't give me dinner-sized salads, but I'll have a few leaves at a time for sandwich toppings and to put in ricotta for a nice filling for lasagna. 

So here's your self-sufficiency task for the day:  Go get some seed for your favorite greens, whether they be spinach and curly-leafed lettuce, or a more exotic green like my purslane or some Swiss chard.  Be as frugal or fancy as you like; I don't care if you spend $2 a pack at the grocery store seed rack or order $5 organic seed.  You will save money regardless.

Take your favorite pot, fill it with soil (or my favorite, finished compost), and plant away.  Put in a sunny window, and in about 6 weeks (depending on light level and temperature), you should have one less item to put on your grocery list every week.  Take charge of your food, and you will take charge of your budget.

The Analysis

Fast:  As I've explained, many gardening projects are very quick.  This should take a few minutes.

Cheap:  You'll probably average about $3 for pack of seeds, and these seeds will yield much more than that would buy in the grocery.  Choose a "cut and come again" (meaning you can cut leaves and they will re-grow) variety of greens to get the biggest harvest. 

Good:  This is self-sufficiency at its most simple and satisfying.  I want to see a pot of greens on every windowsill!
Pin It!

Tuesday, February 15, 2011

Percolator Love


I know my mission here at FC&G is to provide you with ideas of things that are, ideally, two or more of fast, cheap, and/or good.  But you guys, I love my new percolator, even though I don't know if it passes the test.

First, I bought my percolator at Lehman's, my favorite self-sufficiency store.  My idea was to continue to amass items that would help me be prepared for an emergency.  After the recent Great Ice Storm of 2011, the thought occurred to me that I did not have a reliable source of coffee when the power goes out.  Believe me, for me that is a necessity.  So I ordered my percolator, and I absolutely love using it every day.  I also love the fact that I can get that ugly plastic automatic drip machne off my counter.  But how does it stand up to the test?

The Analysis

Fast:  Percolator coffee takes perhaps a few more minutes than automatic drip.  I have not changed my routine of waking up, coming to the kitchen to start the coffee, and letting it brew while I make the bed, but now I probably have an extra couple of minutes' wait for that first cup. 

Cheap:  Calculating this one has required the backs of more used envelopes than I have available.  The actual percolator was more expensive than my usual $12 cheap drip machine that I have to replace every 5-10 years, but I will have this one for a lifetime.  It may use slightly more electricity on the stove, but a compensation is a bit of additional burner heat in the house during the winter and the fact that I turn the burner off and let residual heat keep the pot warm while I wait to get my second cup; I usually leave the drip machine on for a good hour to 90 minutes.  Also, the percolator does not require filters, so that is a small savings.  I use the same amount of coffee grounds in the same way.  I'll call this a wash.

Good:  Here's where we have a winner!  The percolator coffee is smoother, deeper, and much less harsh.  Also, I have the satisfaction of knowing my coffee didn't pass through any plastic parts; this one is all stainless steel.  (Watch out for the ones with aluminum baskets if that is a concern for you.)  Finally, I know that I can use this on my wood stove if the power goes out again.  I'm in love with my percolator. 
Pin It!

Friday, February 11, 2011

Pattern Review: McCall's 3370 Pajamas


I find February to be a challenging time for sustainable living.  I've started the first garden seed (peppers, which I started this year on January 24), but there is little else going on in the gardening department.  I've been quilting and sewing fleece socks, but these are not new projects.

So, this year I have committed to teaching myself some more sewing skills.  And I'm going to take you along for the ride.  I'm not intending to make my own ballroom dance gowns (much to Mr. FC&G's chagrin, because that would indeed be a savings!), but I think I can save a few bucks by sewing the basics.

This project is from a McCall's 3370 pattern, which includes options for PJ pants, tops, short- and long-sleeve tunics, and a robe.  I got my pattern on a 99 cent sale at my local fabric store.

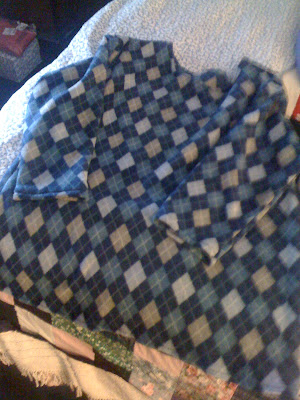
What you see above is a fleece tunic from this pattern.  Rest assured (and look at the photo of me to your left, please), that I am not that enormous.  I like my sleepwear floppy and roomy and cozy (again, probably to Mr. FC&G's chagrin), and this pattern didn't disappoint.  In fact, the next time I make a tunic, I may make one size down.

If you have basic, straight seam sewing skills, this pattern will come together in no time.  The tunic is comprised of front and back pieces, plus sleeves.  Since I was making it in fleece, I opted not to make inner facing and simply to turn down and hem the neckline.

One modification to the pattern instructions:  (If you sew, this will make sense; if you don't, you will be fine following the enclosed pattern instructions the first time out.)  The pattern wants you to sew the front and back totally together, leaving arm holes, then sew the sleeves into tubes, then sew the sleeve-tubes to the arm holes.  That's a lot of circles in my book.

Instead, I sewed the shoulder seams of the tunic, then laid it flat and pinned the flat sleeve pieces to the shoulder curves and sewed it up.  Then, I sewed the entire side of the tunic, from fingertip of the sleeve to the bottom hem, all in one straight seam.  It worked great.

The Analysis:

Fast:  I cut and sewed this tunic in about an hour.  It was really very pleasant work.

Cheap:  As stated, I got the pattern on a 99 cent sale and got enough fleece with a coupon for $15.  Therefore, I got this tunic for $16 to replace a flannel nightshirt that I had loved to death.  I had been pricing nightshirts elsewhere, and something comparable was probably going to come in at about $50.  Savings:  $35, not bad for an hour of effort. (And I won't have to re-buy the pattern to sew pants or a short sleeve tunic.)

Good:  My new nightshirt is soft and warm and just the thing to get me through the next month or so of cold, until that garden is started in earnest.
Pin It!

Tuesday, February 8, 2011

Going (Sort of) Plastic Free


Now, don't get me wrong:  there's a place in the world for plastic.  I have been a medical writer for years, and I know that there are medical devices that rely, quite necessarily, heavily on plastic.  I wouldn't want to try to take all of that out of the world.  Heck, I'm even old enough to remember television commercials touting plastic shampoo bottles as a safer alternative to the glass variety that would shatter if dropped on tile floors near bare feet.  Plastic can be durable and lighter to transport. 

However, when it comes to plastic in my food, that is where I draw the line.  It is bad enough that I have to worry about GMOs, pesticides, herbicides, antibiotics, and hormones, but plastic adds another chemical threat that can leach into food and do God-knows-what to our bodies.  Just the other day I saw the epitome of plastic insanity:  Reynolds (the aluminum foil people) have come out with plastic baggies you can put in your slow cooker so that you run absolutely no risk of having to clean food out of your crock after cooking.  That's right:  you have the opportunity to cook your food in plastic for 10 hours so you don't waste 10 minutes applying some elbow grease.

That's why I was glad when Rodale.com asked me to take part in Rodale.com's Plastic Free February.  Bloggers across the country are going to see what happens when they try to eliminate plastic from their lives for a day, week, or whole month.  Here is my first report:

Day One - The Grocery:  It is virtually impossible to go to the grocery and not buy plastic.  Forget about anything approaching a convenience food.  I try to make as much of our food as possible from scratch, but hey:  I work two jobs and have a raging sweet tooth.  Even at the best of times, I can bake a batch of cookies a week, tops.  But those Oreos I covet come in a little plastic tray.  Thank heavens Pepperidge Farm Milanos come in paper sleeves in a paper bag.

Think you can avoid plastic by shopping the perimeter of the store?  Think again.  Fruits and veggies may be bare, but you have to remember to bring your own bags or you are left to use those little plastic ones from the dispenser.  I don't know that I've ever seen cheese that wasn't wrapped in plastic.  And even milk:  if I want to buy in volume (that is, a gallon), I have to buy a plastic jug at our store.  Or, I can schlepp across town to buy the local, sustainable version in the glass half-gallon jug shown above.  It is hormone free, mostly grass-fed, three times as expensive as the regular store brand -- and it still has a plastic handle.

Day Two - Food Storage:  I'm lucky that I'm an avid home canner, because I can refrigerate and freeze  many foods in canning and freezing jars.  However, if I don't want to use the canning lids (unnecessary if I'm not canning), my only option is a plastic screw-top lid.  Even the disposable canning lids (the flat metal ones) are coated with plastic on the inside.  Luckily for both of these options, the lids rarely touch the food.  I've found a canning lid not coated with BPA that I plan to try this year, but it is a more expensive option.

Otherwise, food storage involves some make-do.  We put leftovers on plates and cover with a bowl.  Investing in glass storage containers is worthwhile, but it will take some time and some money.

Day Three - Food Prep:  At last, something that I can control.  Or can I?  Look around your kitchen and see how many utensils have plastic handles that might touch your food.  And heaven forbid you decide to use a non-stick pan; plastic and silicone tools are basically your only options.  I suppose I could commit myself to using my cast iron dutch oven and my wood and metal granny fork....

The Lesson:  Just three days of trying to eliminate the plastic that touches my food, and it is an epic fail.  And remember, I'm a person who has committed herself to high quality food.  I grow my own, I source things locally, and I cook from scratch.  I'm well-educated enough to assess the dangers and benefits of plastic, and I make enough money to afford to make extra trips to the local bodega for milk in a glass jar or to buy a bunch of glass food storage containers.  Even with these advantages, I can't realistically make a choice to totally eliminate the plastic that touches my food -- to say nothing of my toothbrush, my bottle of mouthwash, or my bottle of pain relievers.  What does that mean for those who don't have those advantages? 

What do you think?  Have you tried to reduce plastic?  Is it worth it?
Pin It!

Wednesday, February 2, 2011

On Being Prepared, Pt. II


So, the second wave of the Great Ice Storm of 2011 has blown through, and we indeed lost power for 12 hours.  So, I thought I'd report on the effectiveness of some of our preparedness.

The power went out just before 10 pm last night, and I immediately asked Mr. FC&G if he wanted me to make an olive oil lamp.  I bought the parts for my olive oil lamps from Lehman's right after Hurricane Ike, and to be honest, I felt pretty darn stupid doing so.  I have candles and flashlights, so what was I thinking gearing up to build emergency lamps?  But last night, I was thrilled to have done so.  Right now you can buy a pack of 6 wicks and inserts for $18.95; you provide your own mason jar.  Mason jars are the best container because they can handle heat well.  Basically, the inserts and wicks come in a very small bag that I tucked in a drawer until the time came to use them.  Once I had put together a couple of lamps, I found that they created a much brighter light than candles with virtually no smoke or odor.  (When you blow them out, there is a faint odor that reminded me of fried chicken.)

Mr. FC&G also showed his true preparedness cred by reminding me that he had a stock of Boy Scout camping gear in the garage if we needed to cook, and he remembered to let the faucets drip to keep the pipes from freezing.  He also really took one for the team in the form of getting up every two hours to check the pipes and looking to see if any trees had fallen (we did lose a large pine branch, so I see a fatwood creation project in our future).  I snuck downstairs at 7 am and threw another quilt over him on the couch.

Finally, I have to comment on how helpful Facebook was in this emergency.  While it is probably not a long-term communication solution in a big emergency, I really appreciated seeing everyone across town and across the country reporting on power outages and causes.  I knew a transmitter had blown in the neighboring town almost immediately as it happened and significantly before the media reported it.

How were you impacted by the storm?  Were you prepared?
Pin It!

Tuesday, February 1, 2011

On Being Prepared


Today was the first day of an anticipated two-day storm that has been called both "record-breaking" and "catastrophic."  Mr. FC&G and I woke up at 6:15, and he immediately looked out the window and then went down to check on the condition of the driveway and streets.  I grabbed the iPhone and powered up Twitter long enough to find that the college was closed and by the time I was finished, Mr. FC&G was back.  "It's slicker than snot on a doorknob," he said and dived back under the quilts with me for another hour.  When I got up, I knew this was the perfect day to share with you some of my thoughts on preparedness.

If you search online for sites dedicated to preparedness, you are in for a full afternoon or six reading various people's thoughts about how to prepare for situations ranging from bad to worse.  Many people couch their preparation efforts in terms of events that they wish to be prepared to handle, whether that is job loss, dramatic inflation, political unrest, extreme weather, or even less-likely events.  While the chances of any one thing going wrong may be small to infinitesimal, the chances over a lifetime that you are going to have to deal with a period of going off the grid, being separated from modern conveniences, or having an emergency that you have to handle yourself are pretty great.  Being able to do so is part of living a self-sufficient, sustainable life.

Think you'll never need to be prepared to rough it a little?  In just the last five years, I've had to deal with the breakage and replacement of a sewer pipe, a fender-bender that left me without transportation, the tail end of Hurricane Ike, and now the great ice storm of 2011.  Each of these situations has benefited from me being prepared in various ways, and all were more or less unforeseeable in the long term.  So, I'm not the type to prepare for a specific situation.  Rather, I suggest you begin your preparedness efforts by looking at the amount of time you could possibly be "off the grid," separated from one or more of your conveniences.  Let's look at some examples:

Less than an Hour:  The power goes out to your home in a random thunderstorm.  Do you know where your flashlight is?  Your spare set of car keys?  Can you find first aid supplies and any medications you may need in the dark?  If you are at work, do you have enough gas in your car to get home?  Is it safer to stay at work?  How would you decide?  Is your cell phone charged?

More than an Hour but Less than a Day:  You lose power in an ice storm like we're having today.  Do you have back-up heat that doesn't rely on electricity?  Where are your extra quilts?  Do you have enough food in the house to make a meal without a stove?  What do you have to drink?  Will your freezer stay cold for 24 hours so that you don't lose what you have stored?  Do you have a hand-crank emergency radio so you can get updates?  How about some candles?

A Day to a Week:  Hurricane Ike took us off the grid for over four days.  How will you prepare meals?  Do you have a week's worth of food stored; if not, what if groceries are unavailable in the store?  Do you consistently keep enough gas in your car for an emergency supply run if the gas stations are unavailable?  How will you reach friends and family who are worried?  Where's your passport?  You might not be travelling internationally, but it is the best form of ID we currently have.  Do you think you need a generator, a heater, a water purification system?

A Period of Months:  A job loss, a hyperinflation, or (heaven forbid) a system collapse of some sort occurs.  What survival skills do you have?  Can you grow or trade for food?  Do you know how to repair things around your house?  What medical skills and supplies do you need?  How much can you rely on your neighbors; how much do you want them to rely on you?

None of this is intended to frighten you.  The more extreme the imagined circumstance, the less likely it is to occur.  However, it is a good exercise to imagine scenarios that could leave you without your normal resources.  Start with short term losses of one resource like, as mentioned above, a power outage for a limited period.  Work your way up to more long-term and widespread problems.  Discuss plans with your family.  It might be a good idea to write down your plan, then revisit it occasionally. 

Postscript:  How did we prepare for this storm?  We are in pretty good shape, considering we have a lot of stored food from the summer, piles of quilts, a snowblower, a pile of wood and a fireplace insert/stove.  We charged the phones and got an extra can of gas and some kerosene for the heater.  Mr. FC&G ran to the store for some comfort food items, but we would be OK for many days without.  And so far, we are snug and warm in a house that still has power.  We may not need any of our preparation items, but we'll use up our stock and then restock as needed.  Being prepared and not needing it is far better than doing without.
Pin It!