Wednesday, October 3, 2012

In Praise of Scratch Cooking


Once again, living on a food-stamp-sized budget is in the news, as bloggers attempt to restrict themselves to spending only the amount they would theoretically receive in SNAP benefits on food, and seeing what happens.  I've tried this experiment once before, and not much has changed in the interim.

Except, I have been thinking about why Mr. FC&G and I can easily bring our grocery bill in at a fairly low level, and I've come to the conclusion that most of it comes down to cooking from scratch.

You can see my grocery totals for September at the right (written, of course, on my Key West Calendar, so I'm always aware of my motivation for being a cheapskate!).  September's grocery bill came in at about $353, a good $14 under the maximum SNAP budget of $367 for a family of two, but certainly above the $4 per person per day that some bloggers use.  That lower budget would have allotted us $240 for the month.  However, note that September included a number of expenditures that aren't covered by SNAP benefits, most notably the last grocery trip of the month which included new bed pillows, a new dish draining rack, and make-up and hair products.

I really think our ability to eat on far less than $100 per week is attributable to scratch cooking.  I rarely do anything but; I can't imagine buying primarily prepared foods, and I generally buy ingredients, not meals.  Yes, my freezer does have a few boxes of frozen foods for "emergency" nights, but generally my meals consist of pasta dishes with fresh garden herbs and veggies, homemade soup made with my own canned stock, and, on the weekends, beef roasts or whole chickens slow cooked with garden potatoes and onions.  I buy pasta, but I also make a lot of my own noodles and dumplings, and the fresh-baked bread disappears around here almost as fast as I can make it.

In fact, I bemoan how high our grocery bill is, because I know that what I am buying is at least in part junk.  That grocery total is driven up by luxuries like Pepsi for our daily pop indulgence and cookies to address the sweet tooth.  Certainly, I'm attempting to do more baking of our sweets, which helped September considerably, but my love of desserts will always be our downfall (and the reason I'm glad I dance four nights a week and garden the rest of the time!).

My lesson for controlling the grocery budget?  Sadly, it isn't clipping coupons or looking for sales.  Instead, it is finding that universe of meals you can make from real ingredients, not from boxes of prepared foods, then making those recipes every night without fail.  Make a bunch -- I always make 4-6 servings at minimum, even for two of us, because that will cover another lunch and dinner.  Make ahead and freeze if you can.  Make recipes that do double duty -- that chicken that feeds Mr. FC&G nearly all week will turn into wonderful stock when we are down to the bones.  But, if you really want to save on groceries, I see no better solution than to get into the kitchen and cook.
Pin It!

Thursday, September 27, 2012

A Week in the Sustainable Life

Sometimes, I get to the end of the week and realize that I haven't done a lot of new projects to share with you.  Rather, I've repeated a lot of old projects, and they've gotten me through a busy time.

Spring and fall are most like this.  The garden is either not yet producing or just finishing up, so there's little to talk about there, and crochet/knit/sewing season is not really upon us.  This week, things were really busy around here work-wise, and that meant some repeats of old sustainability projects to keep things on track:


  • We are enjoying the very last salads from the garden, as you can see at the right.  The lettuce is producing like crazy, but the tomatoes are finished except for the box of breakers I harvested this week.  They will ripen, but they will really best work in sauces, not in salads.
  • I'm continuing on with my Tunisian crochet.  In spite of what I said earlier in the week, the ragged left edge bothered me, so I tore out some of my piece and crocheted it back.  Now, I need to go back to that excellent tutorial and learn to bind off.
  • Carrot Creations, my Very Part-Time Job, is going great guns.  I love that I know whenever a chilly spell settles over the country, because my yoga socks start selling more rapidly.  Most of my crocheting time is spent on that, which gives me something to do while Mr. FC&G and I get caught up on Downton Abbey.
  • I quit the second shift job, which means I'm officially down to a full-time job and Carrot Creations.  This means less excuse to bike to work, but it also means less time in the car once the weather gets nasty.  Sorry, but I'm a fair-weather bike commuter; I don't bike when it is raining, snowing. or below 60 degrees.  
  • Mr. FC&G has been crazy-busy, so he has appreciated having a supply of homemade frappuccinos in the fridge as his caffeinated drink.
  • However, I must admit that I'm personally having trouble with the season switch.  My business has been going great guns, which, as Mr. FC&G notes, is a "high quality problem," but it takes away from the time to really cook well.  I need to think of some good meals to make that don't rely so heavily on lots of prep time or goods from the garden.  Last week, I bought a $17 grass-fed chuck roast at the farmer's market, which is expensive, but it will certainly feed Mr. FC&G for several days and throw off a nice bone for stock, too.  I plan to make it on a day I have a few hours to put it in the oven with potatoes and onions and enjoy the stove heat as well as the smell.
  • Finally, it is not quite time to Freeze Yer Buns, but we have had the AC off the majority of the time for the past month, and the heat will not be turned on until we can't stand it.  We're having a mild fall, which I hope continues.  And, one of the best things about quitting the second shift job is that I will be home all day (in my home office), which means I can babysit a fire in the cookstove to heat the house.  I just never feel comfortable starting one and then leaving for the afternoon, so now I can use that as our primary source of heat on chilly-but-not-cold days.


So what are you doing this fall?  And what should I make for dinner that doesn't depend on tomatoes and cucumbers?  Weigh in below!
Pin It!

Tuesday, September 25, 2012

Sustainable Pin: Tunisian Crochet

I love to crochet, and I also love to knit.  And I love to discover new methods that create different effects and different types of finished fabrics.  That's why I'm in love with the technique I learned through today's sustainable pin:  how to do Tunisian crochet.

Our inspiration blogger is Crocheting the Day Away.  Go take a look at her excellent tutorial.

Basically, Tunisian crochet uses a really long crochet needle called an afghan needle.  It looks like a long crochet hook with a stopper on one end.  This lets you do a technique that is between knit and crochet.  It uses just the one hook, so that feels very similar to crochet, but it requires you to crochet the stitches onto the needle and then back off, just like knitting.  As it turns out, it seems to have just the right blend of what I like about both knit and crochet, so I am captivated.

One caveat.  When you "turn" at the left edge (which is not really a turn but just a reversal) be extra careful to make sure you make a stitch in that final "bar" at the end.  If you miss it, you will decrease your fabric on that row.  Learning to do this step correctly has meant that my test work piece has a very raggedy left edge, but that's why I always do dishcloths first when I'm learning -- I don't feel compelled rip out errors, because if people are criticizing my dish cloths, they are getting way too involved in the details of my cleaning routine.  

I think this is a great new stitch to have in my repertoire, and I'm very happy to have a new fiber arts skill!
Pin It!

Wednesday, September 19, 2012

How Much Does a Garden Grow: August

I have to say, I've actually been dreading working on this post because there is so much accounting involved! Next year, I am definitely making changes to my garden spreadsheet, because it took an hour to record all of the produce harvested in August!

August, obviously, is all about the tomatoes.  All together, I harvested just over 39 pounds of tomatoes in August, which is far from what I have done in the past, but which is better than last year.  (Last year was 28.5 pounds of ripened tomatoes total; I'm still not done this year, so I'm ahead.)  This is all nothing compared to the year I brought in 75 pounds of tomatoes in one week, so we are far, far behind on production, but at least this year I have tomatoes in my pasta, tomatoes to can (some), and tomatoes to eat by the plateful in slices and in salads.

However, the thought of how comparatively bad the tomato years have been around here gives me a bit of a sick stomach ache.  I have to remember that we take the good years with the bad, but in the best years I know that we are hardly even buying groceries in August.  This year was better than last, but it is far from what I would want to have.

However, rounding out the month was the harvest of onions, butternut squash, potatoes, cucumbers, and beans.  I also continued to bring in greens by the handful, which certainly makes this the easiest and highest value-per-ounce crop that I grow.  That's good, because I have greens aplenty started to move into the sunroom, where they will grow much more slowly over winter, but they will continue to grow.  Last year, I grew the summer greens well into the following March, so hopefully I can do so again this year.

And, luckily, we are finally into profit mode for the garden.  Even with the lackluster past couple of years, we are turning a profit with the gardening, which is certainly a help for that grocery bill even if I do still have to go shopping!

2012 Tally to Date
131.9665 lbs. total harvested
$195.62 value of harvest for August
$361.76 value of harvest for 2012
$196.65 expenditures for 2012
$165.11 profit to date
Pin It!

Thursday, September 13, 2012

Homemade Tomato Soup

One thing is for sure about September tomatoes -- they aren't August tomatoes.  As the garden starts to wind down, I have a crop of small and somewhat less juicy tomatoes that I nonetheless want to enjoy.

What I haven't enjoyed for a while is a bowl of tomato soup.  Concerns about BPA in the linings of the cans have caused me to avoid my normal brand, and I haven't yet found a replacement I love.  So, what better to do than to make soup with these last tomatoes.

I started with inspiration from AllRecipes.com  I love recipe sites like this because I browse several recipes in the category I want to make to learn the typical proportions, then I change the flavor profile to fit what I want to eat.  In this case, I learned the proportions of stock to tomatoes, then figured out spicing on my own.

Homemade Tomato Soup
2 c. stock (homemade if you have it)
4 c. tomatoes, cut into quarters-ish (garden tomatoes)
1 t. dried basil (hopefully from the garden)
1 small onion, quartered (again, hopefully from the garden)
a few grinds of salt and pepper
1-3 T flour

Simmer tomatoes, onion, and spices in stock until the tomatoes start to get mushy and the skins peel back -- kind of like you would expect if you were making tomato juice or sauce.  Pass the entire soup through a food mill to remove tomato skins and seeds and onion pieces.  Return to pot and cook on low, adding flour slowly until the soup thickens slightly.

The Analysis

Fast:  I would say I made a batch of this in about 30 minutes total, so homemade still possible on a busy night.

Cheap:  Everything but the flour and the salt and pepper came from my garden or my pantry supply (homemade stock), so I think my cost for two big servings of soup came in at under 15 cents total!

Good:  Soooo much better than the stuff from a can!  I hope I have enough tomatoes to do this at least one more time this year.
Pin It!

Sunday, September 9, 2012

More About The Container Potatoes

The recent post on container potatoes has stirred up a bunch of questions.  Some of them you can see on the original post, along with my answers, but some were asked of me in person.  So, I thought I'd aggregate what I learned in this post for those of you still curious.  Please, keep posting questions and your own experiences!

What kind of container should I use?
You can really use any container you like, but tall is what you are going for -- I use a plastic decorative planter from the hardware store that stands about three feet tall and two feet wide.  You could use anything -- a half barrel, a whole barrel with the top cut off, an industrial container (as long as it didn't hold chemicals or petroleum or anything you don't want to eat), or a tall-sided raised bed.  Just remember that you don't want to use something so big you can't lug it outside and tip it over when the time comes.  My container is at the outside edge of what I can roll to the garden and tip once the vines are dead, and I am pretty strong for my size (although you wouldn't know it to look at me).  If you grow in a raised bed or accidentally grow in one of your compost bins, you will have to dig in order to get your potatoes.

Can I use plain old store-bought potatoes or do I have to buy seed potatoes?
The beauty of this project is that you will never throw away another potato that started sprouting in your potato bin; just shove it in the container and let it grow.  That said, it is better to buy organic potatoes than conventional potatoes, because the conventional ones are treated with a chemical that discourages greening and sprouting, so they obviously are less likely to grow in your container.  That said, I have grown potatoes from conventional store-bought "seed."  I just no longer like the idea of consuming that growth-retarding chemical, so I buy organic.

What do I fill the barrel with?  How am I going to get dirt to fill it in the winter?
The beauty of this is that potatoes are very shallow-rooted, so maybe 4 inches of good dirt in the bottom is enough for the roots that grow from the seed potato.  The rest is stem; you bury the stem as it grows, and new potatoes grow from the stem.  This is why you want a tall container more than a wide one; you want lots of vertical room for a single potato stem to grow potatoes.

So, what do you fill the container with?  Potato stems aren't picky; I've heard of folks that put just straw or pine needle mulch around their potatoes.  I do a mix of pine needle mulch and some fresh dirt or compost.  I figure the mulch decomposes while my potatoes grow if I introduce the healthy bacteria from the compost, and I will be dumping finished humus on the garden when I harvest my potatoes.  I always keep a container or two of sifted, finished compost in the sunroom over the winter for repotting plants and for projects like this, so I don't need to dig into the compost pile on a 17 degree day.

Is this really worth it?
If you've ever been frustrated by buying a bag of potatoes only to reach in a couple of weeks later and find that you have a pound of sprouts rather than cooking potatoes, you know the answer to this one!  This is a great way to combat the food waste problem in your house, and it will ultimately take a bit of money off your food bill once you start replanting your container from "seed" that you grew yourself.

What are your experiences?
Pin It!

Thursday, September 6, 2012

Sustainable Pin: Homemade Frappuccino

What a crazy week!  Thursday already, and I'm just getting the chance for my first blog post.  Whew!

I'm having enough fun with this Sustainable Pin column that I thought I'd offer another.  Today, it is a recipe for homemade frappuccinos as you would see bottled and sold for about $1.25 a bottle when under the Starbucks label.

Mr. FC&G loves frappuccinos.  We used to buy the bottled variety at the store for him to grab on the way out the door to work, but he quit drinking them because of the presence of HFCS.  Unfortunately, he needs something with caffeine to make sure he is awake to drive to his client sites, which sometimes require early mornings or late nights or both.  So he has switched to energy drinks, which are not a lot better.

Good thing I found this recipe by Christina Flis.  Go check it out.

OK, so the original recipe called for 10 cups of coffee, which is more than my percolator makes.  It turns out I had to adjust the recipe to work with the four cups of coffee I could make at a time, which was no problem.  Obviously, I didn't add the alcohol that Christina added for her birthday celebration, but I like the way she thinks, and I will take note for the future.

Four cups gave me about two and a half bottles of frap, which is good because I only have four of these bottles saved to fill with homemade drinks, although I suspect I will be adding to the supply.  I'm not a cold coffee person, and I thought these were yummy.  Mr. FC&G is a fan of cold coffee, and he liked that these had a bit more coffee flavor than do the name-brand variety.

In the future, I think I will save the extras from our morning coffee (from the pot, not from our cups!) in a carafe in the fridge, then make this recipe when I have 10 cups, which should happen every few days if I make a whole pot of coffee each day.  That will prevent me having to make pot after pot of coffee when I want to do a batch.

The Analysis

Fast:  The recipe is easy to make and easy to bottle if you have some empty, sterilized bottles and a funnel.  Even faster if the coffee is already made; I'm not worried about using "stale" coffee, because these will sit in the fridge anyway.

Cheap:  Even with the name-brand Bailey's creamer (which is totally worth it), this probably comes in at under $1 per batch instead of $1.25 per bottle.  If Mr. FC&G is going to drink something like this, it is cheaper if I make it for him.

Good:  Tasty, and no HFCS.  It is still high in sugar, so you can't drink these continually, but if you need something for a pick-me-up, this will hit the spot.


Pin It!

Friday, August 31, 2012

The Container Potatoes are a Success!

I really enjoy growing potatoes, even though my results are pretty mediocre.  I love having an excuse to plant something in March, and I like to see how long I can keep myself from sticking my hands into the hills to find new potatoes.  I also love the Easter-egg-hunt quality of the harvest; you don't know what is down there until the vines die back and you dig into the hills.

But I have been harboring doubts that growing potatoes is the best use of our land.  We have put in a couple of rows of potatoes the past couple of years, and we really get maybe the equivalent of a bag of potatoes back.  This is after a lot of digging for planting by Mr. FC&G, and it is after injuring quite a few potatoes that, in spite of liberal additions of mulch to the hill, still seem to get embedded in the clay-y soil and then accidentally get hit by a shovel.  Truly, I have to admit that there is little ROI in this project.  It isn't Fast or Cheap, with the saving grace being a small supply of organically-grown specialty potatoes like the blue ones I so love.

So, this year I experimented as well with the container method.  I put about 6-8 leftover potatoes (maybe 3 Yukon Golds and 5 Blue) in the bottom of a large pot (about 2 feet in diameter), and I covered the vines as they grew.  When they got over the top, I just let them go and ignored them.

The vines lasted way longer than my other potatoes; I put these in the container sometime in April, and I just moments ago (that is, August 31) tipped the container over in the garden to see what I had.  I had what you see above and below:

The total harvest gave me 7 ounces of Yukon Gold and a full pound of Blue.  Not a huge amount, but that's a couple of meals right there, and I really didn't use up any land to do it; I just had that container sitting in a corner of the yard.  Also, all of the potatoes were perfect and uninjured, because I didn't have to stick a sharp shovel into their growing space to find them.

That's the way I'm doing my potatoes from now on.  I have the container ready again, and I have a handful of small Blue seed potatoes sitting out in the sunroom to green up.  Once they do, I'm planting another round, and hopefully I'll have a harvest in January.  The sunroom, where the container will ultimately reside, stays in the 50s year round, so I think the potatoes will love it.

The Analysis

Fast:  This was much quicker and easier, as far as prep and harvest, than the in-ground method.  Let's save Mr. FC&G's muscles for breaking more sod in the spring.

Cheap:  There is no cost difference with the in-ground method, but this method seems to give me larger and more potatoes per seed potato, so definitely a bigger payoff.  Also, if I can get potatoes growing year-round, that is a small additional weight off the food budget in mid-winter just when the canned and frozen goods start to give out.

Good:  I'm a pretty happy camper on this one.  From now on, my potatoes all go in containers.
Pin It!

Wednesday, August 29, 2012

Sustainable Pin: Brownie Mix

Like many people, I am addicted to the social pinboard site Pinterest, and I have discovered a lot of great ideas.  And, like many people, I am having fun testing these ideas to see what works for me.  So, I thought we'd start a new occasional column:  Sustainable Pin.  This feature will take a look at a popular pin and rate it on the Fast, Cheap, and Good scale.

Our first Sustainable Pin comes from Fake-It-Frugal, with her fake boxed brownie mix.  Let's show this blogger some love and click on over to her site for the recipe; I'll wait.

OK, welcome back.  The purpose here was to recreate boxed brownie mixes so you have the convenience of the box without the expense.  I can definitely rate this one a winner.  The mix is incredibly easy to make up in bulk and store; as you can see, I mixed up several jars' worth and put them in the pantry this weekend.  They are really easy to grab and mix with the wet ingredients to get a fresh batch of brownies when you are short of time.

The brownies bake up just a little thin, which is common with the boxed mixes too.  I extended the cook time to 25-30 minutes, which may be due to my oven or to the fact that I have clear glass brownie pans.

The Analysis

Fast:  The mixes are easy to make, and this makes a fresh pan of brownies a possibility even in a busy day. I would imagine this would be a nice school night treat for busy families with kids, too.

Cheap:  Our original blogger put the mix cost in at $0.30.  I did not recalculate, but that sounds about right. Even once you add your farm fresh eggs, oil, and organic vanilla (which is how we roll here at FC&G), you should be able to get a complete batch of brownies for less than half the cost of the mix alone at the store.

Good:  We have eaten 3 pans of these in the past four days.  All in the name of testing a pin for you guys.


Pin It!

Friday, August 24, 2012

Sustainable Technology

"Planned obsolescence" was a term coined by marketers in the post-WWII era to describe the process of creating items that the consumer would want (and later, need) to replace after a very short time.  After WWII, companies that had not been able to sell products either due to rationing, lack of money, or conversion to war materials production during the war enjoyed a boom in purchasing as their production capacity returned to normal and consumers released pent-up demand in the form of shopping.  And shop they did -- for cars, houses, appliances, and all the items we now associate with the "American Dream."

But soon, marketers feared that the demand could not continue, and the idea of planned obsolescence was born.  If you've ever wondered why appliances suddenly started changing colors every year or why the fins on 1950s automobiles grew larger and larger with each model, you can look to planned obsolescence for the answer.  One automobile exec of the period commented that he wouldn't be satisfied until the average consumer purchased a new car every year.

This is the long, history-instructor introduction to my point that technology has raised planned obsolescence to a new level.  Without pointing a lot of fingers right now (because most tech companies are guilty on some level), I will say that I am beyond frustrated with the pressure to buy new tech just because the screen resolution is better or the case is sexier.  And those sexy cases come with a price -- Apple's attempt to make their new devices slimmer has led to smaller dock connectors, requiring the purchase of new cords, new peripherals, or at least new adapters, and their beautiful new glass iPhone bodies have to be encased in an after-market rubber shell soon after purchase or they cannot survive a 12 inch drop onto a wood bedroom floor (not that I would know that from experience....ahem).

Anyway, I like new devices as much as the next girl, but I get even more frustrated when the devices that made my life better suddenly are unusable due to changes in software or operating system or connection.  That's why I was so pleased to finally be able to download the right drivers and software to resurrect my old AlphaSmart Dana and get her back into the writing process.

The AlphaSmart was designed in the 1990s as a laptop replacement for K-12 schools that couldn't afford to give each student a fully-functioning laptop to use during the day.  Therefore, the AlphaSmart solves a lot of problems:  it is cheap; it is virtually indestructible; and it really is only useful for writing rather than designing, illustrating, or formatting.  Because of these features, professional writers like me flocked to the AlphaSmart as a travel option -- it slides into a purse or briefcase, can withstand a drop or two, and is instant-on.

Now, all of these features (sans the drop-ability) are now supposedly offered by laptops and tablets, but let me tell you, nothing makes me as productive for certain types of articles as the AlphaSmart.  The keyboard lets me type quickly and with few errors, and the little screen makes me focus on the paragraph I'm currently writing rather than looking at the whole document or surfing out to Facebook or email when I get stumped.  For an article that won't require a lot of online research -- so, many of the articles I write based on an interview with a single subject matter expert -- I can just sit down, open my file of quotes for reference beside me, and focus only on creating the words I need.  Then, I attach the HotSync cable and upload the document into a Word file for editing and submission.

So far, I am reminded that I write better on the AlphaSmart, and I write quicker, too.  The other night, I wrote 600 words in 45 minutes, a number that would have taken about two hours with the distraction of a computer; last night, it was 400 words in 20 minutes.  I am producing my work better and faster -- and that's sustainable (and fast and cheap!).  I bought my AlphaSmart in about 2000, and I hope she lasts many more years.  Long live the AlphaSmart!
Pin It!

Tuesday, August 21, 2012

Dilly Carrots


"How are the carrots this year?"

Every year, my father-in-law asks this eagerly, and for the past couple of years I've had to disappoint him.  The carrot crop has either been thin or extremely late, which has meant that I didn't have high quality carrots to make his favorite recipe, dilly carrots.

This is a creation of mine born of a little experimentation, and it is a great thing to do with extra carrots, especially the sweet round Ox Hearts I am growing this year.  It is a nice alternative to freezing carrots, especially if you like to snack on them year round.

Dilly Carrots
(Note:  this recipe makes two pints of canning syrup, which you won't need if you have two pints of carrots.  I tend to make too much because I like to pack my carrots loosely in the jar.)

2 c. cider vinegar
2 c. sugar
1 head of fresh dill per jar (substitute 1/2 to 1 t. dill seed if your dill weed has finished for the season)
1/8 t. cloves
1 t. celery seed
2 pts. carrot rounds or sticks

Pack carrots and dill raw in sterilized jars.  Bring remaining ingredients to a boil, and fill jars.  Wipe threads and seal.  Process in water bath canner for 25 minutes.

The Analysis

Fast:  As far as a carrot preservation mode, this is faster than pressure canning and slower than blanching and freezing.

Cheap:  Normally, I compare things to their retail prices, but I have never seen pickled carrots on the store shelves.  Suffice to say, if you grow  your own carrots and dill, the rest is pretty cheap.

Good:  I think my father-in-law would agree, these are pretty yummy!
Pin It!

Wednesday, August 15, 2012

Silly Sustainability Products


I generally don't make a lot of fun of products for being unsustainable in nature.  For one thing, if I really dedicated myself to making fun of products, I'd be doing nothing but.  For another, most products have an ideal customer; what I think is silly you may think is a justifiable luxury or a downright necessity to getting things done.  However, I have recently found a couple of products I think are just really silly:

The Williams-Sonoma Garden Implements:  Oh, this is like shooting fish in a barrel to make fun of these garden implements from America's favorite gourmet cooking store.  While I applaud their extension of cooking into gardening (which should be a natural for foodies, anyway), I laugh at the prices.  This long-handled garden fork will set you back $299.95 at the top of the price range, boasting its copper-alloy head.  Instead, I think I bought the warren hoe you see at right for about $30 from Home Depot, and high-quality garden forks that weren't so decorative were available at comparable prices.  I shudder to think of blowing my entire garden savings for the year on something beautiful I would soon be sticking into the compost to flip it.  To be fair, some of the hand tools in the line are of a more reasonable price.

Ball FreshTECH Jam and Jelly Maker:  Again, my heart hurts a little to make fun, because I buy a great deal from Ball each year in the way of jar lids, canning implements, and extra jars.  However, this labor-saving device takes the cake.  All you have to do is add fruit, pectin, and sugar, and soon you are rewarded with fresh jam to eat, freeze, or can.  Except, all you ever do to make jam is add fruit, sugar, and pectin and cook it for a while.  Making the jam is not the hard part.  Actually, nothing about making fruit jam is difficult; the canning is the only process that takes any thought.  Buying a machine to do the stirring for me seems a little silly.

Water Genie Bottomless Watering Can:  So, let me get this straight.  In order to avoid unsightly piles of hose (why are people so ashamed of garden hoses, anyway?) and to avoid trips to fill up my watering can, you've figured out a way to make a watering-can-shaped hose nozzle?  For just $39.99 of my hard-earned dollars, I can have control over my water flow and avoid looking at my hose.  Or, I can keep coiling it up on our hose rack and use my $7 multi-function hose nozzle that is working just fine.

What is the least-sustainable sustainability product you've found?
Pin It!

Friday, August 10, 2012

What Would You Choose?

Sometimes, sustainable living sort of overlaps with discussions of what choices are the healthiest for us.  After all, it does no good to make a choice that you can keep up for a long time -- financially, effort-wise, or enjoyment-wise -- just to find out it is slowly killing you.

So let me do something a little different today and pose to you the problem I recently posed to my personal Facebook friends, and then I'll give you a bit more context:

You are in an all-day, closed door meeting. Bringing your own water bottle, for the purposes of this question, is not an option. The venue has provided a limited selection of drinks. Do you choose:

A) Regular pop in a can, with HFCS
B) Diet pop in a can, with aspartame
C) Water in a bottle, possibly leaching BPA and other contaminants
D) Dehydration

Here is the additional context:  Occasionally, I have to go on site for a long meeting for a client  These clients are typically very gracious and offer a selection of drinks, and the ones above are common.  I do not expect my clients to be waiting at the door with a Pepsi Throwback, nor do I want to interrupt the meeting flow with a tedious discussion of why I want tap water in a glass or ceramic glass.  I could bring my own water bottle, but I often forget.  This is my own dumb fault, but I constrained the question so we wouldn't all get into a discussion of how to sneak a water bottle or a can of Throwback into my purse, or what BYOB does to the flow of the meeting.

A few months ago, I was in just such a situation.  I didn't think to supply myself with a beverage of choice, and I was in a long meeting with a very gracious selection of beverages, each of which raised its own red flags:

Regular pop with HFCS?  Well, I try to stay away from HFCS, and all I could think of is that the HFCS almost certainly is made with some if not all GMO corn with incredible pesticide and herbicide exposure.

Diet pop with aspartame?  In this case, I know that I underwent a torturous few weeks several years ago getting myself off of aspartame because of possible health threats from it.

Water in a bottle?  Some bottles can release BPA, potentially dioxin, and God knows what else, particularly when heated.  I had no way of knowing if my bottle had been sitting in an overheated truck or not.

Dehydration was not an option for me that day, although I am pretty good at it.  (Ask me sometime about the 12-hour travel day that included a layover in the Pittsburgh airport.  I do NOT go to the ladies room in Pittsburgh.  Sorry, Pittsburgh readers -- the rest of your area is quite pleasant.)

Basically, I think I concluded that anything I drank had a downside that day.  So I wound up having a diet pop and then a bottle of water.  (It was a long meeting.)  Even after getting off the diet pop, I allow myself one per quarter, so I just counted this one as my "treat."  The water I figured was the best choice beverage-wise, and that I would simply have to hope for the best with the container.  The regular pop I dismissed because I just don't like the flavor after switching to all products made with natural sugar

However, I find it a little sad that, of the mainstream products available for hospitality, every one has a potential health consequence even BEFORE you factor in things like connections with obesity, etc.

So, sound off.  What would you have picked?


Pin It!

Tuesday, August 7, 2012

How Much Does a Garden Grow: July

July was all about the zucchini,, as you can see from the super-close shot to your right that was meant to show them and the cucumbers off without showing you my currently-messy kitchen counter.  We finally started bringing in some produce, and when we did, it was the zucchini show.

Zucchini:  With a harvest coming in at 31.75 pounds and the price still hovering at $2.99 a pound for organic zucchini, this was my food staple for the month.  I shredded and froze a whole bunch, and I put zucchini in everything we ate.  Almost literally.  I mean, check the July blog posts, and that isn't even the half of it.

Potatoes:  The Yukon Gold potatoes, which I planted from store-bought organics, gave me just 4.3125 pounds, while the first harvest of the blue potatoes was just 13 ounces.  I still have a half a row of blue to account for in August, and a container that I think will beat them all, but for right now, I'm going to say that I think potatoes are a luxury crop that really gives me an excuse to garden in March but otherwise does very little else.  Even the specialty potatoes in the store come in at $1.40 a pound, although I will admit that organic blue potatoes have been impossible to find.

Tomatoes:  Most people I've talked to throughout the Midwest feel their tomatoes are about two weeks behind, and I sort of do too.  We harvested 3.875 pounds of tomatoes in July, enough for a lot of salads, but no canning until just recently.  Store prices for organic tomatoes are $2.99/pound.

Carrots:  3.1875 pounds here, with prices for organics still at $2.99 a pound (recognize a theme in our grocery stores?).  Most of this came from finally finishing out the small bed that I started last year, so most of these were really last year's carrots.  I promptly reseeded the bed, because who knows how long this next crop will take?

Cukes:  3.25 pound harvested in July, and they are yummy.  The low yield thus far is my fault.  For years, I have grown Burpee Pickler and Straight Eights, but this year I got fancy with some heirlooms and grew another kind of pickling cuke.  They are yummy, but they are tiny.  I have a small secondary row of the more traditional varieties warming up, so maybe August will give me some canning cukes.

Onions:  1.875 pounds, mostly pulled an onion at a time for dinner.

Beans:  3.5 ounces.  This is NOT my fault.  The critters really leveled the beans during the drought, even though we put out water for them and put up screens, so the beans have taken a while to recover.  Again, I have a secondary crop coming up and plan to put in a tertiary crop where I just took out the potatoes.

Expenses:  None!

But, but!  We're still not profitable!  Man, this is taking some time, and I really want to show that gardening will help beat the economic woes.  But we still aren't there.

"Don't forget the foregone psychiatry bills!" Mr. FC&G said in his yearly joke.  Yes, that's true.  Plus, I need to figure out how I'm going to account to you for culinary herbs harvested and some medicinal herbs, like Feverfew and St. John's Wort, that would be pretty expensive if purchased.

Still, one of my unfortunate take-aways is that gardening requires upfront investment that doesn't pay back for a fairly long time, and if we are going to use it as a society to help those that are the most impoverished (as I still think we should), we are going to have to support community gardening, rooftop gardening, and other types of communal local gardening that may have to have the upfront costs paid by an outside organization, like a charity or other philanthropic organization.  Luckily, I see more and more of these springing up.

2012 Tally to Date
58.65625 lbs. total harvested
$131.84 value of harvest for July
$166.14 value of harvest for 2012
$185.39 expenditures for 2012
-$19.25 loss to date
Pin It!

Friday, August 3, 2012

Why the Drought Means You MUST Garden

As you are no doubt aware (even if you've gotten a break from hearing about it by the wall-to-wall Olympics coverage), most of the country is fighting a serious drought.  Farmers are predicting low yields on the corn and soy that seem to find their way into every grocery store product, and prices on meat and dairy are expected to go up because factory-farmed cattle (unnaturally) eat mostly the corn that is in short supply.

Frugality blogs and news stories are responding with hints about ways to stock up and find deals in the coming months.  While these tips are generally very helpful, I'm going to take a different position and say that, in difficult growing times, you MUST plant a garden.

Why do I think you can succeed where large farms cannot?


  1. Your microclimate:  Even if you are sitting in the middle of the worst of the heat wave and drought, your own microclimate may lend itself to production of vegetables large farmers can't grow.  A shade tree, a porch for your container garden, or just a slightly low spot in your yard can all make a degree or two difference in temperature and can have different water needs.
  2. Your irrigation needs:  Factory farmers simply can't irrigate as much as they would need this year, and they sometimes are growing crops so closely spaced that their water needs are even more. You, on the other hand, can surely pull out the watering can or hose to douse your small garden.  If you are putting in a fall crop, space your plants a little farther apart so they have more root space to dig for water.
  3. Transportation:  Once farmers harvest their paltry drought-damaged crops, the crops have to be transported multiple times for processing and sale in your area.  In case you haven't noticed, fuel prices aren't dropping either, so you will also pay your portion of those increases.  Why pay to transport crops out of the drought area to your store if you can just go outside and grab your dinner from your yard.
  4. Flexibility:  The large farmers have to grow certain varieties of crops that can grow densely and can withstand the treatment they get, which in many cases mean they grow GMOs and other questionable hybrids instead of heirlooms.  A lot of this is driven by economics and scale on which they operate.  You, as the small gardener, are not confined in this way.  This year alone, we have grown carrots over the winter in a raised bed protected by a cold frame, are growing more carrots in the main clay-y garden by choosing a short, stocky heirloom variety, have a crop of leeks that will probably mature in winter (again protected by a cold frame), and are growing potatoes in a container with plans to repeat the process over the winter.  You can do likewise with your space. 
None of this is meant as a diatribe against individual farmers in the large farm system.  In many cases, I think these hard-working men and women wanted to hold onto a traditional way of life and have been slowly squeezed by governmental, economic, and corporate pressures into farming highly-modified varieties of crops in monoculture -- ironically, exactly the recipe for failure in any kind of temporary shift in the weather.  It will take a culture change to fix those problems.

In the meantime, those of us with small gardens can relieve some of the demand and help our own budgets by growing locally.  If you are a southern gardener, now is the time to plan for your fall/winter gardens; middle and northern gardens should be planting crops that will mature before frost or be safe under row covers or in cold frames.  All of us can be thinking of crops that we can put in large containers in sunrooms, in sunny windows, and under grow lights.  But now more than ever, you really need to garden.
Pin It!

Tuesday, July 31, 2012

Second Year Onions

I don't know much about onions, but I do know that they really aren't supposed to be biennial.  Nonetheless, as you might remember, last year I pitched a gardener's fit when most of my onion starts declined to...well, start!  I dug up the entire crop and got only a few paltry small onions, and a whole bunch of onion sets that looked almost exactly the same as they did when I put them in the ground four months prior, even though they had given me lovely onion tops that had browned and died, supposedly the signal for mature onions.  I threw them all back in the field, mulched over them, and left them for the winter.

So, they started to grow by March, and I have been harvesting medium sized mature onions since almost the beginning of the summer season.  I thought you might like a look at these oddities.

As you can see, each onion I pull really looks like two entities.  On the right is a hard stalk that comes down next to an onion bulb.  The stalk is very woody, but it is very onion-y.  If you are cooking something for several hours, like a stew, these have no problem softening up.  However, I have been taking the easy way out and just throwing the "bulb" part of them into the stock bucket in the freezer.  If I don't wind up with more meat bones and chicken gizzards soon, I'll be making onion stock rather than meat stock!

On the left, you see an onion bulb.  It looks and tastes just like any other "normal" onion, except it has a smaller hard stalk or core inside.  I pop that core out and send it to compost, then dice up my onion as usual.  The onions are sweet and tender, and you would have no idea their rather circuitous path into the world.

Lesson?  It just goes to show that gardening isn't always predictable.  We can read almanacs; calculate germination rates; buy heating pads and potting mix; and chart the phases of the moon, but sometimes you plant things and they don't work.  Or they work in unexpected ways.  But every little bit helps, and the randomness is part of the fun.  I'll be chuckling all summer as I cruise past the onions in the store and back home to my odd little second year onions.
Pin It!

Friday, July 27, 2012

Egg Tea

When I was a kid, my parents spent a summer having our back patio enclosed as a porch.  Of course, I fell in love with the idea.  They let me fill it with plants, each of which I gave a name.  Some of those names are still penciled on the sides of clay pots that I used today.  And every day, I would go out and water my plants, wash their leaves when they were dirty, and fertilize them with natural methods I read about.  One of these is egg tea.

It is very simple:  The next time you crack some eggs, put those egg shells in some water to soak for a day or two, then use that water to water your plants.  Put the eggshells into the compost after.  The plants will love the extra burst of nutrition, especially if they are in containers.  Right now, even my garden-based tomatoes love the little extra shot of fertilizer.

And thanks, Mom and Dad, for letting me take over your new enclosed porch with a bunch of plants and vats of egg tea.  You had no idea what you were starting, did you?
Pin It!

Monday, July 23, 2012

Zucchini Corn Chowder

OK, it is a little hot for soup these days, but I was super-excited to develop a chowder recipe that seemed to really make great use of the veggies coming in from the garden right now.

Zucchini Corn Chowder


1 T. organic butter
1 med. onion, diced
1 clove garlic, diced
1 med. zucchini, shredded
1 pint canned corn, drained (or equivalent off the cob)
Approx. 1 cup diced potatoes
1 T. dried sage, or to taste
1 c. stock
12 oz. evaporated milk or half and half

In a 3 quart pan, melt butter and saute onion and garlic until soft.  Add stock, corn, and potatoes, and cook until potatoes are soft.  Add zucchini and sage and cook until zucchini looks integrated into soup.

Add evaporated milk or half and half and cook until hot; the potatoes will thicken things up a bit.  Serve with cracked black pepper on top to taste.

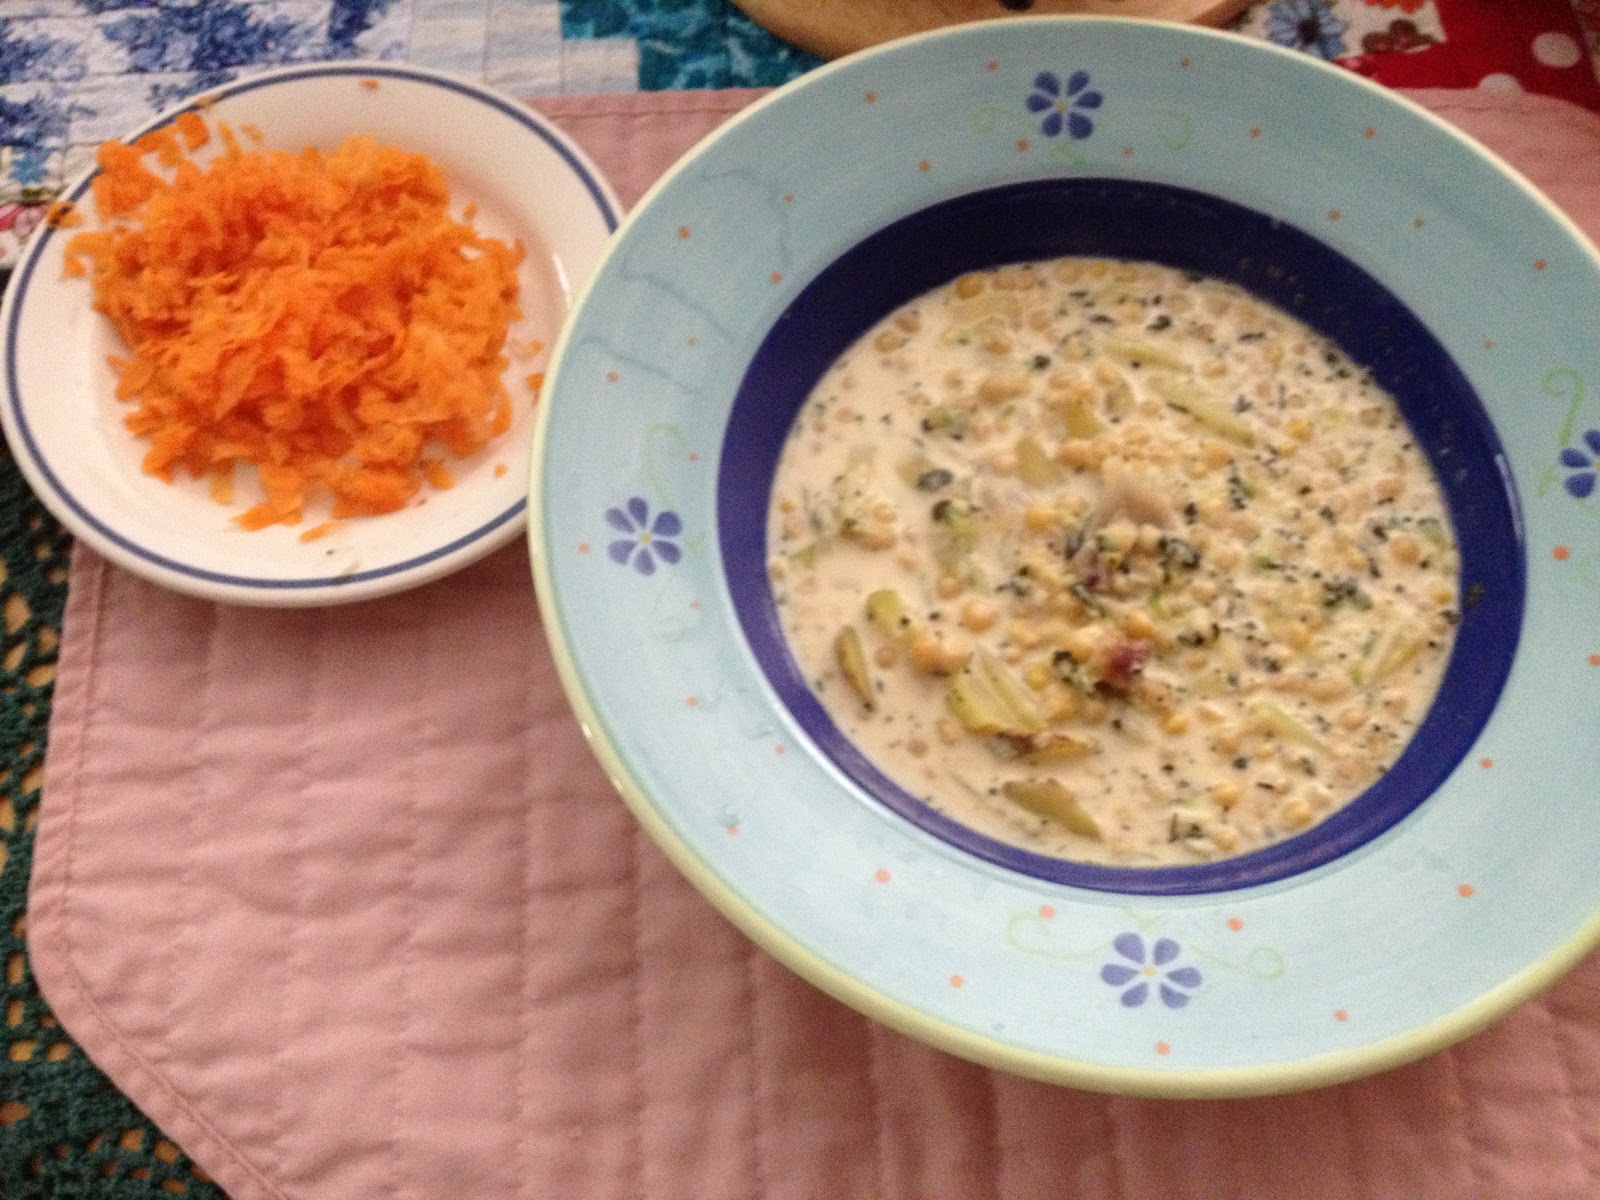
We served ours with a side of shredded carrots.  Fresh-baked bread would have been great here too! Makes four servings.

Fast:  This was quick enough from fresh ingredients, but I think the real speed advantage will be later on.  I plan to pressure can all of the ingredients except the milk together in pint jars and label them with a note that they are "soup base."  The addition of milk will make chowder, and extra stock will make a great noodle soup broth or the beginnings of cheesy corn soup.

Cheap:  Everything here came from my garden or pantry except the milk and butter.  I am still using up canned corn from last season, hence the "canned corn" notation.  Feel free to add more potatoes if your garden is producing well and you've brought in a good handful that you want to use -- it will only thicken the soup base further.

Good:  Although a little warm for July, I am really pleased with this recipe.
Pin It!

Monday, July 16, 2012

PB&J Cobbler

When I was a kid, my mother struggled to find a breakfast I would eat.  I remember her going to the book store and getting a book of breakfast recipes and trying to get me interested in something that I would eat at 6 a.m. that would allow me to get through a whole morning of school.  It was an uphill battle, because I can only really eat when I'm hungry, and I rarely am hungry that early.

Finally, she declared that there was no difference between blueberry cobbler and blueberry pancakes, and that if the latter was a breakfast food, so was the former.  Cobbler, I could eat.

I thought of that episode this weekend when browsing through a new cookbook for inspiration.  (Note:  I rarely make recipes as written, and I never share them with you without attribution unless they are my own.  I got only the most general idea for this recipe from a book.)  With a lot of experimenting, I came up with PB&J cobbler, certainly something I would have eaten for breakfast or any time as a child.  I like this recipe because it makes use of the berries in season right now, and it can be sugar-free if you choose to make it so. It was great warm out of the oven, and I can't wait to have some of the leftovers today!

PB&J Cobbler


2 pints mixed berries, in season (I used blackberries and blueberries)
1/2 c. sugar (optional)

3 T. organic butter
1 c. natural peanut butter (no sugar added)
1 c. rolled oats
1/2 c. flour

In a glass baking dish with a lid (like a casserole dish), crush the berries slightly and add sugar if you wish.  Your berries will sweeten on their own as they bake, but the sugar will make them somewhat sweeter and draw more of the juice out.  I didn't add the sugar, and it was fine; you can always sprinkle with sugar later if you wish, and that lets you control the sugar for different dietary needs.

Meanwhile, melt butter and combine with remaining ingredients.  You can sprinkle over the top like a streusel topping, or I rolled mine into balls to better control how many "servings" of topping each person got.  Your call.  My inner child kind of wanted PB balls on my cobbler; they break up and mix in to the berries fine when it is time to eat.

Bake covered at 350 for 40-45 minutes until juicy and hot!

The Analysis


Fast:  This takes maybe an hour to make, most of which is baking time.

Cheap:  Farmers' market berries are not cheap, but they are plentiful right now.  I paid $10 for 2 pints of berries, and I was happy to do so.

Good:  This was very, very good.
Pin It!

Thursday, July 12, 2012

Zucchini Toll House Cookies

Permit me for a moment to poke a little good-natured fun at "city folk" who like to "help" you with your "zucchini problem."

"I have so many zucchini," you say, half terrified and half boastful.
"Oh, then you need the recipe for the chocolate zucchini cake," they say.  "I'll send it to you."

The infamous chocolate zucchini cake, whose recipe I have received, it seems, from at least a half dozen well-meaning acquaintances, is a recipe designed to "use up" zucchini if your entire supply consists of three zucchini that a gardener-neighbor gave you.  It takes absolutely forever -- including the cooked frosting for the recipe I have -- and it uses up one, measley, tiny, medium-sized zucchini.

Guys, when I say I have zucchini, I have zucchini!  I have a pyramid of them on the counter, and they need to go into every baked good and starchy dish I make every single day.  I love the chocolate zucchini cake, but I simply don't have the time or the caloric expenditure to make a homemade chocolate cake every time I bring in a zucchini; I'd be making about three cakes a day and I'd have to quit my job and dig a potato furrow five miles long to burn off all that cake.

So, in addition to zucchini pie, zucchini orzo, and zucchini-roni for dinner, I put zucchini into baked goods that take very little time to make.  One of the best ideas is Toll House cookies.

Now, this idea will still only use up a medium sized zucchini, but cookies just don't take that long to make.  If you alter the recipe as I did here -- with pasture eggs, pasture butter, turbinado sugar, and maybe a bit of whole wheat flour -- you have a fairly healthy cookie once you add a shredded zucchini.  Also, the zucchini adds additional moisture, so you will have to increase your flour (from 2 1/4 cups to about 3 cups) and will consequently make more cookies in the process.  The cookies stay moist, too, having an almost cake-like quality that hangs in there for days.  I would eat these for breakfast -- I think they are just as healthy or healthier than many breakfast foods.

Now, where else can I hide a shredded zucchini?
Pin It!

Monday, July 9, 2012

How Much Does a Garden Grow: June

Finally!  June is here, and we are finally bringing in some actual harvests!  Yeah!

Big on this list this month was blueberries; even though I only harvested a few ounces from my two bushes, it was a definite savings.  Organic blueberries in season at Trader Joe's came in at $0.50 an ounce, so it is worth it to have your own supply.

Potatoes were another crop that started coming in this month.  The ones you see at the right were my volunteers; we didn't grow fingerlings this year, but we got a few surprise hills that came up on their own, likely from potatoes missed during digging last year.  Organic potatoes are relatively inexpensive to buy, but again, they made a wonderful treat.

The big "cash crop" of the month was the start of the zucchini harvest.  Organic zucchini at Trader Joe's is $2.99 a pound, and I started bringing in over a pound a day.  That means I recouped my seed costs pretty much the first day, and everything else has been profit.  I just love zucchini, and I love it even more because I don't think I ever would have tried it if I didn't decide to grow it some years ago.  I put it in absolutely everything, and right now we have both pasta and bread with zucchini in it.

Rounding out the month were some onion and carrot harvests, with more on the way.  All told, I harvested 7.75 pounds of produce in June.  There were no expenditures.  I expect July and August to be the real break-out months.

2012 Tally to Date
7.75 lbs. total harvested
$27.26 value of harvest for June
$34.30 value of harvest for 2012
$185.39 expenditures for 2012
-$151.09 loss to date
Pin It!

Tuesday, July 3, 2012

Zucchini-Roni

Hey, it's zucchini time again!  It's always feast or famine in the zucchini patch around here.  I typically plant more than I need, because about half of the time I will wind up with a few plants that just refuse to produce, so having some redundancy is necessary.  (Take that, everyone who has commented, "A family of two only needs one zucchini plant.")

This year, I have nine plants, and about four of them are in full production, which is plenty. So I have a recipe that will hide some of that zucchini, plus a lesson in the analysis about why it is so important to grow/make your own.

Zucchini-Roni


3 cups stock
1 1/2 cups rice (I used cheap white rice, but it would be better with brown.)
1 package hot dogs, sliced  (Do yourself a favor and get the kosher kind, for quality reasons.)
1 medium zucchini, shredded
2 large carrots or about 6 smaller ones, cut into small cubes
1/2 t. dried marjoram
1 t. dried oregano
1 t. turmeric (adds flavor and gives it that nice yellow color)

Place rice, stock, marjoram, oregano, and carrots in saute pan and cook over medium heat until the rice and carrots start to soften.  Add sliced hot dogs, zucchini, and turmeric, and continue cooking until rice is cooked through, carrots are soft, and hot dogs are heated through.  This takes about 25-30 minutes total.

Makes about 5 servings.

The Analysis


Fast:  This is definitely one of those thrown-together-from-the fridge meals.  I made this at 9 p.m. last night with what I had on hand.

Cheap:  Here's your takeaway:  sustainable living makes this super-cheap.  I made my own stock from freezer scraps (ham, chicken, and beef bones, plus onion trimmings), so that was free.  Zucchini, carrots, marjoram, and oregano are already accounted for in the gardening budget, so they are essentially free too.  That leaves some inexpensive rice, a package of expensive kosher hot dogs, and a small amount of turmeric.  All told, this recipe probably came in under $7 for me, and most of that was hot dog costs.  You could substitute any cooked meat you had in the fridge, like pre-cooked sausage or leftover roast chicken, although you will want to add some salt if you use a salt-free meat.

If I had to buy these ingredients, I probably wouldn't make this recipe.  Organic stock is around $4 a quart, and organic zucchini is $2.99 a pound around here.  Let's say that buying the additional ingredients would add another $7 to the cost.  This recipe is pretty yummy, and it is still a pretty good deal to get five servings for $14, but it isn't the huge benefit to the budget that it is when you are making so many of your own ingredients on the cheap.

Good:  The homemade stock and fresh veggies really added a lot of flavor to the dish.  Since I do have so many of these ingredients on hand for virtually free, I will continue to make this yummy dish.
Pin It!

Thursday, June 28, 2012

Beating the Heat

As I write this at 6:20 a.m., it is already 70 degrees, and my part of Ohio is headed for a high of 100 to 104 degrees today, depending on who you ask.  A heatwave is upon us.

It is tempting to be more cavalier about a heat wave than about an ice storm (at least for me), but either temperature extreme can be equally challenging for your sustainable and frugal lifestyle.  So what are we to do?

First, shade your garden!  What you see at the right is Mr. FC&G's homemade sunshade for the cucumbers and the more delicate plants.  Luckily, most of our gardens get dappled shade in the heat of the afternoon, but this one corner gets full sun all day long.  That is nice for plant growth most of the time, but today it could be dangerous.  With some camo netting, a few posts, and an old chaise lounge (nice...), we have an ugly but serviceable sunshade.  And you know, I'll take shade over beauty all day long today.

Second, water your little darlings, but not in the heat of the day.  If you are reading this in the early morning, you may have a chance to sneak out and water some roots (not the leaves -- they'll burn), but if not, just remember to soak them really well tonight to prepare for tomorrow.  Feel free to laugh at the neighbors watering their grass -- today is all about keeping the crops happy.  Brown grass just means less mowing.

Third, move your container garden.  I juggled mine around a bit last night since I anticipate being at a client meeting off-site all day, but Mr. FC&G is home and may pull some of the delicate container plants into the sunroom where they can enjoy the shade.

Finally, take care of you.  I'll spare you the common sense recommendations to be sure to drink lots of water and avoid outdoor exercise.  However, remember that today is all about keeping your AC running, so try to put as little stress on the rest of your electrical load as possible.  Today is not your day for laundry, baking, extra task lighting, or anything else.  Put the air on the highest level you find comfortable, go to the coolest room of the house, and make yourself a nice glass of iced tea.  And then just wait out the heat wave, like you'll be waiting out the inevitable ice storm come February.
Pin It!

Tuesday, June 26, 2012

A Quick Canning Tale

Seven quarts of beautiful homemade stock, pressure canned, sealed, and ready to head downstairs into the pantry.  Except, for a moment there, I thought I was going to have stock on the ceiling of the kitchen, not in the downstairs pantry.

I have been learning to pressure can, and so far my attempts at canned corn and applesauce, both last year, have been successful and easy.  Canning stock was also easy, but I am always a little wary of canning things that are primarily liquid because of the tendency for them to boil in the jar.

I followed my canner's instruction manual to the letter, and after allowing the pressure gauge to return to zero and removing the weight to release all the steam, it said I could remove the lid.

When I did so, the burst of cooler air into the heated canner made the lids of the jars heave.  They expanded and then contracted, releasing the air in the headspace to create a vacuum, but they did this over and over and over.  Plink. Plunk. Plink. Plunk.  All while the stock bubbled in the jar.

"Put the lid back on!  Put the lid back on!" I yelled at Mr. FC&G.  Apparently, even the specified waiting time and the steam venting procedure were not enough for this batch of stock.  So we put the lid back on and went to watch a movie, checking on the jars later before we went to bed.  Then they were cool, sealed,  and ready to remove.

So that's it.  Pressure canning isn't hard, but from now on I'm joining the club of those who do their canning late at night and then take the jars out the following morning.  I don't need that kind of drama in my kitchen.
Pin It!

Thursday, June 21, 2012

Garden Experiments

Remember "Random Acres?"  This was my patch of potatoes and onions that were left in the ground after failing to produce last year, and which seemed to be growing well.

And here's the proof!  Although we have been raiding this patch of last year's onions pretty regularly for onions that look more like leeks (but still taste perfectly yummy), I was finally able to pull a real, full-sized onion.  And let me tell you, it was good:  sweet and really meaty in texture.  I don't think it harmed the baby onion set at all to spend the winter in the ground, although I do think that its survival had more to do with the mild winter and a good layer of mulch than it did with good onion-growing technique.

I know I'm not the only one experimenting.  Several of my friends have started their first square-foot gardens this year, and I love to see the Facebook posts of these darling little 4x4 gardens, so lovingly crafted, with all the care evident in the creation of the frame and the filling with perfect soil.  They are starting to post picture of their first veggies, too, and it is wonderful to see people so gleeful at harvesting a dinner salad from their own garden, perhaps the first food they have ever created for themselves in their lives.

Other friends are experimenting with different ways of being sustainable, and I love to hear tales of batches of freezer jam, homemade chicken stock, and new clothes lines going up in back yards.  I think there is a growing population of those of us taking back our own livelihoods, and I am excited.

So, I want to hear more:  What are you experimenting with this summer that makes your life more sustainable?
Pin It!

Sunday, June 17, 2012

Welcome, Preppers!

Well, butter my butt and call me a biscuit!  I checked my blog stats yesterday and was flattered and honored to discover that no less august a publication than Survival Blog had mentioned me!  If you found your way here via Survival Blog, welcome aboard and please hang around as we explore ways to live sustainably, independently, and as ready as possible for any emergency.

If you are here because you consider yourself a prepper (or hope to be one), these are some of the pieces I've written on the subject:

Prepping 101: What is Prepping?
Prepping 101: Garden Crop Selection for Prepping
Prepping 101: Weekend Challenge
Sustainable Bookshelf: Survival Mom

And a mini-series on our own experience with a catastrophic weather event:

On Being Prepared: Part I
On Being Prepared: Part II

As you can see if you read through this blog, I focus on prepping for some of the little emergencies of life, which I think is an approach compatible with my larger goal of sustainable living and independence.  The advanced preppers among us are already prepared for the big disasters:  global hyperinflation, major weather change or disasters, political unrest, and the like.  I hope, if you are one of these folks, you stick around and give us your expert assessment of some of the FC&G ideas.

For the rest of us, I believe in a lifestyle that makes each of us as self-sufficient as possible.  The more you learn to do, the better prepared you are for any emergency, and the more fulfilling your life will be.  I hope we never have any of the big disasters mentioned above; if we do, we have a better chance of weathering them, and if we don't, our efforts for independence will make our lives that much richer.

Welcome aboard to our new readers!  I'm glad you're here, because new friends are one of the best renewable resources we can have!

Pin It!

Friday, June 15, 2012

Vent Fan for Cooler Upstairs Rooms

If you have been reading this blog for any time, you are familiar with the fact that our upstairs bedroom has the worst air circulation in the whole house, rendering it as much as 10 degrees warmer than the foyer thermostat year round.  This is a real bonus in the winter, when I can crow about keeping the nighttime house heat on 57; we simply run a fire downstairs if we are going to sit there, and otherwise we cuddle up in our warm bed in our 60-something-degree bedroom.

The summer, however, is another story.  While everyone else is enjoying cool nights in the mid-60s, we are starting to swelter.  We turn the whole-house AC down, and we still resort to a window air conditioner to make things manageable.

This year, however, Mr. FC&G is trying one of these little beauties.  This is a fan that lays on top of your vent register, and it draws the air out of your ductwork into the room.  Since we know that the room below our bedroom is the coldest in the house, it is to our benefit to draw that pool of cold air straight up into the bedroom.

So far, we have not yet put our auxiliary AC unit in our bedroom window, and we are currently running the whole-house AC at night only, turning it off during the day.  The house has thus far stayed plenty cool, and I anticipate the bills will be somewhat lower.

The Analysis


Fast:  Just lay this fan on the register, plug it in, and let it go.

Cheap:  I anticipate that this inexpensive unit will at least pay for itself in savings.

Good:  A cooler bedroom in summer means a happier FC&G family!
Pin It!

Tuesday, June 12, 2012

How Much Does a Garden Grow: May 2012

OK, now we're talking!

Obviously, I am writing this in the first part of June, when the garden has really started to explode with produce coming in.  Just this weekend, I had my first day of 2012 during which I harvested more than a pound of veggies, so the garden season has begun in earnest to make a dent in the budget.

By the end of May, however, things had just gotten started producing.  As far as expenditures, I spent $25.14 on some extra seeds and some herb plants to replace those that didn't start well from seed or that didn't make it through the winter, like rosemary and basil.

As far as harvest, I brought in 3 ounces of assorted organic lettuces, and I have a new price for these:  my most recent price check shows $0.60 per ounce on such things if you purchase them organic, so that will be my price going forward until the next price check.  I also brought in 12 ounces of onions from our experimental patch, with a comparable price of $0.09 per ounce (on a phenomenal sale for organic onions, but I have to be fair).

The most interesting item is the first ounce of blueberries, which came in on May 31.  Blueberries are an item that is widely recommended to be purchased organic due to pesticide use in conventional growing, and the prices show it.  Organic blueberries are $0.50 per ounce at Trader Joe's, and I bet they taste nothing like these sweet little tidbits from our bushes.  More of that will show up in June.

2012 Tally to Date

1.5625 lbs. total harvested
$3.38 value of harvest for May
$7.04 value of harvest for 2012
$185.39 expenditures for 2012
-$178.35 loss to date
Pin It!